


If your G-DRIVE isn’t showing up on your Mac or Windows PC, don’t panic; it doesn’t necessarily mean that your drive has failed or your data is gone. The cause could be something relatively simple: a power issue, mounting problem, or an incompatible file system. In other cases, the issue could be caused by enclosure, HDD/SSD, or RAID failure.
In this guide, we’ll go over some ways you can try and narrow down what’s causing your specific issue, and how to go about attempting to fix it.
To err on the side of caution, before you do any troubleshooting:
- Disconnect the drive if it’s clicking, grinding, or making unusual noises,
- If it repeatedly connects and disconnects, stop using it
- Do not initialize, erase, format, or reformat the drive if you still need the files
- Identify whether you have a single-drive G-DRIVE or a RAID system
- Navigate to the Mac or Windows troubleshooting steps for the setup that applies to you
Starting cautiously gives you the best chance of fixing the issue without putting your data at any further risk.
What Does “G-DRIVE Not Showing Up” Mean?
When a G-DRIVE isn’t showing up, the first step is to figure out where exactly the connection is failing. Your drive could be physically connected and detected by the computer without being mounted or displayed in Finder or File Explorer.
In other words, detected, mounted, and visible are three very different things. Finding out whether your G-DRIVE appears in Disk Utility on Mac, or Disk Management on Windows, can help you narrow down the issue and determine whether you’re dealing with a simple mounting issue, or a more serious hardware failure.
Identify Your G-DRIVE Before Troubleshooting
Before you start tweaking any settings or attempting fixes, make sure you know which G-DRIVE model you have.
This is important because a portable drive, a desktop drive, and a RAID can all fail in very different ways; and you’ll need to approach them differently, too. Power requirements, connection type, and the number of drives all affect what “not showing up” might mean.
Current G-DRIVE Models
WD’s current lineup of G-DRIVE devices includes several different types:
- G-DRIVE: A desktop hard drive with USB-C connectivity, powered by a separate AC adapter rather than through the serial bus.
- G-DRIVE PROJECT: Desktop single-drive HDD with an Ultrastar 7200 RPM drive, Thunderbolt 3, and USB connectivity.
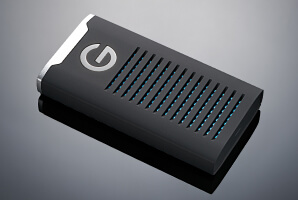
- G-DRIVE ArmorATD: A rugged portable backup drive with USB-C, designed for simple plug-in use and portability.
- G-RAID PROJECT 2: A two-drive unit with Thunderbolt 3 and USB-C, using enterprise-class 7200 RPM drives.
- G-RAID SHUTTLE 4 / 8: Multi-bay storage systems built for higher-capacity workflows, with built-in hardware RAID and Thunderbolt 3 connectivity.
Older G-DRIVE Models
If you aren’t running one of the recent G-DRIVE products, you may be working with a legacy model such as G-DRIVE Mobile, Mobile SSD, G-DRIVE PRO, G-RAID, or G-SPEED.
Knowing the model is important because you shouldn’t apply single-drive repair steps to a RAID system (and vice-versa). A missing RAID volume may involve one or more member drives, the enclosure/controller, or the array configuration itself.
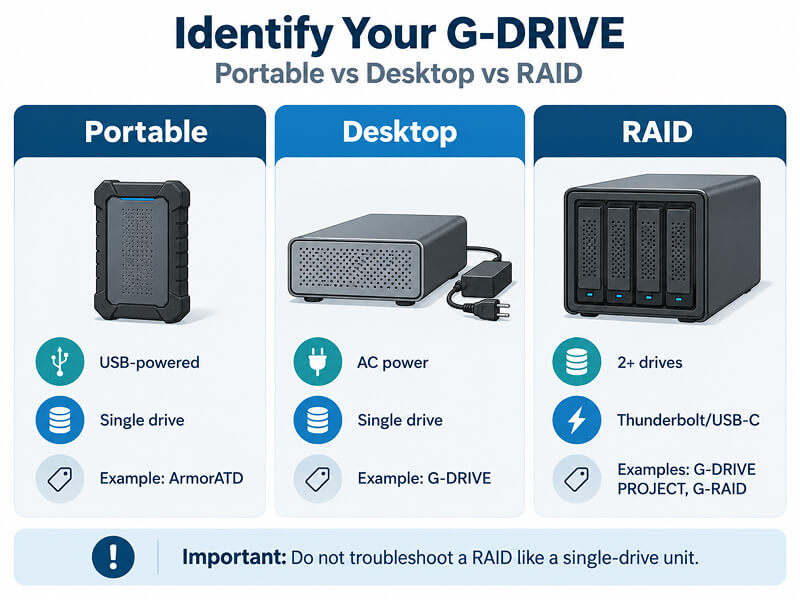
If you’re confident you know what G-DRIVE model you’re working with, move on to the next section, where we’ll go through a few steps to attempt to fix the issue with it failing to show up.
How to Fix G-DRIVE Not Showing Up on Mac
If your G-DRIVE isn’t appearing on your Mac, start with the basics before moving on to software troubleshooting: make sure there aren’t any loose connections and that everything is plugged in as it should be.
If your drive is clicking, repeatedly disconnecting, or showing other signs of hardware failure, stop now and avoid any further power cycles.
1. Check Power, Cable, and Port
For desktop G-DRIVE models, the first thing you should always do is to confirm that the AC adapter is connected and that your drive is receiving power. Once you’ve done so:
- Disconnect and reconnect the USB-C or Thunderbolt cable.
- Try another compatible cable that you know to work well.
- Connect the G-DRIVE directly to your Mac (rather than via a hub or dock).
- Try a different compatible port.
If none of these checks resolve the issue, move on to the next step.
However, if the drive repeatedly appears and disappears, avoid reconnecting it over and over — this is a sign of potential hardware failure, and it’s best to seek professional help at this point.
2. Check Finder Settings
Your G-DRIVE may have mounted without any issues, but simply isn’t appearing where you expect it to. To address this issue:
- Open Finder > Settings
- Check the General and Sidebar tabs to make sure external disks are enabled.
3. Check Disk Utility
Open Disk Utility, then select View > Show All Devices.
What you see here could help narrow down what’s really causing the issue.
- Drive appears but isn’t mounted: Select the volume and try Mount.
- Drive appears but the volume is unavailable: This suggests there may be a problem with the drive’s file-system or partition.
- Physical G-DRIVE doesn’t appear at all: A cable, power, enclosure, controller, or drive failure is likely the cause of the issue.
Warning: if you still need the data on your drive, make sure not to erase or reformat it.
4. Use First Aid Cautiously
If your drive is detected and there seems to be a logical issue (such as the volume being unavailable), Disk Utility > First Aid may be able to repair certain file-system errors.
However, if your G-DRIVE is making clicking or grinding noises, constantly disconnecting, extremely slow, or otherwise showing signs of physical failure, do not repeatedly run First Aid on it.
5. Restart and Test Carefully
Once you’ve completed the checks above, restart your Mac and reconnect your G-DRIVE to see if the problem has been fixed.
If the G-DRIVE still doesn’t appear, avoid repeatedly restarting, and move on to determining whether the issue is logical or hardware-related.
How to Fix G-DRIVE Not Showing Up on Windows
If your G-DRIVE isn’t appearing in File Explorer, start with the simplest connection checks before moving on to more involved checks (such as changing disk settings).
1. Check the Connection and Power
First, make sure your drive is properly connected:
- Try another compatible USB or Thunderbolt port.
- Test with another data cable that you know works well.
- Connect the drive directly to your PC rather than through a hub or dock.
- If your G-DRIVE uses an AC adapter, confirm that it’s receiving power.
If the drive repeatedly disconnects, makes unusual noises, or becomes extremely slow, stop reconnecting it immediately, and avoid further troubleshooting. These signs point to physical hardware failure, and it’s best to seek professional assistance.
2. Check Disk Management
If the G-DRIVE still isn't appearing in File Explorer, check whether Windows is able to detect it at a lower level:
- Right-click the Start button and select Disk Management.
- Look for your G-DRIVE in the list, using its capacity to help you identify it.
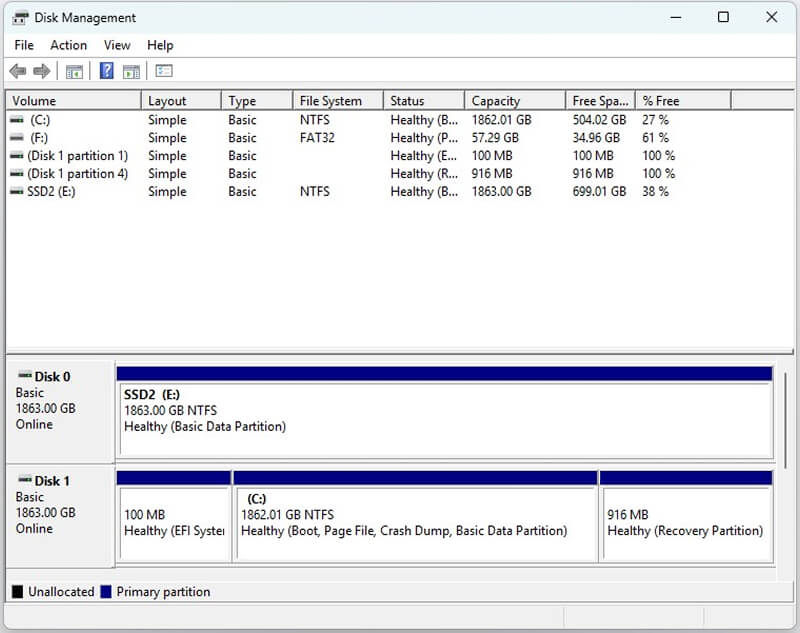
- Check how Windows describes the disk or volume. It may appear as:
- Healthy, but without a drive letter
- Offline
- RAW
- Unallocated
- Unknown / Not Initialized
- If it appears healthy, continue to the drive-letter step below.
- If it appears as RAW, unallocated, or not initialized, stop before making changes if you need the data.
Caution: If you still need the data, do not initialize, format, or create a new volume even if Windows prompts you to. Doing this can overwrite important file-system information.
3. Assign a Drive Letter
If Disk Management shows that your G-DRIVE is healthy but doesn’t have a drive letter, you can assign one to it by following these steps:
- Right-click the G-DRIVE volume.
- Select Change Drive Letter and Paths.
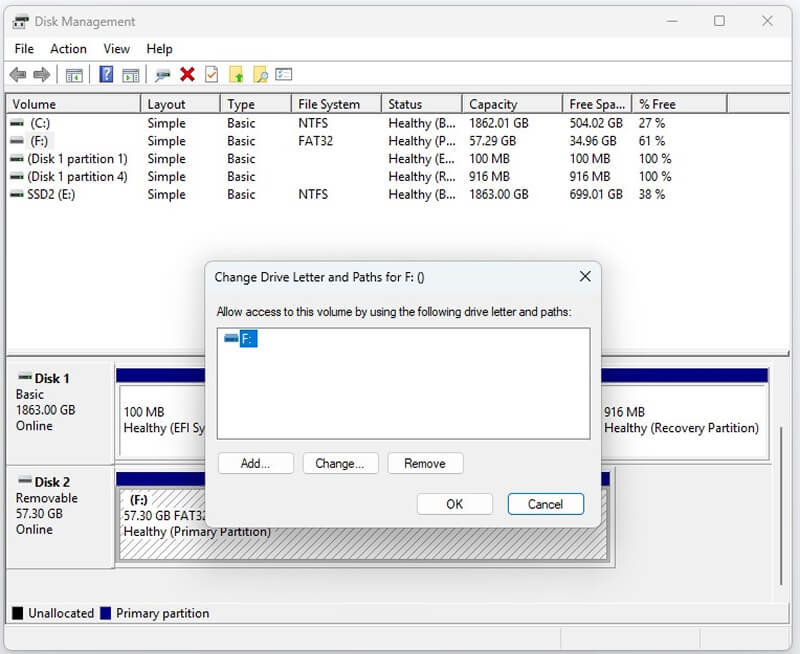
- Choose Add or Change.
- Select an unused drive letter.
- Click OK.
- Reopen File Explorer and check whether the G-DRIVE now appears.
Remember, this method is only applicable if the existing partition for your G-DRIVE appears to be healthy. If Windows shows the drive as RAW or unallocated, assigning a drive letter won’t fix the problem.
4. Check Device Manager
Next, check whether Windows recognizes the physical device or its controller:
- Right-click Start and open Device Manager.
- Expand Disk drives and look for your G-DRIVE.
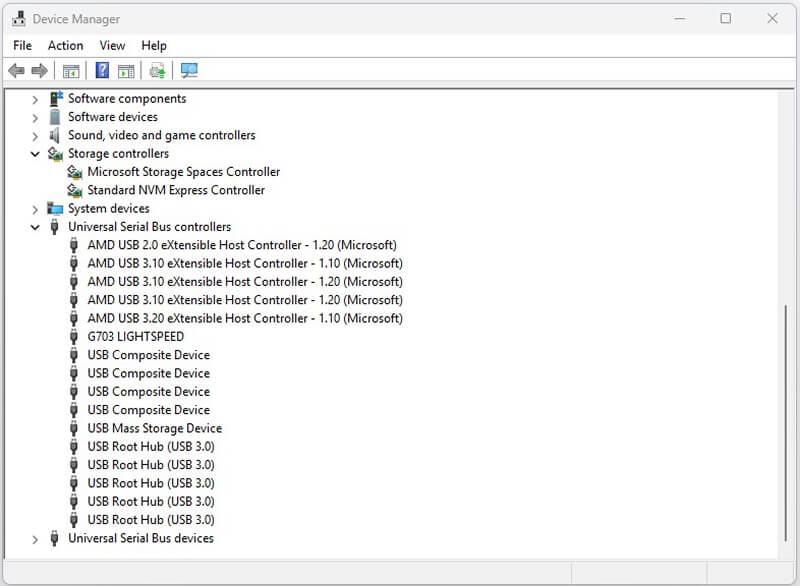
- If necessary, also check Storage controllers and Universal Serial Bus controllers.
- Right-click the relevant device and select Properties to check its status.
- You can also select Action > Scan for hardware changes after reconnecting the drive once.
If your G-DRIVE appears in Device Manager but not in File Explorer, the problem is more likely to be related to mounting, the partition, the file system, or drive-letter assignment than a completely failed connection or device.
5. Check the File System
Finally, make sure your G-DRIVE is actually formatted correctly for use with Windows.
Current desktop G-DRIVE models are formatted as APFS for macOS when they’re shipped, whereas for Windows, Western Digital lists support via reformat.
This means that a perfectly healthy G-DRIVE may be detected by Windows, but still not appear as a readable volume in File Explorer. If you suspect this could be the problem:
- Check whether the drive was previously used with a Mac.
- Look for it in Disk Management.
- If you still need the files, do not format or reformat it.
- Instead, connect it to a compatible Mac or recover/copy the existing data first.
- Once you are certain you no longer need the data on the drive, reformat the drive for Windows.
Even when the hardware itself is working exactly as it should, file system incompatibility can sometimes seem like drive failure.
Encrypted or Incompatible G-DRIVE Volumes
Sometimes, a G-DRIVE can be working normally at the hardware level, but appears inaccessible on your computer because of its file system or encryption setup.
- APFS is Apple’s modern macOS file system. Windows can detect drives formatted as APFS, but it’s unable to natively give normal read/write access.
- NTFS is Windows-native. macOS can usually read NTFS volumes, but native write support is limited.
- exFAT works on both Mac and Windows, which makes it a common choice for shared drives, but it can still become corrupted if the drive is disconnected unsafely.
- Encrypted APFS volumes require the correct password or recovery credentials before the files can be accessed.
- BitLocker is Microsoft’s encryption system, and macOS doesn’t unlock BitLocker volumes the same way Windows does.
In short, an unsupported or encrypted volume can make a healthy G-DRIVE look unreadable, even when the hardware itself is fine.
You can format the drive to make it work for the operating system of your choice. However, keep in mind that formatting will erase all existing data on the drive.
Should You Recover or Reformat Your G-DRIVE?
Whether you should recover or format your G-DRIVE comes down to a simple question: do you still need the files that are currently on it?
If You Need the Data
Prioritize recovery before you make any changes to the drive.
This is especially important if:
- Windows shows the drive as RAW or unallocated
- macOS can detect the drive but cannot mount it
- Windows asks you to initialize the disk
- The file system appears corrupted
- The G-DRIVE worked previously but suddenly became inaccessible
If any of these apply to you, do not format or reformat the drive. Writing a new file system can overwrite structures used to locate existing files and may make recovery more difficult.
If You Don’t Need the Data
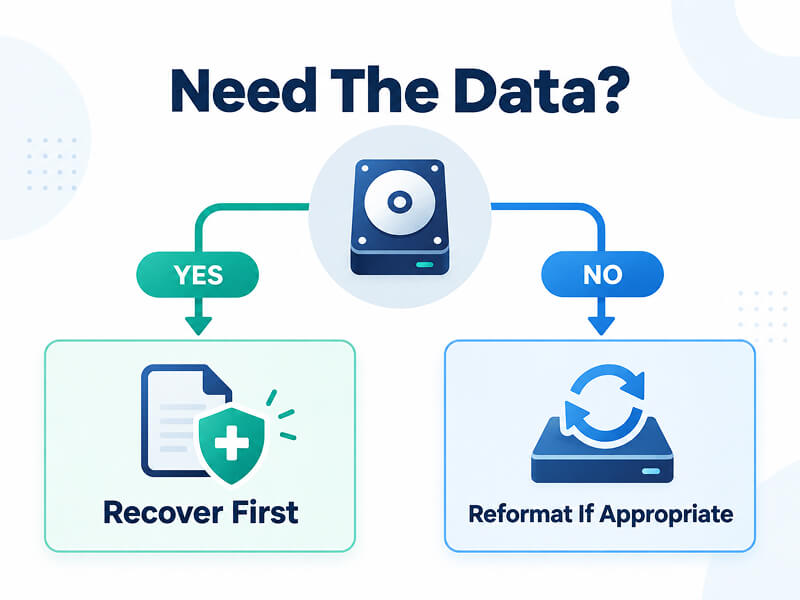
If your G-DRIVE is otherwise healthy and you no longer need any of the data stored on it, reformatting may be an appropriate course of action.
Here are a few reasons you may choose to reformat your G-DRIVE:
- To switch between APFS, NTFS, or exFAT
- To make the drive compatible with a different operating system
- To set it up for cross-platform use
Here’s a simple rule of thumb to follow: recover your important data first, then reformat only once you’re sure nothing on the drive needs to be preserved.
Why Your G-DRIVE Won’t Show Up (And How to Help Prevent It)
There are several reasons your G-DRIVE can stop appearing, from a simple cable issue to a failing HDD, SSD, enclosure, or RAID member. You can’t always fully remove the risk of some of these issues occurring, but a few good habits can help you significantly reduce it.
For professionals using G-DRIVE storage, here are a few extra precautions that are worth taking:
- Never treat RAID as a backup
- Keep another copy of active projects and essential data
- Avoid unnecessary daisy-chaining while troubleshooting
- Eject drives properly before disconnecting them
- Follow the 3-2-1 backup rule for valuable files
Ultimately, the goal is this: your G-DRIVE should be one copy of important data, not the only copy.
When to Call Professionals for G-DRIVE Data Recovery
Some G-DRIVE problems are best left to the professionals before further troubleshooting causes additional damage. Stop DIY attempts if you have business-critical or irreplaceable files at risk or notice any of the following symptoms:
- Clicking, grinding, or abnormal HDD sounds
- Repeated disconnections or intermittent detection
- The drive disappearing from Disk Utility or Disk Management
- Extremely slow performance
- An unexpected RAW or unallocated status
- A failed or missing RAID member
- More than one possible failed disk in a G-RAID or G-SPEED system
RAID systems require particular caution. Recovering a failed G-RAID PROJECT 2, G-RAID SHUTTLE, or legacy G-SPEED may involve not only the individual drives but also the array configuration and member order. Rebuilding, initializing, or changing the configuration without understanding the failure can make recovery more difficult.
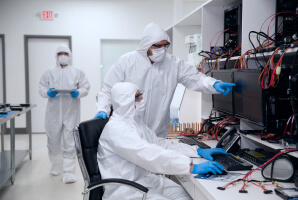
At Secure Data Recovery, we handle external HDD and SSD recovery, RAID recovery, and both logical and mechanical failures. We provide secure diagnostics and, where physical HDD work is required, we perform that work in one of our cutting-edge ISO Class 10 cleanrooms.
When you reach out to us, we’ll start your recovery journey by offering you a free diagnostic, and a clear, transparent quote and timeline. And thanks to our No Data, No Recovery Fee policy, we won’t charge you unless we successfully retrieve your data.
Recover Your G-DRIVE Data Safely
If your G-DRIVE, G-RAID, or legacy G-SPEED no longer appears on Mac or Windows and the files are important, avoid formatting, initializing, rebuilding the RAID, or repeatedly reconnecting the failing device.
We can help determine the safest approach for your G-DRIVE. Our support team is available 24/7 to discuss your case and set up your free diagnostic. To get started, call us at 800-388-1266 or start your case online today!

Monica J. White

Monica is a tech journalist with a lifelong interest in technology. She first started writing over ten years ago and has made a career out of it, with a particular focus on PCs, mobile devices, SaaS, and cybersecurity. She enjoys the challenge of explaining complex topics to a broader audience, whether it's how semiconductors work or how to back up your data. Her work has previously appeared in Digital Trends, Tom's Hardware, Pay.com , SlashGear, Forbes, Springboard, Looper, Money, WePC, and more.





.png)
