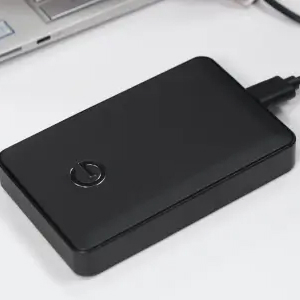
Western Digital is a world-renowned manufacturer of hard disk drives (HDDs) and other storage media. Millions of individuals and organizations store critical data on Western Digital devices. They have a deserved reputation for reliability, but these drives can still encounter errors that impact their functionality. Secure Data Recovery, experts in RAID, SSD, and hard drive recovery, explain what causes Western Digital errors and how to fix them.
Check Hard Drive Health With Western Digital Dashboard
Monitoring the health of a Western Digital drive is essential to anticipating issues and preventing data loss. Western Digital Dashboard is the manufacturer's official software for testing the drive and updating its firmware. Western Digital uses a monitoring system known as S.M.A.R.T. (Self-Monitoring, Analysis, and Report Technology) to detect reliability concerns. To conduct a test:
- Download and install Western Digital Dashboard on Windows.
- Open the software.
- Connect the supported drive.
- Click Tools in the left sidebar of the dashboard.
- Click the S.M.A.R.T. option. Choose Run Short for a quick assessment of the drive's health. Select Run Extended for a more thorough examination of the device. A short test will take about 5 minutes while extended diagnostics could last much longer, depending on the model.
- Confirm the test and wait for the scan to finish.
- Review the results. Your drive will receive a PASS or FAIL designation after the test completes. If the drive fails, create or update backups of important data and prepare to replace the device.
Note: Western Digital Dashboard is not available on macOS. To receive a S.M.A.R.T. report on a Mac, open Disk Utility and select the external hard drive from the list. Click Info at the top of the main window, then select S.M.A.R.T. Status. The external drive will display as Verified, indicating a healthy device, or Failing.
Even without S.M.A.R.T. alerts, it is vital to monitor the health of your Western Digital drive. Unusual noises, frequent crashes, and inaccessible files can signal serious underlying issues with the disk. Being proactive can reduce the potential for errors that impact the product's performance and reliability.
Common Western Digital Errors and Fixes
There are several common Western Digital error codes. Each code represents a different failure scenario and often requires a tailored solution. Fortunately, diagnosing and troubleshooting Western Digital errors is not difficult. Understanding what causes these issues also allows users to implement preventative measures that safeguard data and optimize performance.
The steps in this guide can restore the drive to an operable condition and avert data loss.
Disk Read Error
Disk Read Error is among the most common errors in Western Digital devices. When this happens, the following message appears on an otherwise blank screen: "A disk read error occurred. Press Ctrl + Alt + Delete to restart." The error indicates that the operating system (Windows or macOS) could not access the Western Digital drive. Despite the prompt, restarting the computer will not resolve most Disk Read Errors.
Causes of Disk Read Errors:
- Failed or malfunctioning hard drive
- Corruption in the Master Boot Record (MBR)
- Incorrect BIOS settings
- Memory issues
- Faulty data cables or unreliable connections
Fixes for Disk Read Errors:
- Reset or replace data cables. Ensure the data cables connecting the hard drive and motherboard are secure. You can consider replacing the data cables to rule out the possibility of faulty connectors.
- Move or remove RAM modules. Though rare, sometimes Disk Read Errors occur due to memory issues. If you've recently upgraded your desktop, switch the aftermarket module with the primary RAM. You can also try moving modules to different slots to see if that resolves the error.
- Reconfigure BIOS settings. While Disk Read Errors prevent users from booting, they can usually still enter their system's BIOS. Some BIOS settings, like an incorrect boot order, can cause Disk Read Errors. You can typically access the BIOS by pressing F2, F10, or Delete. However, the specific method depends on the motherboard manufacturer, so consult documentation. In the BIOS, verify the hard drive is recognized and the boot order is correct. If the computer does not detect the drive, follow manufacturer guidance to update the BIOS/UEFI firmware. To change the boot order, follow the on-screen instructions in the Boot Menu.
- Reset BIOS to default settings. If reconfiguring BIOS settings is overwhelming, you can sometimes simply reset the BIOS to default values. To reset settings, navigate to the main menu and look for an option like Load Default Settings or Load Setup Defaults.
- Check hard drive health with software on a bootable disk. Downloading tools on another device and using a second computer to perform diagnostics can help determine the problem.
- Repair the Master Boot Record. In many cases, Disk Read Errors occur when the MBR is corrupted. If that is the issue, you can use a bootable disk to attempt repairs or rebuilding the MBR. However, these repairs require some familiarity with Command Prompt and accepting the potential risk of complex data loss. To repair a corrupt MBR, open Command Prompt and use the following commands: X: bootrec /fixboot and X: bootrec /fixmbr. To try to rebuild the MBR: X: bootrec /rebuildbcd. Replace X with the letter assigned to the corrupted drive.
Additional Tips on Disk Read Errors:
- You can also try connecting the hard drive to a different port on the motherboard. Sometimes, defective ports can impede a reliable connection.
Advice: Disk Read Errors can be fatal for a device. If the problem persists, appraise the value of the data stored on the drive. Consider professional data recovery services if retrieving its files is essential.
BIOHD-8
BIOHD-8 is an error code encountered on HP desktops and laptops. The error often registers after the HP SMART diagnostic tool identifies a serious issue with the Western Digital hard drive. If left unresolved, BIOHD-8 can lead to permanent data loss.
Causes of BIOHD-8:
- Bad sectors on the disk
- Damaged file system
- BIOS or firmware issues
- Overheating
- Loose, defective connections
- Malicious software
Fixes for BIOHD-8:
- Inspect connections. Open the computer's case and ensure the connection between the device and the motherboard is firm.
- Prepare for the inevitable. If the device is failing, use its remaining time to create new backups and clone the computer to an external drive. These practices can ease the pain of hard drive failure and reduce downtime by quickly restoring the original data.
- Perform a CHKDSK scan. CHKDSK can resolve logical problems with a hard drive. However, it also carries a degree of risk. Sometimes, CHKDSK flags a bad sector on the disk, but does not relocate its stored data. As a result, that data becomes inaccessible. If you still wish to use CHKDSK, run Command Prompt as administrator and enter the following command: chkdsk /r /f X. Replace X with the assigned letter of the failing drive.
- Download data recovery software on separate media and recover lost files. If logical errors lead to hard drive failure, recovery software can often reverse data loss.
Additional Tips on BIOHD-8:
- You can hide the BIOHD-8 error code, but that does not address the underlying issues with the hard drive.
- In some cases, outdated firmware can cause compatibility problems. Updating your firmware to its latest version can resolve errors like BIOHD-8.
Advice: Do not ignore BIOHD-8 error codes. Giving the issue the immediate attention it deserves often makes the replacement and restoration process painless.
Format Errors
The Format Error occurs when Windows or macOS encounters an issue when reformatting a Western Digital drive. The error usually displays one of the following messages: "Windows was unable to complete the format" or "The format did not complete successfully."
Causes of Format Errors:
- Significant physical issues with the disk
- Write protection enabled
- Lack of partitions
- Malicious software
Fixes for Format Errors:
- Disable write protection. When enabled, write protections restrict the drive from modifying or saving data. It is essentially a read-only mode for the device. To disable write protections, open Command Prompt and enter the following series of commands: diskpart > list disk > select disk X > attributes disk clear readonly. Replace X with the letter assigned to the drive. On Macs, open Finder and right-click the external hard drive, then select Get Info in the context menu. Check the device's permissions.
- Remove malicious software. In some cases, a malware or virus infection can interfere with a hard drive's routine operations. Removing the infection with a reputable antivirus program can allow users to successfully reformat.
- Use CHKDSK. CHKDSK can identify bad sectors blocking the disk from completing actions, but the system tool can also cause data loss. Back up your important data before running a CHKDSK scan. Proceed with caution.
Additional Tips on Format Errors:
- Remember to create comprehensive backups before formatting.
- Using a third-party partition manager can sometimes fix errors involving unavailable volumes.
- You can force format the hard drive with several tools, but most experts do not recommend that option. However, forcibly formatting the drive can cause data loss and system instability by damaging data structures and removing boot instructions. This irreversible action can render the drive's contents inaccessible.
- Understand the consequences before choosing to force format.
Advice: Format Errors often arise from fundamental issues with the drive that need addressing. Finding the source of the Format Error and fixing it is the best method of troubleshooting. Avoid force formatting a hard drive unless it is required.
Connection Problem and Hard Disk Not Recognized Errors
Sometimes, the Western Digital drive will provide "Connection Problem" or "Hard Disk Not Recognized" errors. While restarting can help the computer detect the drive in some cases, most situations will need additional action. Resolving connection and detection problems allows users to regain and maintain access to their valuable data.
Causes of Connection Problem and Hard Disk Not Recognized Errors:
- Incompatible file systems
- Out-of-date device drivers
- Faulty cables or USB ports
Fixes for Connection Problem and Hard Disk Not Recognized Errors:
- Restart the computer. Rebooting can sometimes restore a connection between the computer and hard drive. Restarting is an effortless solution if it works.
- Switch cables and USB ports. Try different connections if you suspect there is a physical issue with the cables or USB ports.
- Update device drivers. On occasion, out-of-date device drivers can lead to connection and detection issues. You can update or uninstall and reinstall drivers in Disk Management on Windows. Otherwise, visit the support section of Western Digital's official website and download the latest device driver for your model.
- Enable USB devices in the BIOS. If it is an external hard drive, access the BIOS and navigate to advanced storage options or a similar menu. Check the status of USB devices. If disabled, edit the setting and confirm the changes, then exit the BIOS.
- Reformat the hard drive. Windows and macOS interact with file systems differently. If your hard drive works on one operating system but not the other, incompatible file systems could be the problem. You can try formatting your hard drive for Windows or Mac to better suit your needs or preferences. However, it is important to back up your data beforehand. Formatting will make your files inaccessible.
Additional Tips on Connection Problem and Hard Disk Not Recognized Errors:
- If Disk Management detects the external hard drive, but shows it as not initialized, right-click the device. Select Initialize Disk in the context menu and create a new simple volume.
- If the device does not appear in File Explorer, assign or change a drive letter in Disk Management and see if the computer recognizes it.
Advice: A systematic approach toward connection and detection issues will usually uncover the problem and solution. If not, some data recovery services have tools and techniques to obtain low-level access to a Western Digital drive. With that expertise and equipment, experienced engineers can retrieve lost data.
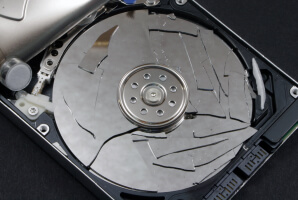
Fatal Errors
Seeing a Fatal Error on a Western Digital hard drive can be unsettling. While this error often signifies a serious issue with the disk, there are several possible scenarios. Thankfully, not all of them are catastrophic.
Causes of Fatal Errors:
- Accumulation of bad sectors leading to failure
- Unassigned or unformatted external hard drive
- Out-of-date device and hardware drivers
- Faulty connection
Fixes for Fatal Errors:
- Inspect cables and ports for obvious signs of damage. You can test a combination of cables and ports to determine if the error is the result of defective connectors.
- Update device and hardware drivers. Navigate to the Disk Drive section of Device Manager. Right-click the relevant device and select Update Driver. Next, scroll down and locate the Universal Serial Bus controllers. Update each of the drivers and uninstall devices that have been flagged with an exclamation mark. Mac users can visit the manufacturer's official website and download the latest device and hardware drivers.
- Assign a drive letter. Open Disk Management and assign or change a drive letter for the external device. Adjusting the drive's identifier can resolve recognition issues between the computer and the disk.
- Run CHKDSK to repair the disk. CHKDSK can diagnose specific physical issues and repair logical errors in a failing hard drive. However, CHKDSK can also have the opposite effect and lead to data loss. That is because when CHKDSK marks the hard drive's bad sectors, it moves that data to a more reliable cluster on the disk. In doing so, CHKDSK can scatter data across the platters, leaving some file fragments unavailable. Though rare, CHKDSK can also cause corruption when it applies a logical solution to a hardware problem. If the trade-off is worth it, enter the following command in the Command Prompt to attempt a CHKDSK repair: X: /r. Replace X with the appropriate drive letter.
Additional Tips on Fatal Errors:
- If possible, performing a S.M.A.R.T. test in the Western Digital Dashboard can narrow down potential issues and inform the next steps.
- Sometimes, external hard drives are not initialized, which can register as a Fatal Error. To check, open Disk Management. Right-click the desired drive. Click Initialize Disk if applicable.
Advice: Fatal Errors can represent a serious threat to the hard drive and its stored data. Assess the value of that data before proceeding with a tool like CHKDSK. Consider a professional data recovery service if preserving the data on the disk is crucial.
I/O Device Errors
An I/O (Input/Output) Device Error occurs when the operating system cannot communicate with the Western Digital hard drive. An I/O Device Error manifests in multiple ways, but it most commonly interrupts all read and write operations. An I/O Device Error reads: "The request could not be performed because of an I/O Device Error."
Causes of I/O Errors:
- Hard drive failure and corruption
- Incompatibility between the computer and file system
- Incorrect transfer mode settings
- Out-of-date device driver
- Loose connectors or damaged hardware
Fixes for I/O Errors:
- Restart the computer. Before moving onto more complex fixes, see if a simple restart re-establishes communication.
- Check all connections and cords. Examine the cables connected to the external hard drive. Ensure they are intact and securely attached to the device and system. Consider testing various connections by plugging the external hard drive into another port or using a different cable. To avoid potential interference, disconnect other external devices from the computer.
- Update or uninstall and reinstall device drivers. Device drivers are an essential software component that facilitate communication between a computer and hard drive. Having out-of-date drivers can lead to I/O Device Errors. Updating or uninstalling and reinstalling device drivers can resolve compatibility and functionality issues. To do so, open Device Manager, right-click the preferred hardware, and select Update Driver or Uninstall Device. After uninstalling, reinstall the device. You can also download the latest drivers from the manufacturer's website.
- Perform a clean boot. A clean boot minimizes startup items and can isolate software and service conflicts. It is a reversible troubleshooting technique that affects the system's software environment instead of the disk itself. A clean boot will not further damage the drive. To perform a clean boot, open the System Configuration application by searching msconfig and hitting Enter. Navigate to the Services tab and click the Hide all Microsoft services checkbox. Next, click Disable All, then go to the Startup tab. Press CTRL + SHIFT + ESC to launch Task Manager. In Task Manager, disable each startup item. Apply the changes in System Configuration and restart when prompted. You can repeat this process to find the conflict.
Additional Tips on I/O Device Errors:
- Adjusting transfer mode settings is another option. Sometimes, the operating system cannot transfer data due to incorrect settings. You can modify these within the Device Manager by selecting IDE channel properties and altering the transfer mode to PIO Only. However, manually adjusting transfer mode settings is generally not recommended, unless you have a specific compatibility concern. It is also important to realize that switching to PIO Only might be a temporary solution.
- While CHKDSK can repair issues that contribute to I/O Device Errors, it can also complicate the recovery process. In general, do not run CHKDSK if you suspect the underlying issue is hardware-related.
Advice: Exercise caution when troubleshooting I/O Device Errors. Executing improper commands can worsen the situation.
Western Digital Data Recovery
From time to time, hard drives fail, and even systematic troubleshooting does not fix the problem.
When that happens, Secure Data Recovery can help. As a proud WD Platinum Partner, we offer professional Western Digital data recovery for a variety of failure scenarios. Our engineers have the experience and expertise to reunite you with your valuable data.
We have flexible service options for our customers. As part of those services, we provide a free drive diagnostics and quote. Each case comes with a "No Data, No Recovery Fee" guarantee. You get your data back, or you pay nothing.
Call us at 800-388-1266 to start a case and reclaim lost data.

Timothy Burlee

Timothy Burlee is a content writer for Secure Data Recovery Services. He specializes in various topics in the data industry, including data recovery technology, storage devices, and digital forensics. Throughout his career, he has covered complex concepts and provided accessible solutions for users. Before joining Secure Data, he worked as a freelance technical writer.