No matter how careful you are with your Windows PC, there's always a chance that something bad might occur and wipe out all your data. In order to safeguard your files, it's crucial that you have a backup.
Luckily, Windows 11 comes equipped with tools to easily backup and restore your data, giving you a safety net for unexpected digital problems. In this article, we'll look at how to secure your Windows 11 system. We'll provide a step-by-step guide for backing up and restoring your files and address common issues you may come across.
Steps to Backup Windows 11
Before you can back up your computer, you'll need to choose the method you want to use.
Windows 11 offers the following four backup methods to choose from:
- Windows 11 offers the following four backup methods to choose from: -System Image is a complete backup of your computer. It includes a copy of everything on your computer, such as its installation, programs, settings, and files. This tool is good for fixing your whole system if it breaks. If you want to go back to an older version of Windows 10.
- File History is a feature in Windows 10 and Windows 11 that allows you to select files or folders for backup. It then creates regular snapshots of these files or folders. You can easily restore previous versions.
- System Restore is a helpful feature that allows you to create restore points to back up your system settings and programs. These restore points can be created automatically or manually. It also lets you go back to a previous working version if the software fails.
- Recovery Drive allows you to make a recovery copy of files to a USB drive. This will save your system files to a USB and lets you restore them if your computer won't start.
Now, let's look at the steps to begin your Windows 11 backup using each method.
Now, let's look at the steps to begin your Windows 11 backup using each method. -System Image in Windows 11
To create a backup of your Windows 11, you'll need a storage device to save the system image. You can use a USB drive, a hard disk, or a network drive.
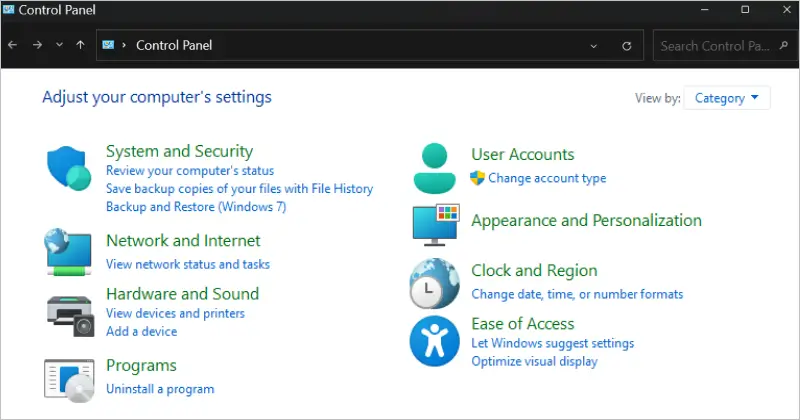
Type Control panel in Windows search and open the application.
Find Back up and Restore (Windows 7) under System and Security, and click on it.
Click on Create a system image on the left panel.
Select the destination drive and click Next. Make sure your device has enough space, is correctly formatted, and isn't your Windows boot drive.

Choose other included drives in the backup and click Next.
Select the desired settings and then click Start backup.
File History
Here are the steps to backup individual files and folders with File History.
Type Here are the steps to backup individual files and folders with File History. Control panel in Windows search and open the application.
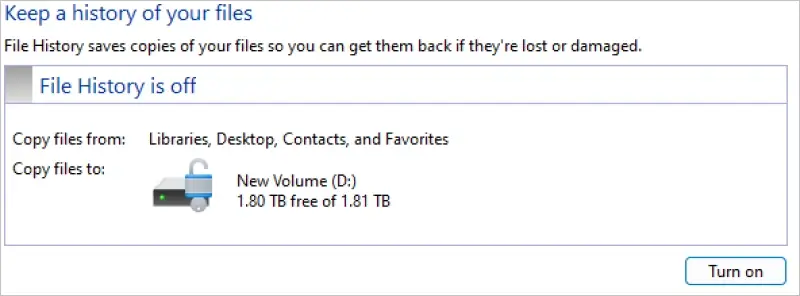
Find Save backup copies of your files with File History under System and Security, and click on it.
Select your chosen storage device for your backup data by clicking Select drive in the left-hand column. Next, click on Turn on when you’re done.
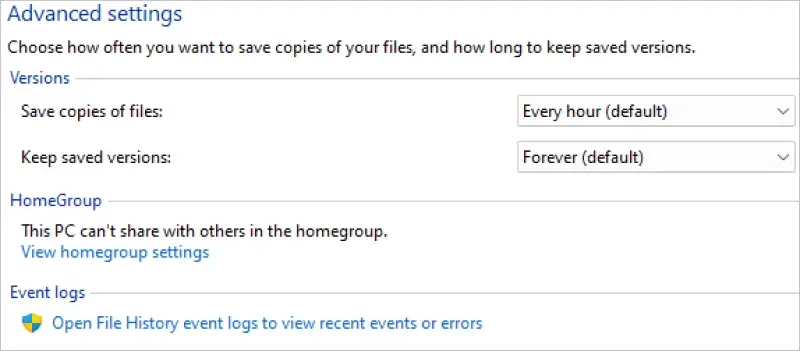
Configure your backup settings by clicking on Exclude folders and Advanced settings from the left-hand side column.
In the Advanced settings window, choose how often you'd like to backup your data. Then, choose how long you'd like to store your backups.
In the Exclude folders settings from the left column, select any folders in your Libraries, Desktop, Contacts, and Favorites that you’d like to skip from routinely backing up.
Click on Run now to start creating a backup, or exit and let your automatic backup schedule take effect.
Create Regularly Scheduled Backups with System Restore
To regularly create backups of your files using System Restore, follow these steps.
Type To regularly create backups of your files using System Restore, follow these steps. Control panel in Windows search and open the application.
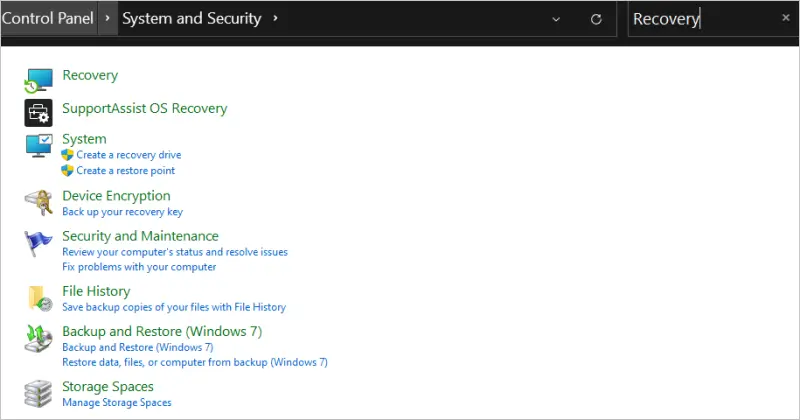
Type Recovery into the search bar at the top right, and select Recovery from the results.
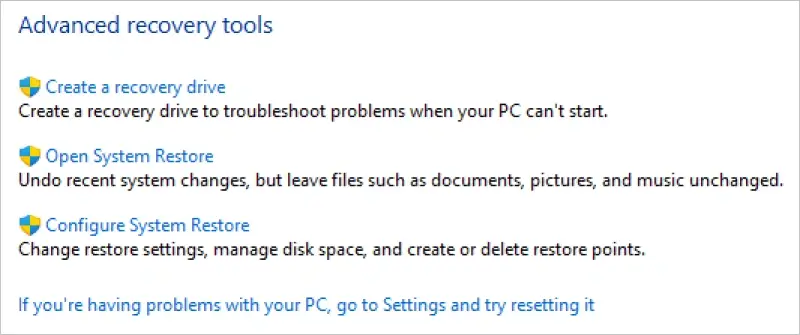
Select Configure System Restore.
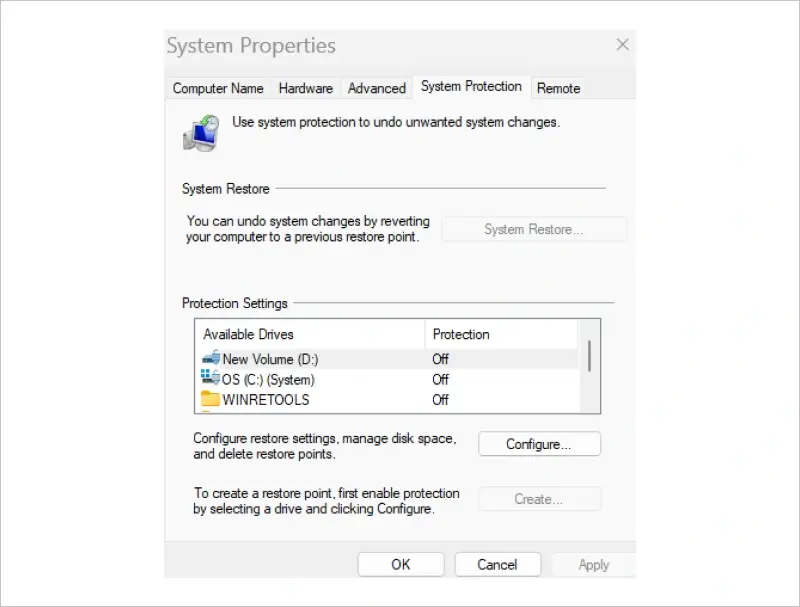
Select the System Protection tab in the System Properties window. Choose the drive to set up under Protection settings box and click Configure.
Toggle System protection under Restore settings and then allocate backup data as desired.
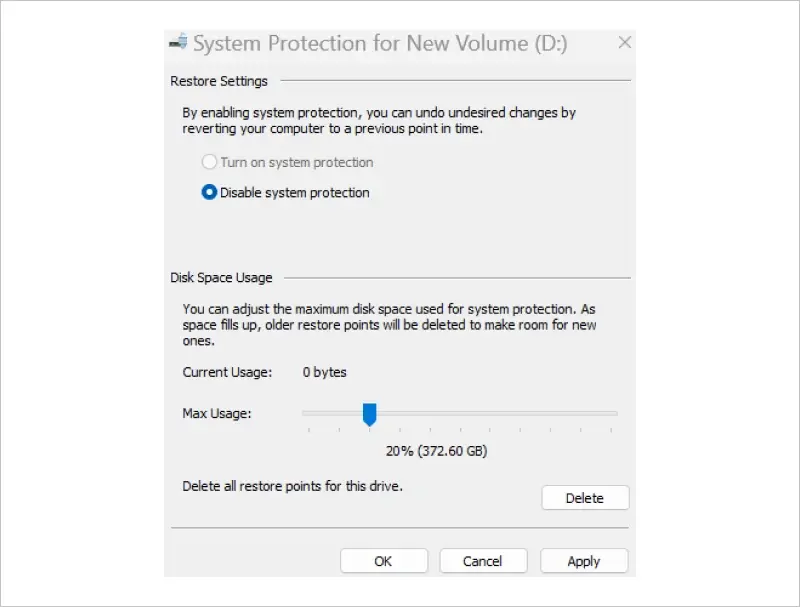
Click on Apply and then on OK. Your system will now automatically create restore points at regular intervals.
To create an additional restore point, click the Create… button. Next, name your restore point in the pop-up window, and click Create.
Creating a Recovery Drive
To create a Windows 11 recovery drive, you'll need a USB that's at least 16GB or larger.
Connect your USB drive to your PC.
Type Connect your USB drive to your PC. Control panel in Windows search and open the application.
Type Connect your USB drive to your PC. Recovery into the search bar at the top right, and select Recovery from the results.
Select Create a recovery drive from the Recovery window, and grant the wizard the required privileges.
In the Recovery Drive window, check the option to “Backup system files to the recovery drive” and click Next.

Select your USB drive and click Next.
Confirm the warning that your recovery drive will be cleared in order to proceed, and click Create.
Click the Finish button to complete the install wizard.
Steps to Restore Your Data on Windows 11
Backing up is important, but it's also essential to understand how to utilize these backups when needed. We will discuss each backup method thoroughly.
Restoring Using System Image
To restore your computer from a system image, you'll need a bootable USB drive or DVD to start the process.
- Restart with your bootable USB drive or DVD. Click Next if you're satisfied with the language, time, and keyboard input settings.
- In the next window, select Repair your computer in the bottom left corner.
- Select the “Troubleshoot” option in the Choose an option screen.
- Click on Select the “Troubleshoot” option in the Choose an option screen. -System Image Recovery.
- Navigate to and select your system image, and click Select the “Troubleshoot” option in the Choose an option screen. -Next.
- Select whether you want to format and repartition disks, and click Next.
- Click Finish, then confirm that you want to replace the current files with the system image by clicking Yes.
File History
After you have backed up your files using File History, you can easily recover them whenever you need. Here are the steps on how to restore your files using File History.
Type Control panel in Windows search and open the application.
Find Save backup copies of your files with File History under System and Security, and click on it.
Click on Restore personal files in the left-hand column.

Select the files you want to recover from the displayed list. Next, click on the green button to finalize the restoration process.
System Restore
Once you've created one or more restore points, you can always revert to your system's settings from those times.
Type Control panel in Windows search and open the application.
Type Recovery into the search bar at the top right, and select Recovery from the results.
Select Open System Restore.
Click Next, and select the restore point you want to revert to.
Click on Scan for affected programs to see which applications and drivers will be rolled back. If you're okay with this, press Next.
Confirm your selected restore point and click Finish to finalize the process.
Recovery Drive
To restore your Windows 11 from the recovery USB drive you created earlier, connect the drive to your computer.
- Boot your computer from the USB recovery drive you created.
- Select the Boot your computer from the USB recovery drive you created. -Troubleshoot option.
- Select Boot your computer from the USB recovery drive you created. -Recover from a drive.
- Select either Just remove my files, or Clean the drive fully.
- Finally, click on Recover to start restoring Windows from your USB drive.
- Follow the instructions on-screen to set up your computer and complete the restoration.
Troubleshooting Common Backup and Restore Issues
Difficulties may arise from time to time during backups and restorations. Still, most of these can be fixed easily. In this section, we'll discuss a few typical issues you'll probably come across.
Storage Space
You may not be able to back up your files if your hard drive or solid-state drive doesn’t have enough space. Make sure your storage device has enough space for both backing up and restoring your files. Backups can get rather big depending on the amount of data you're dealing with.
Backup and Restore Configuration
It's important to set up your backup configuration correctly. If you have scheduled backups, make sure the times you set match your preferences and keep your computer on during those times.
When you restore your backed-up files, ensure that the parameters match the settings of the original backup to avoid corruption or data loss.
Slow or Failed Backup/Restore
Try to utilize USB 3.0 or higher for data transfer if you're using an external hard drive for backup or restoration. Make sure your cables are secure.
Also, it's a good idea to close unnecessary applications to free up system resources. Hard drives are slower than SSDs, so avoid overloading your HDD with resource-heavy tasks.
Problems with Compatibility
To avoid problems with compatibility, make sure the file types of the backups and the restoration match.
Sometimes, other security software can cause issues that stop the backup or restoration process. If you have this problem, try closing these apps and trying again.
Make sure to update your Windows 11 system regularly for the latest backup software.
Make sure to update your Windows 11 system regularly for the latest backup software. -Corrupted Files
If you see error messages saying your backup is corrupted, just follow the prompts on the screen to fix them. If that doesn't work, you might have to think about backing up corrupted files again or reaching out to a data recovery expert. We can assist you with that.
Data Recovery for Windows
Sometimes, you cannot restore a backup to recover lost data.
At Secure Data Recovery, we specialize in restoring files in these cases. Our certified engineers have decades of experience with SSD and hard drive data recovery. That means we can often retrieve data from desktops and laptops running Windows 11 or older versions. Plus, our free diagnostics and a SSD -No Data, No Recovery Fee guarantee provides complete peace of mind. If we cannot recover your files, then you pay nothing.
Call 800-388-1266 or request help today for a free consultation.

Monica J. White

Monica is a tech journalist with a lifelong interest in technology. She first started writing over ten years ago and has made a career out of it, with a particular focus on PCs, mobile devices, SaaS, and cybersecurity. She enjoys the challenge of explaining complex topics to a broader audience, whether it's how semiconductors work or how to back up your data. Her work has previously appeared in Digital Trends, Tom's Hardware, Pay.com , SlashGear, Forbes, Springboard, Looper, Money, WePC, and more.