Features like iCloud and over-the-air updates made manual iPhone maintenance a thing of the past. However, there are still occasions where users might need to restore an iPhone backup or connect their device to update. In those cases, the mobile device and computer must be able to communicate with each other. Sometimes, users receive iPhone Error 4013. This error prevents people from restoring their iPhones or iPads with an iTunes or Finder backup.
Our experts explain what causes iPhone Error 4013 and how to fix it.
What Is iPhone Error 4013?
Error 4013 is a code signaling a failure to complete an iPhone’s restoration or update process. You will see this message on the screen:
The iPhone [Device Name] could not be restored. An unknown error occurred (4013).
The error can happen for several reasons. First, the mobile device and computer could have an improper connection. Corrupted files could also interrupt the download. Using an outdated iTunes version with the latest iOS software is another possible cause. Lastly, there could be issues with the iPhone’s storage or the computer’s motherboard.
Luckily, you can often address each scenario and avoid data loss.
Troubleshooting iPhone Error 4013

Adopting a systematic approach is helpful when it is unclear why the process failed. Testing potential solutions one by one is an effective method of diagnosing the problem and resolving the error.
Follow these steps to fix Error 4013 and restore an iPhone backup or upgrade the device.
Step 1: Inspect USB Cables and Ports
At times, the simplest explanation is the correct one. Damaged USB cables or connections could prevent data from transferring between devices. Look for exposed wires or knots along the length of the cable. Examine connectors and ports for broken pins or dust and debris. If something appears wrong, try another Apple-approved Lightning cable or a different port on the same computer.
Step 2: Restart the iPhone
Devices might freeze on a set of tasks from time to time, interrupting the restoration or update process. Performing a force restart can clear the issue if a minor software glitch is the source of Error 4013.
To force the iPhone to restart:
- Press and quickly release the top volume button.
- Press and quickly release the bottom volume button.
- Press and hold the side button.
- Release the side button when the Apple logo appears.
Continue if the problem persists after a restart.
Step 3: Disable Cybersecurity Software
While rare, cybersecurity software could interfere with the process and lead to Error 4013. Some programs have strict policies for data transfers involving untrusted devices over USB. Therefore, the iPhone might be unable to access data for a restore or update. Most programs have options to pause protection for a few minutes to see if that is the origin of the error.
If Error 4013 keeps occurring, re-enable the software and move on to the next step.
Step 4: Check iTunes Version
Ensure that iTunes is up-to-date. Running outdated software is one of the most common causes of Error 4013. If needed, update the program to the most recent version.
Note: Most modern Macs no longer support iTunes. Users with macOS Catalina (released in 2019) or later must manage their iPhone backups through Finder. As the default file manager on macOS, Finder receives automatic updates from Apple.
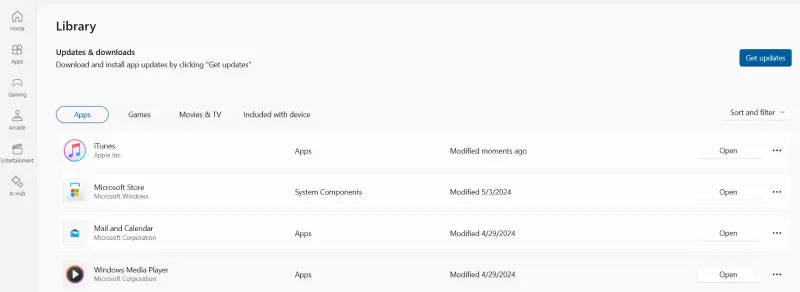
To update iTunes through the Microsoft Store on Windows 11 or 10:
- Launch the To update iTunes through the Microsoft Store on Windows 11 or 10: -Microsoft Store.
- Click the Library tab at the bottom of the left sidebar.
- Click Get updates at the top of the window.
To update iTunes on other versions of Windows with direct downloads:
- Launch To update iTunes on other versions of Windows with direct downloads: -iTunes.
- Select Help in the navigation bar.
- Choose Check for Updates in the drop-down menu.
- Click Download iTunes.
- Click Install 1 item.
- Restart the computer.
To update iTunes on macOS Mojave (released in 2018) or earlier:
- Launch the To update iTunes on macOS Mojave (released in 2018) or earlier: -App Store.
- Select the Updates tab at the top of the window.
- Click Update to download the latest iTunes.
Below is a list of the optimized iTunes version for older releases. iTunes 12.9.5 was the final version created for Macs. It is not available as a standalone download. Visit Apple Support for more details on iTunes for Mac, or use the links in the table.
You can attempt to restore or update the iPhone again once finished.
Step 5: Check the Operating System
Your operating system (OS) could also trigger Error 4013 on iPhones or iPads. Restoring or updating the device through iTunes or Finder requires communication with the computer. An outdated OS might be unable to interact with updated firmware on the device.
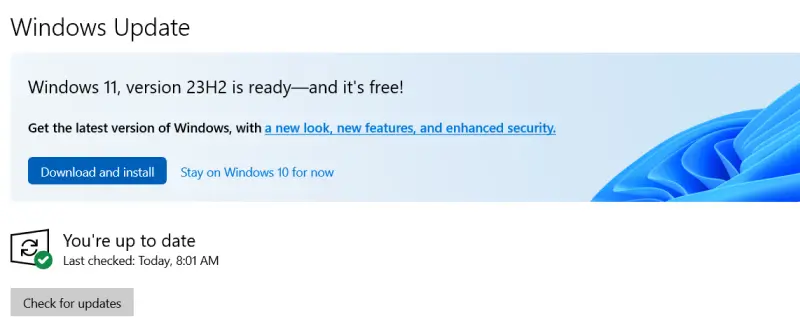
To update Windows 11:
Type Settings in the Windows search box.
Select Windows Update in the sidebar.
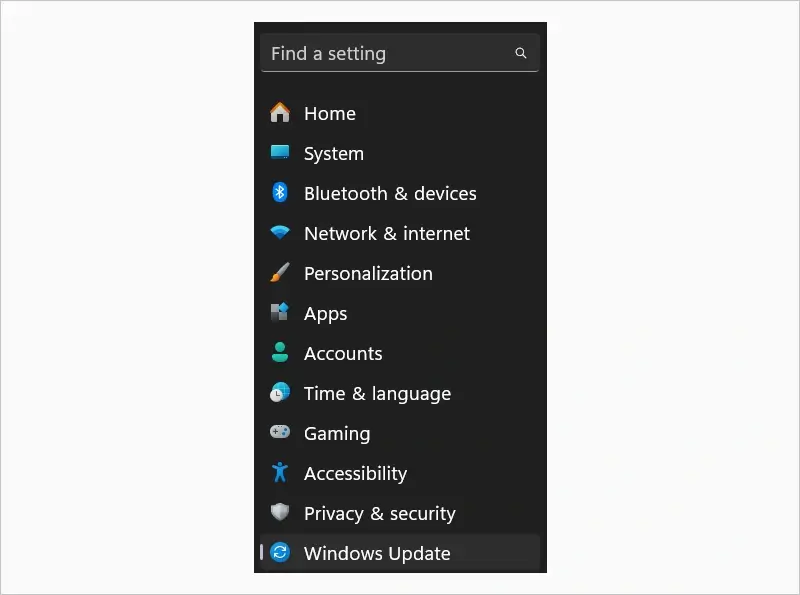
Click Check for updates.

To check for updates on Windows 10:
Type Settings in the Windows search box.
Select Update & Security.
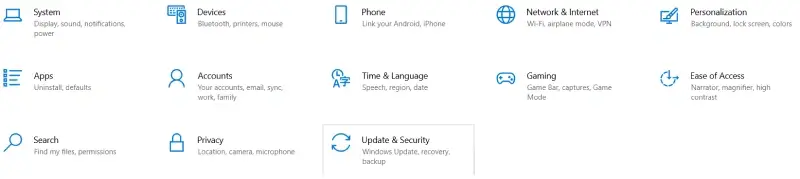
Click Check for updates.
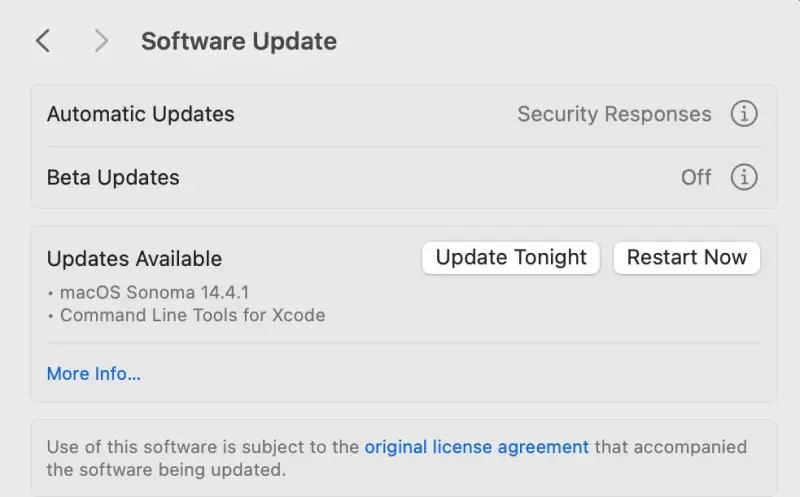
Follow these steps to search for updates on macOS Ventura (released in 2022) or later:
Choose System Settings from the Apple menu.
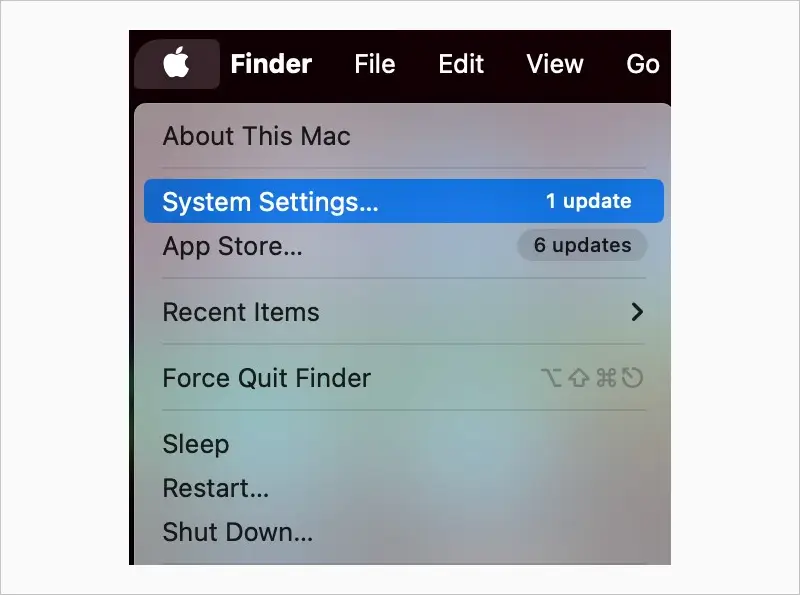
Select the General tab in the left sidebar.
Click Software Update.
For updates on macOS Monterey (released in 2021) or earlier:
- Choose System Preferences from the Apple menu.
- Click Software Update.
Note: You can also check the computer manufacturer’s site for driver updates. These drivers allow the iPhone and PC or Mac to communicate. Chipset and USB drivers impact the process most, so ensure they are up to date.
Step 6: Update iOS in Recovery Mode
If Error 4013 continues, try putting the iPhone into iOS Recovery Mode. This mode runs on a minimal version of iOS. The restricted environment can help restore or update the device by isolating it from problematic system files and apps. Installing a new version of iOS could resolve software issues on the device side.
To enter iOS Recovery Mode:
- Restart the PC or Mac.
- Connect the iPhone to the computer with a USB cable.
- Launch iTunes or Finder, depending on the OS. (See Step 4)
- Press and quickly release the top volume button.
- Press and quickly release the bottom volume button.
- Press and hold the side button.
- Release the side button when a laptop and USB cable appear.
Now, you can attempt to update iOS on the device. Updating the mobile device preserves all of its data and settings.
Note: Sometimes, the iPhone will not enter Recovery Mode. If that happens, scroll down to Step 9.
To update iOS in Recovery Mode on iTunes:
- Click Update in the pop-up window in iTunes.
- Select Update again to confirm.
For those using Finder:
Click iPhone in the left sidebar.
Click the General tab.
Choose Check for Update.
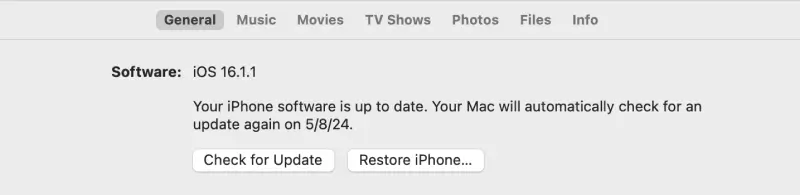
Select Update to confirm.
If successful, the iPhone or iPad will download and install the update. If the update fails, iTunes and Finder will prompt you to restore the iPhone or iPad. Do not restore the iPhone without a recent backup. Choosing to restore will result in data loss.
Do not disconnect the device from the computer before ejecting it. Improper ejection increases the risk of file corruption.
On iTunes, that means right-clicking the arrow icon next to the iPhone or iPad’s name, as seen below.

Mac users can click the Eject button in Finder. Older versions of macOS will also use the arrow icon in iTunes.
Step 7: Restore On Another Computer
Though unlikely, you could try to restore the device on a different computer. A clean install of iTunes or a fresh version of Finder could rule out corrupted files and other system conflicts.
Step 8: Check the Hardware
If nothing has worked so far, the iPhone or iPad’s storage could have failed. iPhones store their firmware in NAND chips soldered right onto their logic boards. That code is responsible for managing the device’s operation and data. Damaged electronics could prevent the smartphone or tablet from reading and writing data, leading to Error 4013.
People with personal info or priceless memories stored on a device without a valid backup should contact an expert. We provide reliable data recovery services for any iPhone or iPad model. Our certified engineers have over a decade of experience with Apple devices and flash storage. We have the specialized hardware and software to gain low-level access to the device and rescue its critical files.
You do not have to lose important data when an iPhone becomes unresponsive.
Step 9: Reset iPhone to Factory Settings
Those with a working backup or needing an immediate solution can reset the iPhone to factory settings. While a factory reset can fix Error 4013, it will erase the device’s data and settings. Do not wipe the iPhone if you want to keep the stored data. iPhones have built-in encryption and destroy the decryption keys upon deletion. You will not be able to recover data after resetting. This action is a last resort.
If Find My iPhone is active, you will need your Apple ID password to turn it off before proceeding.
To perform a factory reset on an iPhone with Error 4013 in iTunes:
- Enter iOS Recovery Mode. (See Step 6)
- Click Restore in the pop-up window.
- Select Restore and Update to confirm.
Here is how to reset an iPhone to factory settings in Finder:
- Click iPhone in the left sidebar.
- Click the General tab.
- Choose Restore iPhone.
- Follow the onscreen instructions.
Your iOS device will return to its original state after several minutes. Once finished, users can restore a backup from iTunes, Finder, or iCloud.
Note: In extreme cases, the iPhone or iPad will not enter Recovery Mode. If that happens, users might need to restore the iPhone in DFU (Device Firmware Update) mode. This mode allows for deeper diagnostics and troubleshooting, including updating corrupt firmware, which could cause Error 4013.
To enter DFU mode and reload clean firmware on iPhone 8 or newer:
- Connect the iPhone to the computer with a USB cable.
- Press and quickly release the top volume button.
- Press and quickly release the bottom volume button.
- Press and hold the side button.
- Press and hold the bottom volume button when the screen goes black. Continue to hold the side button.
- Release the side button after 5 seconds. Continue to hold the bottom volume button.
- Release the bottom volume button once iTunes or Finder recognizes the device.
Like in Step 6, DFU mode offers the option to restore or update the iPhone or iPad. Attempting to update the device first could save stored data. Choosing to restore the smartphone or tablet will delete all of its data.
Exercise caution in DFU mode. Improper use could lead to permanent data loss.
Other Related iPhone Error Codes
Users can also encounter iPhone Error 9, 4005, or 4014 when restoring or updating.
Error 9 refers to an issue that interrupts a data transfer in progress. This code often occurs because of faulty hardware or a firewall preventing connection to Apple’s servers.
Battery issues or a broken USB connection typically cause iPhone Error 4005. Testing new cables and different ports could fix the problem.
You may also run into iPhone Error 4014. Like the other errors, it could be a hardware problem like cables and ports or outdated software. It requires a similar troubleshooting approach to Error 4013.
Professional iPhone Data Recovery
There’s still hope if nothing works. You can recover your lost data with the support of an expert.
Since 2007, Secure Data Recovery has been a proven leader in iPhone data recovery. As an Apple Authorized Service Provider (AASP), we have access to genuine iPhone parts, tools, and product info. Those resources help us resolve the most challenging cases of iPhone data loss. Our team has reunited thousands of people with their important data and can do the same for you. We even have a No Data, No Recovery Fee guarantee. You get your data back, or pay nothing.
Call us at 800-388-1266 to start a case and reclaim what matters most.

Philip Bader

After more than a decade in Southeast Asia as a reporter and editor for magazines, newspapers, and online media organizations, Philip Bader now serves as a freelance content writer for Secure Data Recovery Services. He writes blogs and web content about data storage technology, trends in enterprise data recovery, and emerging data storage technology.