Data drives decision-making and sentiment in the modern world. From critical data on a professional system to priceless memories on a personal computer, the contents of a Seagate storage device are often invaluable assets. That makes resolving errors and preventing sudden data loss even more essential. Secure Data Recovery, the authority in RAID, SSD, and hard drive recovery, explains what common Seagate errors mean and how to fix them.
How To Check and Monitor Seagate Hard Drive Health
The first step when identifying errors on your drive is to check the health of the drive. Luckily, Seagate hard drives come equipped with several diagnostic methods to ensure the functionality and performance of the device. These diagnostic tools assess the drive's hardware and logical features like partitions, sectors, and file systems. Here are some of the recommended methods:
Adjust Settings in the Seagate Dashboard & Test Your Drive
Seagate Dashboard is a utility for adjusting settings and testing your hard drive.
- Connect the drive to the computer via a USB port, bypassing docking stations or hubs.
- Launch the Seagate Dashboard software by double-clicking its icon on the Windows desktop.
- For macOS users, locate Seagate Dashboard in the Applications folder.
- Select the desired drive from Seagate Dashboard’s panel.
- Navigate to the Manage tab and press Test.
Note: If the Seagate Dashboard test returns a failure scenario, run the SeaTool software before deciding to replace the hard drive.
Use SeaTools to Run Diagnostics on Your Device
SeaTools is a more comprehensive diagnostic program for identifying errors and offering potential solutions.
Close other applications before starting the diagnostic for optimal results. Other software could interfere with SeaTools. Ensure the computer remains powered on.
For extended tests, modify power management settings to prevent automatic shut-offs. To do so, follow this path: Control Panel > Power Options > Change plan settings > Change advanced power settings. Switch the Turn off hard disk after setting to Never.
Choose the drive to perform diagnostics. Supported models include Seagate, Samsung, LaCie, and Maxtor. Next, select the desired tests from the following list:
- Fix All
- S.M.A.R.T. Check
- Short Drive Self-Test
- Short Generic
- Long Generic
Once concluded, SeaTools saves a log in the program's installation folder. You can view these logs and results within the SeaTools interface.
Check the Drives Health With Built-in tools on Windows or Mac
Both Windows and macOS come with built-in tools that enable you to check the performance of your drives. We will walk you through the steps for both operating systems.
CHKDSK on Windows
CHKDSK is a built-in system tool on Microsoft Windows that can monitor hard drive health and performance.
Note: In terms of application software, CHKDSK is unforgiving. Back up important data before running CHKDSK, as the tool can cause data loss. CHKDSK identifies bad sectors and flags them, which can make previously accessible data inaccessible. Proceed with caution.
If you wish to proceed, open Command Prompt by typing CMD in the Windows search bar. Enter the following command: chkdsk X: /f. Replace X with the appropriate drive letter.
First Aid on macOS
First Aid is a robust software utility designed for internal and external drives on macOS.
Note: Like CHKDSK, back up your data before using First Aid. The Repair Disk option could lead to data loss if it encounters bad sectors.
First, confirm the drive’s visibility in Disk Utility. The following path opens Disk Utility: Go > Utilities > Disk Utility. A list of drives should be displayed. Click on the Seagate drive to view its details. If the partition is visible but not mounted, you can repair it using First Aid:
- Select the highlighted partition.
- Navigate to the First Aid tab.
- Click Verify Disk. If prompted, run Repair Disk.
Common Seagate Errors & Tips on How to Fix Them
Now that you have completed the diagnostic steps for your Seagate hard drive, we’ll walk you through possible error codes and how to fix them. All storage devices have the potential to experience failure. A damaged or defective drive can prevent users from accessing crucial data at the most inopportune time. However, being proactive and understanding these errors can mitigate the risk of data loss and extend their device’s lifespan.
The following list covers the most common Seagate errors. We explain what causes these errors, provide potential fixes, and offer advice on how to avoid them.
Fatal Hardware Error
The dreaded Fatal Hardware Error indicates a physical issue with the drive. The full notification reads: “X: is not accessible. The request failed due to a fatal device hardware error.” In the error message, X represents the drive letter. Fatal Hardware Error often signals the drive is reaching the end of its lifespan.
Causes of Fatal Hardware Errors:
- Faulty cables
- Corrupted or bad sectors
- Mechanical failure or physical damage
Fixes for Fatal Hardware Errors:
- Change cables and ports. Defective cables and ports can prevent the computer and device from establishing a reliable connection. Switching those can sometimes resolve the issue.
- Review the hard drive’s S.M.A.R.T. attributes with Seagate software or Windows utilities. Immediate action is required if the report contains abnormal or inconclusive results. Terminology can vary between monitoring tools, but “Bad”, “Unknown”, and “Caution” are some worrisome statuses.
- Run Error Checking and CHKDSK. Windows has built-in features and utilities, including Error Checking in Disk Management and CHKDSK, that can sometimes diagnose and repair logical issues.
- Initialize the hard drive. Uninitialized drives can trigger this error. Initializing the device in Disk Management and selecting the appropriate partition style (usually MBR or GPT) can fix it.
- Format the hard drive. If all else fails, you can format your hard drive to reset the file system. Formatting your hard drive on Windows and macOS will make stored data inaccessible. Create a backup before taking this step.
Additional Tips on Fatal Hardware Error:
- It is still possible to run CHKDSK on an uninitialized disk with the mountvol command.
- Initializing does not erase data, but subsequent steps like formatting and partitioning will. Proceed with caution.
Advice: Fatal Hardware Error is often a serious issue. Consider professional data recovery services or software if your data is irreplaceable. While some fixes like CHKDSK can correct errors, there is also a possibility that they worsen the situation. CHKDSK identifies bad sectors on the hard drive. In doing so, CHKDSK can make data in that sector inaccessible.
“Beeping Error”
The beeping error occurs when the Seagate hard drive is connected to a computer and makes short, high-pitched sounds.
Causes of Beeping Error:
- Debris can accumulate inside ports and disrupt connection
- Power supply issues
- Defective printed circuit board (PCB)
- Mechanical failure
- Physical damage from dropping or mishandling
Fixes for Beeping Error:
- Clear the ports. From a distance, use short bursts of compressed air to clear dust and other particulates from the device’s ports.
- Test cables and ports. Faulty cables and ports can lead to unreliable connections. Replacing the cable or trying a different port can rule out these possibilities.
- Use a USB Y-cable or hub. A dual USB cable draws power from more than one port to meet the drive’s requirements and resolve supply issues.
- Connect the hard drive to a different desktop or laptop. This step can help determine whether the issue is with the computer or storage device.
Additional Tips on Beeping Error:
- The hard drive’s firmware could also need updating. Check Seagate’s website to see if there’s a newer version available for the specific model.
- Overheating can cause hard drives to malfunction. Consider using a cooling pad or an external fan if you’re using the device for extended periods.
- The frequency of beeping can inform your response. Continuous beeping could point to a power supply issue. Periodic beeping could mean mechanical failure.
- Protect your external hard drive from sudden impacts or rough handling. A protective case can shield it from damage when not in use.
Advice: A beeping hard drive is a warning sign. If possible, back up your files before data loss occurs. In most cases, hard drive beeping indicates electrical and mechanical issues. These situations require specialists to repair and recover data. Consider replacement options once a hard drive starts beeping.
Format Disk Error
Sometimes, connecting a Seagate external device to a computer can lead to an error prompting you to format the drive. The Format Disk Error happens because every drive’s file system must be compatible with the computer’s operating system.
Causes of Format Disk Error:
- Incompatibility between file and operating systems
- Corrupted, damaged, or RAW file system
Fixes for Format Disk Error:
- Test other connections. Plug the Seagate drive into a different port or computer. Check File Explorer or Disk Management on Windows or Disk Utility on macOS. If the drive shows up with all of its data, retrieve it. If not, proceed to the next method.
- Format the hard drive. Formatting your hard drive for Windows or Mac can resolve compatibility problems between the file and operating system. Make sure the computer detects the hard drive, then reformat if needed. However, it is essential to recognize that formatting will render data inaccessible. Save valuable files to another device or a backup platform before formatting.
Additional Tips on Format Disk Error:
- Avoid directly unplugging your hard drive. Use the “Safely Remove Hardware” option on Windows or “Eject” on Mac to minimize the risk of file corruption.
- Regular backups are implemented for these situations. Consider another external drive for local storage or a cloud backup service for better data protection.
- You can still recover inaccessible files after formatting. While a quick format erases the drive’s contents, the process does not overwrite the data with zeros or random characters. That means the data still exists in unallocated space. Often, data recovery services or software can extract deleted data from a formatted hard drive.
Advice: Immediately eject or shut down if you accidentally formatted the hard drive and need to recover the lost data. While data recovery is possible, continued usage could jeopardize the files.
Error Code -36
Error Code -36 for Seagate drives is a Finder-related error on Macs. This error occurs when Finder encounters an issue while reading or writing data. Error Code -36 can interfere with routine operations like copying, moving, or transferring files. It often identifies a problematic file with a ‘.’ or ‘_’ within its name. For example, .DS_Store could cause Error Code -36. Although invisible in Finder, these files store essential information for organizing and presenting data.
Causes of Error Code -36:
- Corruption with a file containing ‘.’ or ‘_’ in its name. Due to this error, Finder cannot access the information it needs to interact with the file.
Fix for Error Code -36:
- Search for Terminal in Spotlight and click the icon that appears or hit Return.
- Enter dot_clean into Terminal.
- Open the Finder folder containing the corrupted files.
- Drag the folder to the Terminal window with the dot_clean command. The complete file path should show up in Terminal.
- Press Return.
- Attempt to copy, move, or transfer the file.
- Exit Terminal.
Additional Tips on Error Code -36:
- Dragging and dropping folders into Terminal is a shortcut for users instead of manually entering complex file paths.
- If you want to avoid Terminal, you can also resolve Error Code -36 with CleanMyMac X, a third-party maintenance tool. Exercise an appropriate amount of caution when downloading third-party software.
Advice: Though rare, Error Code -36 is a fixable issue with Seagate hard drives. Use Terminal or CleanMyMac X to resolve the error.
Error Code 43
Error Code 43 is a standard device manager error when Windows encounters an issue with the drive. The full error message reads: “Windows has stopped the device because it reported problems (Code 43).”
Causes of Error Code 43:
- It often indicates that the Windows driver has lost communication with the Seagate device. This error is not unique to Seagate hard drives.
Fixes for Error Code 43:
- Reconnect the device. Connect the drive to one of the rear USB ports on a desktop computer. Avoid front ports, USB hubs, or switches.
- Run diagnostics. Use diagnostic software like SeaTools for Windows on the drive. If it fails, consider replacing the disk.
- Update device drivers. Locate the relevant drive in Device Manager. Right-click the disk and choose Properties, then Driver and Update Driver. Let Windows automatically search for the updated software.
- Uninstall and reinstall device drivers. Sometimes, uninstalling and reinstalling device drivers can fix the problem. To uninstall, right-click on the target drive and select Uninstall. After uninstalling, right-click on the computer in Device Manager and Scan for hardware changes. Windows should reinstall the device.
- Disable and re-enable the device. You can try opening Device Manager and refreshing the status of the disk. Right-click on it and select Disable Device. Confirm the action. Then, right-click again and select Enable Device.
Additional Tips on Error Code 43:
- Always update your USB drivers. You can check driver updates on the website of your computer and motherboard manufacturer.
- Your Seagate hard drive might work when directly connected but not when using a USB hub. Use a powered USB hub if that is the case.
Advice: Consider data recovery services or software if Windows detects your drive, but it still displays Error Code 43.
Error Code 45
Error Code 45 is a common issue within Device Manager. It relates to Windows not recognizing a connected drive. Here is the full notification: “Currently, this hardware device is not connected to your computer (Code 45). To fix this problem, reconnect this hardware device to your computer.”
Causes of Error Code 45:
- Error Code 45 can occur due to a glitch in Device Manager or an underlying issue with the computer or storage device.
- These issues could include an improper connection, faulty cables, outdated drivers, or corrupt system files.
Fixes for Error Code 45:
- Reconnect the hard drive. Often, resolving Error Code 45 is as simple as reconnecting the device. Inspect the cable for damage, then plug the drive back into the USB port and ensure a secure connection.
- Restart the computer. Rebooting can sometimes eliminate glitches.
- Update Windows. See if Windows is up-to-date. Microsoft releases regular updates that address errors.
- Update the Seagate hard drive. Check the Seagate website for updated hardware drivers.
- Disable and re-enable the drive in Device Manager. Launch Device Manager, right-click the drive, and select Disable Device. To re-enable, right-click the drive again and choose Enable Device.
- Run System File Checker (SFC) or Deployment Image Servicing and Management (DISM) if possible. These utilities can sometimes repair corrupt system files preventing Windows from functioning. However, SFC and DISM are administrator-level tools designed for power users. Exercise caution when using these utilities.
Additional Tips on Error Code 45:
- Connect the device to another computer to determine if the problem lies with the Seagate hard drive or Windows.
- If all fails, performing a system restore could revert your computer to a previous state where it worked. If you opt for this troubleshooting method, you will lose data that you created or edited after the restoration point.
Advice: If Error Code 45 persists, evaluate the importance of the inaccessible files and consider expert data recovery services.
S.M.A.R.T. Errors
S.M.A.R.T. (Self-Monitoring, Analysis, and Reporting Technology) is the monitoring system in Seagate devices. Its primary function is to monitor disk health and performance and predict impending issues. A S.M.A.R.T. error alerts users to prepare for hard drive failure and replacement.
Causes of S.M.A.R.T. Errors:
- S.M.A.R.T. flags several issues with a failing hard drive. These include read retries (incorrect data retrieval on initial attempt), accumulation of bad sectors, slower access times, and high temperatures.
- The monitoring system has a list of predefined thresholds. When a value surpasses a threshold, S.M.A.R.T. reports the error. Thresholds vary between manufacturers and models.
Fixes for S.M.A.R.T. Errors:
- Back up critical data. In most cases, S.M.A.R.T. errors are not fixable. Mitigate the impact of hard drive failure by saving your stored data to a local backup or a cloud service.
Additional Tips on S.M.A.R.T. Errors:
- Though rare, sometimes an outdated BIOS can no longer interpret S.M.A.R.T. parameters. As a result, it could falsely report errors.
Advice: S.M.A.R.T. errors demand immediate attention. Preempt data loss scenarios by creating comprehensive backups as soon as possible. Avoid using the failing hard drive if possible.
Seagate Not Recognized on Windows
While Windows not recognizing a Seagate hard drive can be disconcerting, there are numerous solutions. With these fixes, you can protect your data and the functionality of your hard drive.
Causes of Seagate Not Recognized on Windows:
- Faulty cable preventing connection between the device and system
- Corrupt or outdated drivers
- Hard drive failure
- Malware that corrupts stored data and system files, making the hard drive undetectable
Fixes for Seagate Not Recognized on Windows:
- Inspect the cables and USB ports. Make sure the cables and USB ports are intact and free of debris. Ensure the cable is firmly connected. You can also try another USB port or new cable to rule out a connection problem.
- Utilize Disk Management. Simultaneously press the Windows key and X. Launch Disk Management from the context menu. See if the Seagate hard drive is listed. Assign a new volume and drive letter if necessary.
- Uninstall and Reinstall USB devices in Device Manager. Open Device Manager from the Windows Control Panel. In the Device Manager, navigate to Universal Serial Bus controllers. To uninstall, right-click the USB controller and select Uninstall device. Afterward, right-click again and select Reinstall device.
- Update USB drivers in Device Manager. In the same section of Device Manager, right-click the USB and select Update driver. If an update is not available, confirm with the manufacturer’s website.
- Remove malicious software. Perform a full scan of an antivirus program to eliminate a malware infection that could interfere with the Seagate drive.
Additional Tips on Seagate Not Recognized on Windows:
- Data loss is possible if Windows still does not recognize the Seagate device.
- When disconnecting a Seagate external hard drive, always choose “Safely Remove Hardware” before unplugging the disk.
Advice: Consult data recovery professionals if your essential data needs recovered from an unrecognized Seagate drive. They have the tools to gain low-level access to the storage device.
Disk Utility Errors on Macs
Disk Utility is a built-in tool for managing storage devices, and you may occasionally encounter errors. Read below for a list of Disk Utility errors on macOS and their potential solutions.
Causes and fixes for common Disk Utility errors:
- Drive View Settings: Since macOS High Sierra, Disk Utility’s default view is Show Only Volumes, which can cause confusion when reformatting. To adjust, click View at the top of the Disk Utility window and choose Show All Devices. This will review the non-indented, physical disk.
- Disk Setup: A 134.2 megabyte (MB) volume is reserved for Windows use. This volume is formatted for Windows with a NTFS file system and GUID partition map. If you intend to only use the drive on macOS, you can erase the disk.
- Grayed-Out Partition: A grayed-out partition button occurs when the drive has a Master Boot Record (MBR) scheme. To activate the partition button, erase the disk, then select the preferred scheme and file system.
- MediaKit Reports Not Enough Space: This error displays when Apple tries to use the 134.2 MB Microsoft Reserved volume for their EFI system, which requires 200 MB. To fix, erase the disk and reformat based on your operating system preferences.
- Disk Management: Errors like “com.apple.DiskManagement.disenter error 49223” and “com.apple.DiskManagement.disenter error 49153” indicate compatibility and formatting issues with software, such as Paragon. For error 49223, ensure that the volume is formatted to ExFAT on macOS. For error 49153, uninstall Paragon and reinstall the specific version of the software your device supports.
- Couldn’t Unmount Disk: This error message indicates that macOS cannot unmount the Seagate drive because active applications are using it. To unmount the disk, wait for the ongoing processes to complete and close all applications. If the issue persists, restart your Mac. You can also force macOS to unmount the drive with Terminal, but it could lead to data loss. If you wish to forcibly unmount the device, enter the following command: diskutil unmountDisk force /Volume/X. Replace X with the name of the external drive.
Additional tips on Disk Utility errors:
- Remember to create a backup before reformatting. The formatting process erases the volume’s data.
- Keeping drivers and software up-to-date helps avoid compatibility issues.
Advice: Disk Utility is a powerful tool. However, improper or haphazard actions within Disk Utility can have consequences. Proceed with caution. Accidentally erasing data while using it is not uncommon.
Seagate Data Recovery
Sometimes, the hard drive just fails and requires professional assistance to retrieve the valuable data stored on the disk. While data recovery software is an option in cases involving logical damage, it cannot address mechanical failure or physical damage.
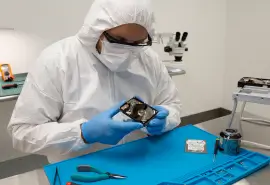
In those scenarios, Secure Data Recovery can help. Our engineers have provided Seagate data recovery since 2007. In that time, they have seen it all. Their experience and expertise with multiple Seagate devices and failure scenarios can reunite you with your data.
We offer flexible services, including emergency data recovery. As part of those services, we offer a free media diagnostic and quote. We also back it with a “No Data, No Recovery Fee” guarantee. You get your data back, or you pay nothing.
Call us at 800-388-1266 to speak with a specialist and start your case today.

