Digital information is equivalent to the most valuable asset, and the reliability and performance of storage devices become crucial. SanDisk, a leading innovator in memory storage, offers a wide range of products that cater to various storage needs, from personal computing to high-end data centers. However, even the most reliable storage solutions can encounter errors, which can be a source of frustration and concern for users. Understanding the intricacies of these errors is not just about quick fixes; it’s about comprehending the fundamental interactions between your data and the hardware it resides on. That makes resolving errors and preventing sudden data loss even more essential. Secure Data Recovery, the authority in RAID, SSD, and hard drive recovery, explains what common SanDisk errors mean and how to fix them.
How To Check Your SanDisk Drive Health
When it comes to maintaining the health and performance of SanDisk external drives and devices, it's essential to perform diagnostics regularly. Known for their exceptional storage solutions, particularly in SD cards, SanDisk drives demand routine checks to safeguard data integrity, optimize performance, and extend lifespan. These checks involve a combination of hardware and software diagnostics, focusing on critical aspects like partitions, sectors, file systems, and the drive's overall health. Implementing these methods ensures that your SanDisk external drive remains reliable and efficient in storing and accessing data.
We’ll walk you through the process of checking your drive health and diagnosing issues and error codes.
Adjust Settings in the SanDisk Dashboard & Test Your Drive
Utilize the SanDisk Dashboard fully by exploring additional features like performance monitoring, firmware updates, and secure erase functions. This comprehensive tool not only diagnoses but also optimizes the drive's performance.
- Connect your SanDisk drive to the computer via a USB port.
- Launch the SanDisk Dashboard by double-clicking on the SanDisk icon.
- For Windows, find the SanDisk Dashboard on your desktop.
- For MacOS, find it in the Applications folder.
- In the Dashboard, select your drive, navigate to the Manage tab, and initiate by selecting the Test button.
Note: Consider additional diagnostics or professional advice if the Dashboard diagnostic indicates a problem.
Use SanDisk SSD Dashboard Diagnostics
The SanDisk SSD Dashboard is a software application designed specifically for SanDisk Solid State Drives (SSDs). It provides users with tools to maintain, monitor, and optimize their SSDs. Among its various features, the Dashboard includes diagnostics capabilities, which are crucial for assessing the health and performance of the SSD.
For optimal results, close other applications before starting the diagnostic. Other software could interfere. Ensure the computer remains powered on.
For extended tests, modify power management settings to prevent automatic shut-offs. To do so, follow this path: Control Panel > Power Options > Change plan settings > Change advanced power settings. Switch the Turn off hard disk after setting to Never.
- Choose from various test options:
- Fix all
- S.M.A.R.T. check
- Short Drive Self-Test
- Short Generic
- Long Generic
- After the tests, results can be found in the Dashboard interface.
Check the Drives Health With Built-in tools on Windows or Mac
CHKDSK on Windows
The built-in Windows CHKDSK utility Check Disk, is a handy tool for SanDisk drive testing.
Note: CHKDSK is unforgiving application software. Back up important data before running it, as the tool can cause data loss. CHKDSK identifies bad sectors and flags them, which can make previously accessible data inaccessible. Proceed with caution.
To proceed:
- Press Windows key + R, type CMD, and open Command Prompt.
- To run CHKDSK: Enter
chkdsk X: /f, replacing X with your drive letter.
First Aid on Mac
First Aid on MacOS provides a robust tool for external drive diagnostics.
Note: Before running First Aid, backup your data. Running the Repair Disk option might render some data inaccessible if it encounters bad sectors.
First, confirm the drive’s visibility in Disk Utility. The following path opens Disk Utility: Go > Utilities > Disk Utility. A list of drives should be displayed. Click on the Seagate drive to view its details. If the partition is visible but not mounted, you can repair it using First Aid:
- Select the highlighted partition.
- Navigate to the First Aid tab.
- Click Verify Disk. If prompted, run Repair Disk.
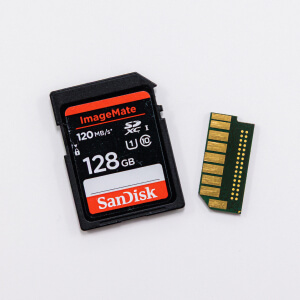
Maintaining SD Card Health
- Regular Backups. Utilize software for comprehensive backups, ensuring a copy of your data exists separately from your SD card. This practice is crucial in preserving your data against unexpected card failures or errors.
- Safe Removal. Always use the 'Safely Remove Hardware' option on your computer before unplugging the SD card. This precaution minimizes the risk of data corruption that can occur when an SD card is removed while data is being written or read.
- Periodic Formatting. Formatting your SD card regularly can significantly reduce data fragmentation, thereby maintaining optimal performance. Before formatting, ensure all data is backed up, as this process erases all existing data on the card.
- Avoid Overloading. Keep free space on your SD card; don't fill it to its maximum capacity. This approach helps reduce wear on the memory cells, extending the card's lifespan. A good rule of thumb is to leave at least 10-15% of the card's capacity unused.
By following these practices, you can significantly improve the health and longevity of your SanDisk SD card, ensuring it continues to store your valuable data effectively and reliably.
Common SanDisk External Drive Errors And Tips on How to Fix Them
Having explored the diagnostic processes for your SanDisk external drive, it's important to address common errors that users may encounter. Like all storage devices, SanDisk drives are susceptible to inevitable failures and issues that can hinder access to vital data, often at critical moments. Understanding these common errors, their causes, and the appropriate fixes is crucial to minimizing the risk of data loss and maximizing the longevity of your device.
In the following section, we delve into the most prevalent SanDisk errors, detailing their origins, offering solutions for resolution, and providing tips to prevent their recurrence. This knowledge is crucial for maintaining the health and reliability of your SanDisk external drive.
Fatal Hardware Error
The Fatal Hardware Error is a significant issue that occurs when your operating system can no longer access the SanDisk drive or perform read/write operations. This error can manifest in various ways, with messages like "X: is not accessible. The request failed due to a fatal device hardware error" or "Error 0x800701E3: The request failed due to a fatal device hardware error." Here, "X" represents the drive letter.
Causes of Fatal Hardware Errors:
- Faulty USB cable or a loose connection.
- Excessive bad sectors on the disk.
- System or hardware faults.
- The drive is nearing the end of its lifespan.
Fixes of Fatal Hardware Errors:
- Check drive connection. Ensure cable connections are secure. Try different USB ports or cables, and test the drive on another computer.
- Verify SMART status with SanDisk software or Windows utilities. Use Command Prompt to check the drive’s SMART attributes. Different statuses like OK, Bad, Unknown, and Caution can indicate the drive's condition.
- Check and repair bad sectors using the Windows DiskPart utility. Be cautious, as running CHKDSK can lead to data loss. Back up data beforehand.
- Run Error Checking and CHKDSK. Windows has built-in features and utilities, including Error Checking in Disk Management and CHKDSK, that can sometimes diagnose and repair logical issues. It cannot resolve physical issues.
- Initialize the SanDisk drive. Uninitialized drives can trigger this error. Initializing the device in Disk Management and selecting the appropriate partition style (usually MBR or GPT) can fix it.
- Format and update the drive. You can format your drive to reset the file system if all else fails. Formatting your drive on Windows and macOS will make stored data inaccessible. Outdated drivers can cause errors. Update them through the Device Manager. Create a backup before taking this step.
Additional Tips on Fatal Hardware Error:
- Stop using the drive immediately if you encounter this error.
- Schedule backups to prevent data loss.
Advice: Fatal Hardware Error is often a serious issue. If your data is irreplaceable, consider professional data recovery services or software.
Drive Is Not Accessible
When a SanDisk drive becomes inaccessible, it often shows as a RAW drive instead of NTFS (New Technology File System), indicating a corruption issue. This error prevents viewing files stored on the device and is usually accompanied by a "Drive is not accessible" message.
Causes of Drive Is Not Accessible Error Code:
- Physical damage like drops or impacts.
- Corrupted file system or partition table.
- Malware or virus infections.
- Other software or hardware issues.
Fixes of Drive Is Not Accessible Error Code:
- Restore data from RAW Drive. Instead of relying on the file system, you can use a recovery tool to scan the disk and retrieve the files you need. This step can be critical in avoiding data loss.
- Access the drive from a different computer. Try connecting the external drive device to a different computer or using a different operating system (like macOS or Linux) to check if the issue is with the computer or the drive itself.
- Update SanDisk firmware. Check for firmware updates on the official SanDisk website or the SanDisk Dashboard software. Follow the instructions carefully to avoid incorrect firmware installation, which could damage the drive.
Additional Tips of Drive Is Not Accessible Error Code:
- Ensure to back up data before attempting repairs or firmware updates.
Advice: If you see an additional message “Access is denied” with the “D: drive not accessible,” it means there are disk errors or data corruption issues. But sometimes, bad sectors can also cause this message to appear.
Error Code 8062 on Mac
Error code 8062 is a common issue on Mac computers that typically arises when renaming, moving files, emptying the trash, or using Time Machine. This error generally occurs during file transfer to a SanDisk external drive device and might be caused by permission issues or corrupted files.
Causes of Error Code 8062:
- Permission issues on the Mac or external drive.
- Corrupted files during transfer.
- Issues with Time Machine backups.
Fixes of Error Code 8062:
- Ensure complete download of cloud files. Wait for files to fully download from the cloud before transferring them.
- Modify drive permissions. Right-click the drive icon, select Get Info, and check the Sharing & Permissions section. Ensure you have Read & Write access and apply these permissions to all items on the drive.
- Identify and skip problematic files. If a specific file causes the error, skip it and resume the transfer with other files.
- Transfer files in smaller chunks. Break large files into smaller parts and transfer them individually.
- Use Disk Utility for Time Machine backups. Instead of copying Time Machine files directly, use the Restore feature in Disk Utility. These steps could erase existing data on the external drive.
- Alternative file transfer methods. Try different methods for transferring files, like using cloud services or different external drives.
Additional Tips of Error Code 8062:
- Ensure that files you’re renaming or moving are not locked.
- Move files out of Trash in smaller batches and delete them incrementally.
- Use Disk Utility to erase and reset your Time Machine backup disk.
- Use utilities like MacClean to remove system junk and caches that might cause this error.
- Back up important data before performing operations like erasing disks or cleaning the system.
Advice: Always check file permissions and locks before moving or renaming files. Regularly update your macOS and external device drivers to avoid compatibility issues.
Not Enough Space in Windows
Despite having ample disk space, the "Not enough space" error code in Windows can be perplexing. Several issues can cause the error code, including permission limitations, disk errors, and virtual memory files. Understanding these causes is key to resolving the error and ensuring efficient disk space utilization.
Causes of Not Enough Space in Windows:
- Lack of administrative privileges.
- Disk errors, including bad sectors.
- Programs installed on a partition with insufficient space.
- Existence of virtual memory files occupying space.
- Non-contiguous sectors lead to inefficient space usage.
Fixes of Not Enough Space in Windows:
- Clean the disk. Use Windows' built-in Disk Cleanup tool to remove unnecessary files, especially if the program is downloaded to a disk with limited space.
- Check and repair disk errors. Use the Windows CHKDKS command prompt to check for bad sectors and repair the disk. This can resolve the discrepancy between actual and perceived space availability.
- Delete virtual memory files. Manage virtual memory settings to delete or resize hidden system files that may consume disk space.
- Organize disk sectors. Use Windows Disk Defragmenter to optimize disk space and make sectors contiguous, which can help resolve space issues.
- Extend the partition. Consider extending the partition if the program is installed on a different disk with limited space. Windows built-in tools like Disk Management and DiskPart can help reallocate space from other partitions.
Additional Tips for Not Enough Space in Windows:
- Ensure you have the necessary administrative privileges to write to the disk.
- Regularly check your disk for errors and defragment it to maintain optimal performance.
- Be mindful of the partition where programs are installed and their space requirements.
Advice: Understanding and addressing the root causes of the "Not enough disk space" error is crucial for optimal disk management and avoiding such issues in the future. Regular maintenance, including cleaning up unnecessary files and managing virtual memory, can significantly help prevent this problem.
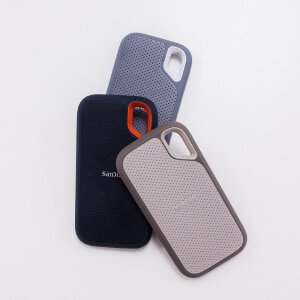
SanDisk Extreme Portable SSDs Errors
The 2 TB and 4 TB SanDisk Extreme and SanDisk Extreme Pro Portable SSDs from 2023 have encountered several issues. As a result, users have reported sudden data loss or unexpected disconnections with the portable SSD. SanDisk has released a fix, but users that have not updated their firmware are still at risk of data loss.
Causes of SanDisk Extreme Portable SSD Errors:
- Firmware bug that scrambles allocation metadata.
- Possible hardware issues.
Fixes of SanDisk Extreme Portable SSD Errors:
- Download SecureRecovery. If you believe it is likely a firmware issue, our cutting-edge data recovery software detects the scrambled metadata and file indexes. After locating that information, it pieces it together and restores the data. SecureRecovery will not retrieve data from an SSD with physical damage. Read more about SanDisk Extreme data recovery.
Additional Tips on SanDisk Extreme Portable SSD Errors:
- Stop using the affected drive. If possible, back up your files to another device or cloud service.
Advice: SecureRecovery provides a free preview of recoverable files. Consider a service if the desired files do not appear. Your device might have physical issues.
S.M.A.R.T Hard Disk Error
The S.M.A.R.T (Self-Monitoring, Analysis, and Reporting Technology) error is a critical drive warning indicating impending failure. This message signals that the SanDisk drive, whether HDD or SSD, may soon crash due to issues like worn-out internal components. S.M.A.R.T technology is vital in predicting drive failures and should not be disabled.
Causes of S.M.A.R.T Hard Disk Error:
- Deterioration or malfunction of the drive's internal components.
- Disabling SMART monitoring in BIOS can sometimes lead to unnoticed drive issues.
Fixes of S.M.A.R.T Hard Disk Error:
- Back-up and replace. If the computer boots up after pressing F1, immediately use a drive backup utility to transfer data to a secure hard disk.
- Reboot and recover. If the computer fails to boot, use bootable media and a data recovery tool to retrieve data.
- Disable S.M.A.R.T in BIOS. While this fix will stop the S.M.A.R.T. error message, it doesn't resolve the underlying issue with the drive. The drive will likely fail eventually, so backing up data and planning for a replacement is crucial. Steps to Disable S.M.A.R.T:
- Restart your computer. Initiate a reboot. As the system starts, enter the BIOS settings by pressing a key such as Del, F2, F10, F12, or Esc. The exact key varies by manufacturer and is usually indicated during the boot process.
- In the BIOS, look for options related to your drive, often found under tabs like Advanced, HDD Configuration, or Storage Options.
- In the S.M.A.R.T settings, select the relevant option, such as S.M.A.R.T Monitoring or S.M.A.R.T Status, and change it to Disabled or Off.
- Select Save and Exit to save your settings, and confirm when prompted.
- Reboot your computer: The computer will restart, applying the new settings.
- Use data backup software: Utilize tools for comprehensive data backup.
Additional Tips for S.M.A.R.T Hard Disk Error:
- Take SMART warnings seriously and act quickly to back up data.
- Consider replacing the drive as soon as possible after a SMART error.
- Regularly monitor drive health to identify potential issues preemptively.
Advice: Disabling S.M.A.R.T is not recommended, as it can increase the risk of data loss. This fix is for those who wish to continue using their drive without seeing the S.M.A.R.T error message, knowing the drive may fail soon.
Drive is Read-Only Error
The Drive is Read-Only error frequently occurs with SanDisk external drives and limits the ability to alter data on the device. This issue is essentially a permission-related error where users are limited to only reading or copying existing data and cannot add new information or modify existing files. The read-only restriction can apply to various levels, ranging from a single file or folder to an entire storage medium, including memory cards, USB flash drives, pen drives, hard disk drives, solid-state drives, and external HDDs.
Causes of Drive is Read-Only Error:
- The device is physically locked.
- No write permission on the disk.
- File system permission is set to read-only.
- The drive or a file(s) have read-only permission.
- Write-protection on the drive.
Fixes of Drive is Read-Only Error:
- Login as Administrator. Accessing the drive as an administrator can sometimes resolve permission issues.
- Clear disk Read-Only Error with DiskPart:
- Connect the drive to your computer.
- Open Command Prompt as Admin, enter diskpart, then list disk.
- Select the appropriate disk (e.g., select disk 1).
- Use attributes disk clear readonly to remove the read-only attribute.
- Change Read-Only permission:
- Right-click the drive in File Explorer and select Properties.
- Under the Security tab, tick Read and Write in the Allow column.
- Take ownership of folder/drive:
- Right-click the drive and go to Properties > Security > Advanced.
- Change the owner to your user account and apply changes.
- Remove write-protection:
- On Windows, you can right-click on the drive, select Properties, go to the Security tab, and adjust the permissions to allow write access.
- On macOS, you can use the Get Info option and modify the permissions under the Sharing & Permissions section. You can also utilize the sudo chflags nouchg command in the Terminal.
Additional Tips for Drive is Read-Only:
- Many SD cards and some USB drives have a physical switch used for write-protection. Ensure this switch is not in the locked position.
- To prevent data loss during such errors, regularly backup important files to a different or cloud storage medium.
- Physical damage can cause read-only issues. Store your devices in a safe, dry place to avoid physical damage.
- Keep the drivers for your storage devices up to date. Outdated drivers can sometimes cause compatibility issues, leading to read-only errors.
- When using disk management or data recovery software, opt for reliable and well-reviewed tools to avoid further complications.
Advice: While using DiskPart can be effective, it requires caution. Incorrect commands can lead to data loss. If unsure, seek professional assistance.
I/O Device Error
An I/O (Input/Output) Device Error on SanDisk storage devices occurs when your operating system cannot perform read or write operations on the device. This error can manifest across various hardware devices and media types.
Causes of I/O Device Error:
- Improper connection of the storage device.
- Damaged or malfunctioning USB ports or card readers.
- Outdated, damaged, or incompatible storage device drivers.
- Incorrectly assigned drive letters.
- Physical damage or dirt on the storage device.
- The OS and the device use incompatible data transfer modes.
Fixes of I/O Device Error:
- Ensure proper Connection. If necessary, reconnect the storage device using a different USB port, cable, or card reader.
- Update device driver. Download, install, or update the storage device driver to ensure compatibility and proper functionality.
- Change the drive letter. Use a tool like MiniTool Partition Wizard to assign the correct drive letter and ensure the computer reads the correct drive.
- Repair disk errors. Open Command Prompt to perform a disk check. Type chkdsk /f x: (replace x with the drive letter) to check and fix errors.
- Change Transfer Mode. In Device Manager, adjust the IDE ATA/ATAPI controller settings to use a compatible transfer mode, like PIO Only.
- Perform a Clean Boot. Start your computer with only essential services to check if background programs are causing the error.
- Format the drive. As a last resort, format the drive using a reliable tool. This will erase all data on the drive.
Additional Tips for I/O Device Error:
- Avoid using USB hubs for connection, as they might not provide sufficient power.
- Regularly back up important data to mitigate risks associated with such errors.
- Keep your computer and its drivers updated to prevent compatibility issues.
- Professional repair or replacement might be necessary if the drive is physically damaged.
Advice: I/O Device Errors on SanDisk storage devices can be resolved with careful troubleshooting. Prioritize data recovery before attempting any fixes. If the problem persists, it may indicate a serious hardware issue requiring professional assistance.
SanDisk SD Card Errors
SanDisk SD card errors can range from minor glitches to major issues that render the card unusable. Common problems include the card being locked or write-protected, not recognized by devices or computers, prompting format errors, or suffering from physical damage and corruption.
Common Signs of SD Card Corruption and Damage
SD card corruption and damage manifests in various ways, often indicating a need for immediate attention.
Key symptoms:
- SD Card not recognized: The card is not detected by devices.
- Read/Write issues: Hinders file access or modification.
- Connection problems: Prevents consistent access to the card.
- Windows format error: Indicates unrecognized or corrupted file system.
- Missing or unknown files: Files become inaccessible or don't appear correctly.
- Incorrect capacity display: Shows wrong storage capacity.
- Slow performance: Unusually low data transfer speeds.
- Device malfunctions: Causes errors or crashes in the device it uses, indicating corruption or damage.
Common Problems and Solutions
- Memory Card Locked or Write Protected
- Issue: SD card is locked, preventing deletion or addition of files.
- Fix: Unlock the physical switch on the SD card or follow online guides to unlock or remove write protection.
- Memory Card Not Recognized
- Issue: The SD card is not detected by PCs or cameras.
- Fix: Try different card readers, USB ports, or computers. Clean the card's contacts and check for physical damage.
- SD Card Says Won’t Format
- Issue: Inability to format the SD card with errors or operation failures.
- Fix: Connect the SD card to a different device or PC to check for device-specific issues.
- Files Hidden or Became Shortcuts
- Issue: Files are missing or appear as shortcuts due to virus infection.
- Fix: Use antivirus software to scan and remove threats, and try data recovery software to retrieve hidden files.
- Forgot SD Card Password
- Issue: Locked out of the SD card due to a forgotten password.
- Fix: Follow online resources to recover or reset the memory card password.
- Deleted Photos or Formatted Card by Accident
- Issue: Loss of data due to accidental deletion or formatting.
- Fix: Use data recovery software to retrieve lost files from the SD card.
- SD Card Says Not Enough Space
- Issue: The SD card shows incorrect available space.
- Fix: Use the SD Formatter Tool or other software to restore the card's full capacity.
- Unable to Format SD Card
- Issue: Errors when attempting to format the SD card on devices or computers.
- Fix: Use third-party formatting tools or check device-specific formatting guides.
- Unsupported SanDisk SD Card Error
- Issue: The device doesn't support the SD card, possibly due to file system errors, bad sectors, or virus infection.
- Fix: Check for bad sectors, use CHKDSK, reboot the device, reinsert the SD card, try it on another device, or format the card.
Tips to Avoid Memory Card Error and Damage
- Eject SD cards properly and power off devices before removal.
- Limit SD card usage to one device.
- Use high-quality card readers.
- Avoid sudden shutdowns during card use.
- Keep infected data off the card.
- Avoid using devices with a low battery with SD cards.
Navigating through the labyrinth of SanDisk error codes can be daunting, but understanding the nuances of these issues is crucial for maintaining the longevity and functionality of your SanDisk storage devices. From the common frustrations of locked SD cards to the more alarming drive I/O device errors, each problem presents its unique set of challenges and solutions.
Contact Secure Data Recovery if You Need Help Recovering Your Files
While SanDisk storage devices are renowned for their reliability and performance, they are not immune to errors. Being equipped with the knowledge to tackle these issues head-on ensures that your data remains safe and your experience with SanDisk products remains positive. Whether you're a professional photographer safeguarding priceless images or an individual keeping personal memories, understanding SanDisk error codes is an essential aspect of digital literacy in our increasingly data-driven world.
When the worst happens, Secure Data Recovery has the expertise to retrieve lost data, regardless of storage device, manufacturer, operating system, or file type. As experts in data recovery for SanDisk drives, our engineers have encountered every data loss scenario and resolved over 100,000 cases since 2007.
Call our award-winning team of experts at 800-388-1266 for a free quote and stop sudden data loss from becoming permanent.

Yevgeniy Reznik

Yevgeniy Reznik is Laboratory Operations Manager at Secure Data Recovery Services in Cleveland, Ohio, and has more than a decade of experience as a data recovery engineer. He graduated from Cleveland State University with a degree in computer science and spent 15 years as an IT entrepreneur and small business owner before joining the company.