An SSD not showing up in Windows comes down to a loose connection, a misconfigured setting, an uninitialized drive, faulty drivers, or hardware failure. Most of these issues can be fixed in a matter of minutes.
The following steps are ordered from the most common causes and effective solutions to the more serious cases. This approach allows you to quickly diagnose and troubleshoot the solid-state drive (SSD) without wasting time.
What best describes your issue?
Why Is My SSD Not Showing Up?
There are three main scenarios for people who experience issues with SSD detection. Each issue is caused by a different problem. As a result, they often require separate fixes to resolve the situation.
Find your scenario below to learn the most likely solutions.
It is rare for a brand-new SSD to fail because of a hardware defect. In most cases, Windows can see the drive, but does not know how to handle it.
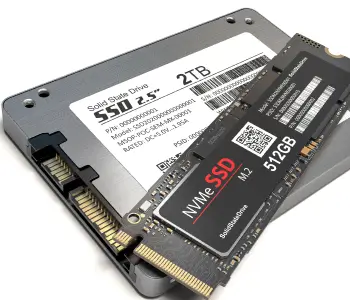
Internal SSDs are not initialized when they ship to customers or stores. They also need a drive letter to provide access to the storage device in File Explorer.
An external SSD is designed for plug-and-play usage. Loose connections and compatibility issues are the most common reasons why Windows does not show external drives in File Explorer.
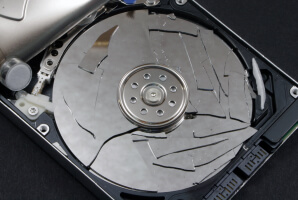
If Windows still does not detect the drive, then it could have severe physical damage or logical errors.
Editor’s Note: Windows may prompt you to format an external SSD with an APFS partition. APFS is the default file system for Macs. Formatting the drive for NTFS (the native file system for Windows) will permanently delete data on the external SSD.
An SSD that was working recently but suddenly vanished is the most urgent scenario.
You can request help for a free consultation from an expert if you need to recover data from the SSD.
Fixing an SSD Not Detected by Windows
This step-by-step guide outlines a straightforward troubleshooting process for an SSD not showing up in Windows.
It targets the most likely hardware, software, and firmware causes for an undetected SSD.
If your SSD keeps disappearing and it contains important files, consider data recovery services before attempting any fixes. An intermittent connection is a warning sign of firmware corruption, flash memory degradation, or controller failure. Trying to fix a failing drive risks further damage, which can limit your data recovery options in the future. We offer free diagnostics and upfront quotes, with no commitment until you decide to proceed.
Otherwise, start with Method 1 below.
Applies To: New SSDs, External SSDs, and Disappearing SSDs
Checking connections is one of the simplest and most telling steps for an SSD that is not showing up.
To check connections for a new M.2 SSD or a SATA drive:
- Shut down the computer and press and hold the Power button for 15 to 20 seconds to drain it of residual energy.
- Confirm that the stick is pressed flat and screwed down to the M.2 slot on the motherboard.
- Reinsert the M.2 SSD at a 30-degree angle, then flatten it and fasten the retention screw if it does not feel fully seated.
- Ensure an aftermarket heatsink does not prevent the internal SSD from lying flat.
- Connect a SATA SSD’s data cable to the motherboard and its power cable to the PSU.
To check connections for external SSDs:
- Disconnect and reconnect the cable from the external drive to the computer.
- Inspect cables for fraying and USB ports for dust or debris.
- Try a rear-panel port on a desktop for higher power delivery.
- Use a cable approved by the drive manufacturer instead of a generic one.
- Remove the external SSD from a hub to eliminate a hardware conflict.
- Test the device on another Windows system to rule out your PC as a problem.
To check connections for a disappearing SSD:
- Shut down the PC and press and hold the Power button for 15 to 20 seconds to discharge static electricity.
- Check whether the retention screw on an M.2 SSD loosened over time due to high temperatures, causing inconsistent connections.
- Examine how a SATA SSD sits in its bracket, as flexing from subtle vibrations could cause the device to vanish.
Applies To: New SSDs and External SSDs
Determine if the hardware appears in Disk Management. If so, the SSD needs to be prepared so Windows can mount and manage it. Initialization is a one-time process that creates a partition table to organize data stored in the drive’s memory cells.
Editor’s Note: Many external drives are preformatted with the exFAT file system for cross-platform use out of the box. Avoid formatting an external SSD that worked previously. Doing so could result in permanent data loss. If the drive was removed without being properly ejected, it could be corrupted instead of missing. Our external drive recovery services include a free evaluation for each device.
To initialize a new SSD or external SSD on Windows:
- Press the Windows key + X together to open the quick menu.
- Select Disk Management.
- Locate the SSD model in the panel and check if it is labeled as Not Initialized or Unallocated.
- Right-click the SSD and select Initialize Disk.
- Choose GPT (GUID Partition Table) for machines running Windows 11 or 10.
Editor’s Note: You could choose MBR (Master Boot Record) if you intend to use the drive on a legacy system as well.
Once complete, the SSD should come online and appear in File Explorer.
A note on SSDs that keep disappearing:
As mentioned, a storage device only needs to be initialized once. Do not initialize an SSD that was working if it shows as “RAW”, “Unallocated”, or “Not Initialized” in Disk Management. Even if Windows prompts you to format the drive. This status points to a corrupted file system rather than a setup issue. Overwriting the volume will result in the loss of files on the SSD.
Applies To: New SSDs, External SSDs, and Disappearing SSDs
An SSD that is visible in Disk Management but not File Explorer typically needs a new drive letter. A drive letter provides Windows with a unique identifier for the SSD. This assignment is essential for new SSDs and external drives.
Editor’s Note: Sometimes, a Windows Update or an abrupt shutdown can cause SSDs to lose their drive letter and disappear. Reassigning the drive letter often restores access to the device.
To assign or change a drive letter in Windows:
- Press the Windows key + X to open the tasks menu.
- Choose Disk Management from the list.
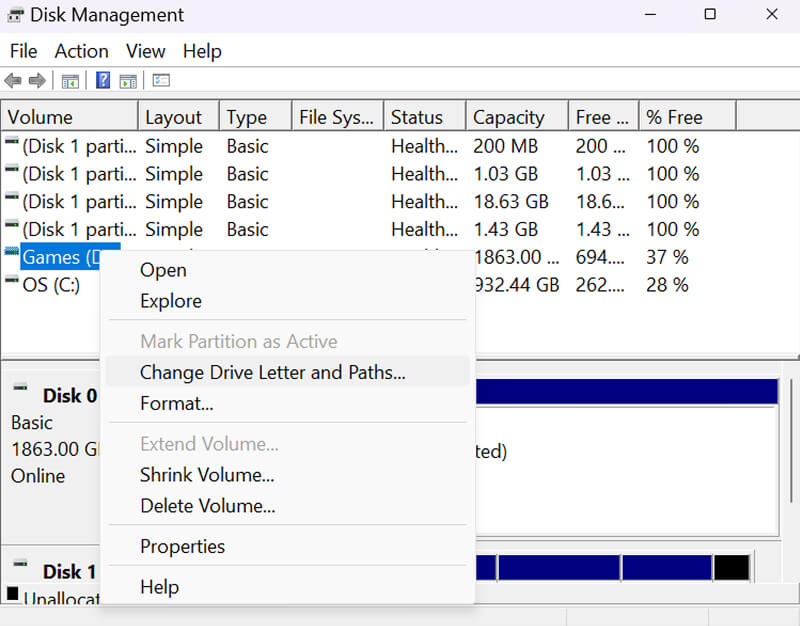
- Right-click the SSD and select Change Drive Letter and Paths.
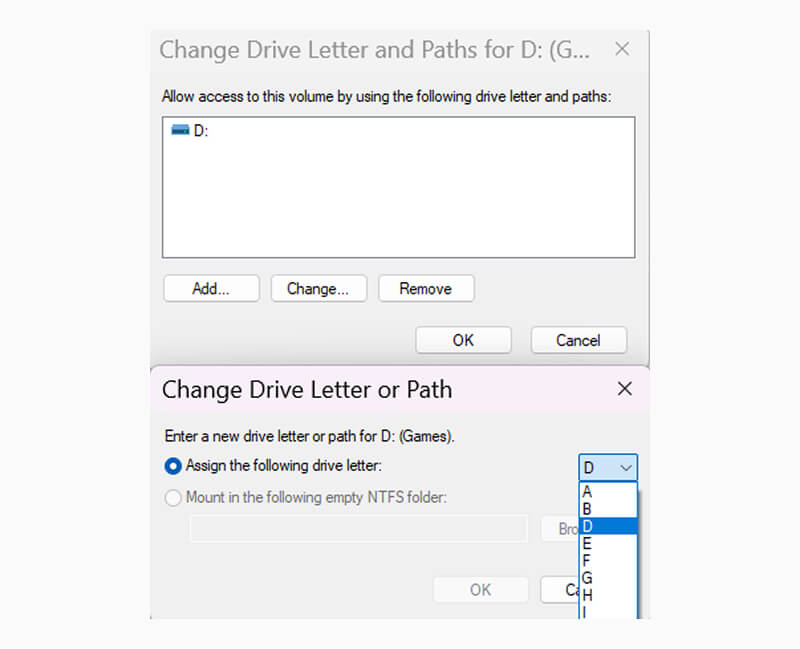
- Click Add for new SSDs or Change for an existing drive.
- Select the desired drive letter from the dropdown menu.
- Click OK.
If the option to assign a drive letter is grayed out, then Windows might not recognize the file system.
On occasion, the letter may display in Disk Management, but the SSD still does not appear in File Manager. A driver or file system error is more likely in that case.
Applies To: External SSDs and Disappearing SSDs
Drivers are software components that enable Windows to communicate with the storage device.
Outdated or corrupted drivers can cause the SSD to not appear because Windows cannot exchange instructions or data with it.
Updating or reinstalling drivers is especially relevant if the SSD was working recently. A brand-new SSD is unlikely to have driver issues.
To update drivers for an SSD:
- Press the Windows key + X simultaneously.
- Select Device Manager.
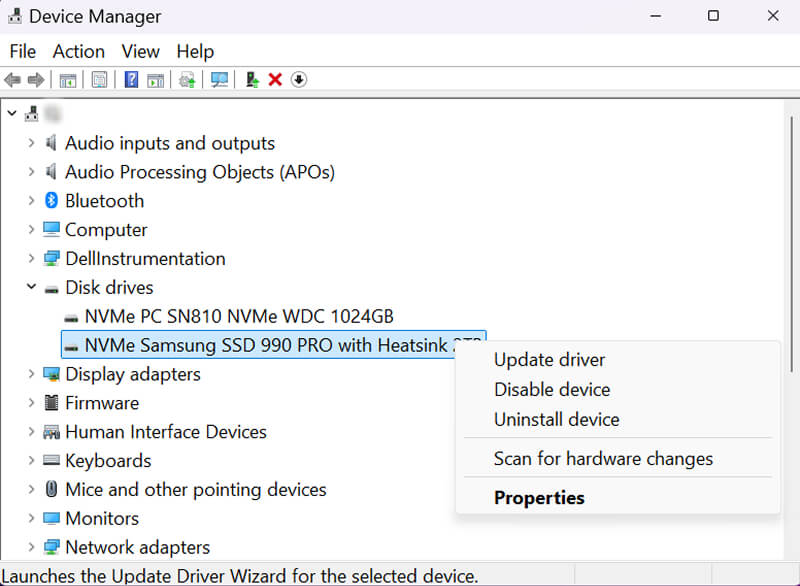
- Expand the Disk drives section and locate the SSD.
- Right-click the drive, then select Update driver.
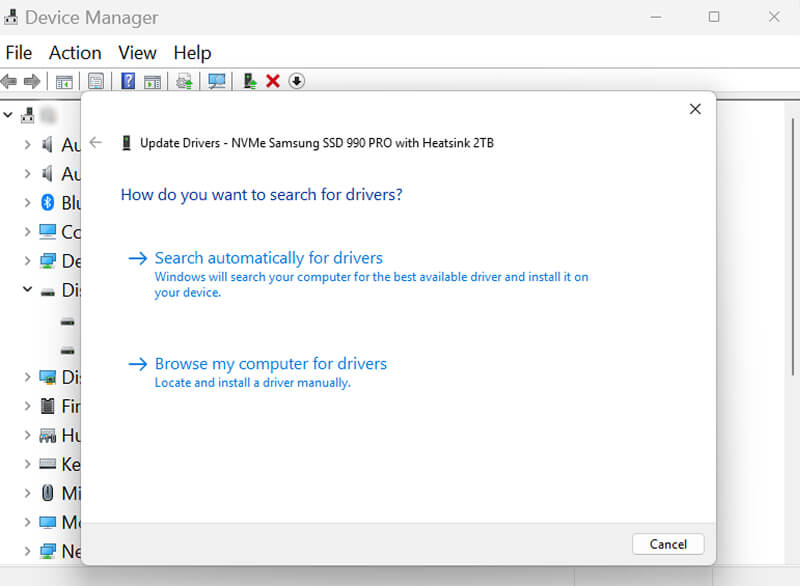
- Choose Search automatically for drivers.
- Wait for Windows to finish.
If Windows reports that the installed driver is up to date, remove and reinstall it on the system.
To reinstall drivers for an SSD:
- Press the Windows key + X at the same time.
- Choose Device Manager.
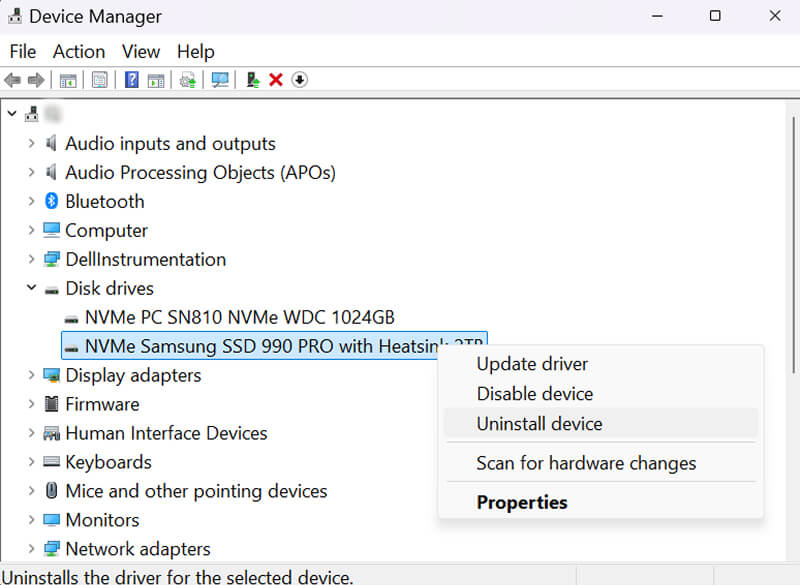
- Expand Disk drives to find the affected SSD.
- Right-click the drive and choose Uninstall device from the menu.
- Check the dialog box if prompted and click Uninstall.
If the SSD is still not visible in Device Manager, Windows does not detect it at the software level. Mismatched BIOS settings are a possible cause if you have already verified the SSD’s connections.
Editor’s Note: High-end M.2 NVMe SSDs for gaming PCs and workstations may have drivers available to download on the manufacturer’s website. These specialized drivers might perform better than the standard Windows controller.
Applies To: Disappearing SSDs
Checking the BIOS mostly relates to an SSD that keeps disappearing in Windows.
The BIOS (Basic Input/Output System) is the primary firmware level for a computer’s motherboard. An SSD that does not show up in theBIOS cannot be recognized by Windows. Therefore, the problem resides beneath the operating system.
Each motherboard manufacturer has a different BIOS interface. The steps below describe the general process, but you will need to consult your manual for specific names and layouts.
To review BIOS/UEFI settings:
- Restart the PC and press the BIOS entry key during startup, such as Del, F2, F10, or F12.
- Navigate to the storage settings menu.
- Confirm the SSD appears in the storage device list.
- Check whether the storage controller is enabled and set to AHCI.
- Ensure M.2 slots are enabled, as some motherboards disable these connections to share bandwidth with SATA drives.
- Disable any RAID settings.
If the BIOS does not detect the SSD, then faulty firmware or the hardware itself are the problem.
Applies To: New SSDs, External SSDs, and Disappearing SSDs
Testing the SSD on another computer is a definitive step that isolates the issue to the storage device or machine.
If the drive appears on a second system, the first PC’s hardware is not configured or functioning properly. If the SSD still isn't showing up on another computer, the device is likely damaged or defective.
For internal SSDs:
- Shut down both PCs and drain them of residual energy by pressing and holding the Power button for 15 to 20 seconds.
- Remove the SSD from the initial computer.
- Install the drive in the other system, ensuring the device is seated correctly.
- Boot into Windows and check Disk Management and Device Manager for the SSD.
For external SSDs:
- Connect the external drive to another computer with working cables.
- Test the SSD on a Mac if possible, as macOS natively supports both APFS and NTFS.
Drives that are visible on a different system suggest a configuration issue on the original PC. A range of hardware, firmware, or software flaws could trigger the detection error.
If the other PC does not recognize the SSD, then drive failure is almost certain. Data recovery is often an option for devices storing critical projects or priceless memories.
A drive that appears briefly on another computer before vanishing points to a failing controller or severe NAND flash degradation. This pattern should be handled like an undetected SSD.
Applies To: New SSDs and External SSDs
Editor’s Note: Running hardware diagnostics on a failing drive can worsen physical damage and logical issues. CHKDSK could increase the risk of losing files forever. Contact us for SSD recovery services with free diagnostics and no-obligation quotes if you have important data at stake.
CHKDSK is a built-in repair tool in Windows. It scans the file system for errors and attempts to resolve them. In the process, CHKDSK tries to move data to a different location, but errors are highly probable on bad drives.
You should treat CHKDSK as a last resort. The tool can lead to permanent data loss by leaving file fragments behind in closed cells. CHKDSK will always prioritize file repair over data recovery. As such, exercise caution when using CHKDSK as a potential solution.
To run CHKDSK:
- Type Command Prompt in the search box on the Windows taskbar.
- Right-click the matching result and select Run as administrator.
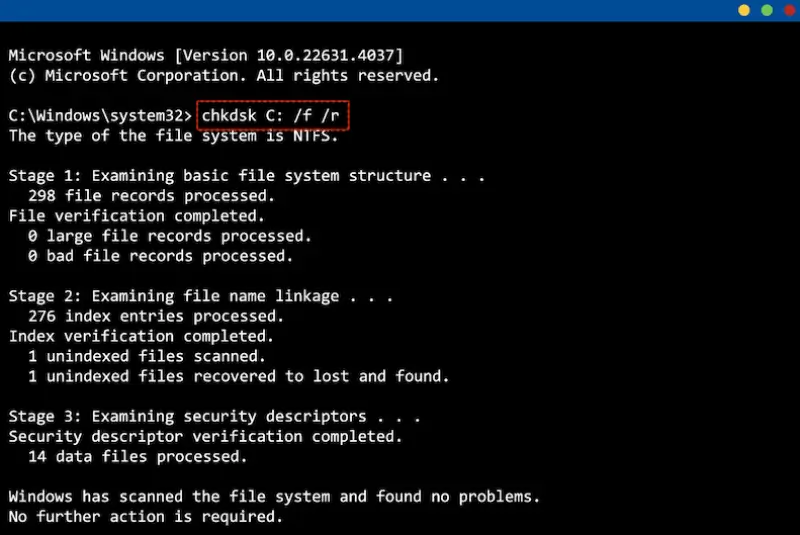
- Type chkdsk X: /f /r in the interface, replacing X: with the affected SSD’s drive letter, which is C: above.
- Press Enter.
Wait for the scan to complete and review the results.
If CHKDSK reports errors that cannot be fixed, the scope of the damage is beyond its capabilities.
An SSD not showing up in the BIOS indicates the problem lies below Windows. No software solutions will resolve the issue unless the drive is recognized by the PC’s firmware.
We outlined several hardware and firmware reasons why a BIOS might not detect an SSD above.
The following cases cover more niche causes for SSDs not being recognized by the BIOS.
SSD Disappeared After Windows Update
An SSD could disappear after a Windows update while being used as secondary storage for games or a media library. For example, a botched update may reset BIOS values to the drive’s factory defaults, as explained earlier.
Updates can also affect much less common drivers, such as system devices and storage controllers. Addressing chipset drivers and NVMe controllers in Device Manager (similar to Method 4) might restore detection.
Update BIOS Firmware
If the SSD is correctly seated and up-to-date controllers are enabled, then flashing the BIOS could be worth a try.
Editor’s Note: BIOS updates have a real risk of failure. A sudden power outage could brick the motherboard. You also need to ensure the update file matches your board model and revision exactly. Seek assistance if you are not comfortable with these steps.
To update BIOS firmware:
- Download the specific update file from the board manufacturer’s official support page.
- Save the file to a USB drive formatted as FAT32.
- Enter the BIOS.
- Find the firmware update tool, such as EZ Flash (ASUS), M-Flash (MSI), Q-Flash (Gigabyte), or Instant Flash (ASRock).
- Select the update file on the USB drive, then follow the on-screen instructions.
- Avoid cutting power to the system during the update.
When the PC boots, restart it and enter the BIOS again to check the storage device list for the SSD.
Data Recovery for SSD Not Showing Up
If you have tried everything and your SSD is still not showing up, then hardware failure is extremely likely. Contact the manufacturer for a replacement if the drive is still under warranty.
Those who have essential files stored on the SSD without a valid backup can consider a professional data recovery service.
The SSD data recovery experts at Secure Data Recovery have decades of experience with all failure types and form factors. Our process features free diagnostics, fixed quotes, and a No Data, No Recovery Fee guarantee.
Call 800-388-1266, find a location, or fill out our form now to get a free quote and discuss service options.
Frequently Asked Questions
Why is my SSD not showing up in Disk Management?
An SSD not showing up in Disk Management means that Windows cannot detect it at the system level.
Why is my SSD showing up in Disk Management but not in File Explorer?
Corruption is a possible cause on a drive that used to function. Although, we do not recommend running file repair tools on a drive with irreplaceable data.
How do I fix an external SSD not showing up?
Does formatting an SSD erase the data it stores?
Yes. Even a quick format could permanently delete files on an SSD due to the TRIM command. TRIM can wipe data from NAND flash memory in a matter of seconds by zeroing out blocks across the drive. Do not format an SSD if it contains files you will need to recover.
How can I diagnose a dead SSD?
You can frequently determine SSD failure by ruling out the most common issues. For example, an SSD that does not show up across multiple systems is probably failing. A drive that was working but suddenly disappeared may have physical damage or low-level corruption.
Regardless, a trained technician is the best option for diagnosing an SSD due to their specialized equipment and expertise.

Timothy Burlee

Timothy Burlee is a content writer for Secure Data Recovery Services. He specializes in various topics in the data industry, including data recovery technology, storage devices, and digital forensics. Throughout his career, he has covered complex concepts and provided accessible solutions for users. Before joining Secure Data, he worked as a freelance technical writer.