Even if you tend to follow best practices when you use your Windows computer, you never truly know when you may be faced with a disaster that causes you to lose your data. To protect yourself from this scenario, safeguarding your files is more important than ever.
Fortunately, Windows 10 offers robust tools that can help you seamlessly backup and restore your data. Providing you with a safety net for unforeseen digital crises. In this article, we'll explore the ins and outs of securing your Windows 10 system. Offering a detailed step-by-step guide for the backup and restoration processes, along with some commonly encountered issues.
Steps to Backup Windows 10
Before you can back up your computer, you'll need to choose the method you want to use.
Windows offers the following four backup methods to choose from:
- System Image – A full backup of your computer, containing a copy of everything on it, including its installation, apps, settings, and files. This tool is well-suited for restoring your entire system from a catastrophic software or hardware failure. As well as if you're trying to revert to a previous version of Windows 10.
- File History – This is a Windows 10 and Windows 11 feature that lets you choose files or folders to back up, subsequently creating regular snapshots of them. As a result, you can easily restore past versions.
- System Restore – This feature helps you back up your system settings and programs by automatically or manually creating restore points. It also enables you revert to an earlier working version in case of a software failure.
- Recovery Drive – With this feature, you can create a recovery USB drive that saves your system files and recovers them if your computer refuses to boot up.
Next, let's dive into the steps to get started with your Windows 10 backup for each method.
System Image
If your chosen backup method is a system image, you'll need a storage device to store your Windows 10 backup image. This can be a USB drive, a hard disk, or a network drive.
Type Backup settings in the Windows search bar and click to open it.
Click on Go to Backup and Restore (Windows 7).

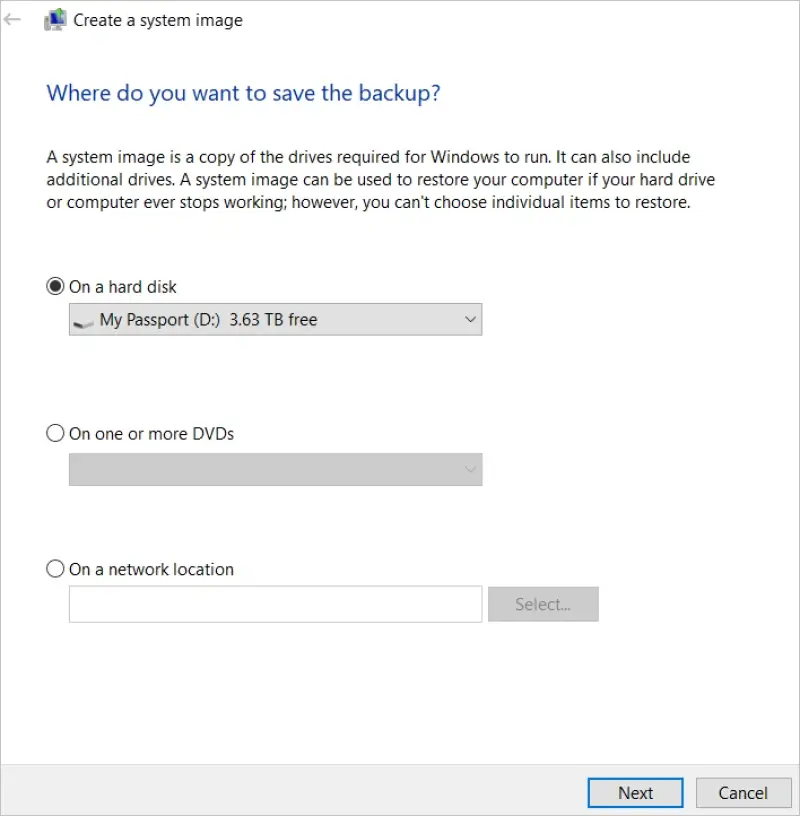
On the left panel, click on Create a system image.
Select the storage device where you'd like to save your backup and click Next. Make sure your device has enough space and that it isn't your Windows boot drive.
Choose which drives you want to include in the backup and click Next.
Confirm the settings you've selected, and then click Start backup.
File History
Here are the steps to backup individual files and folders with File History.
Type Backup settings into the Windows search bar and click to open it.
Under Back up using File History, click on Add a drive.

Select your chosen storage device for your backup data.
Configure your backup settings by clicking on More options.

In the Backup options window, choose how often you'd like to backup your data and how long you'd like to keep it.
Scroll down to the Backup these folders section to select the files and folders to backup regularly. Remember, if there are files you want backed up that aren't listed, you can add them manually.
Setup Regular Backups Using System Restore
To set up System Restore to regularly create backups of your files, follow the steps below.
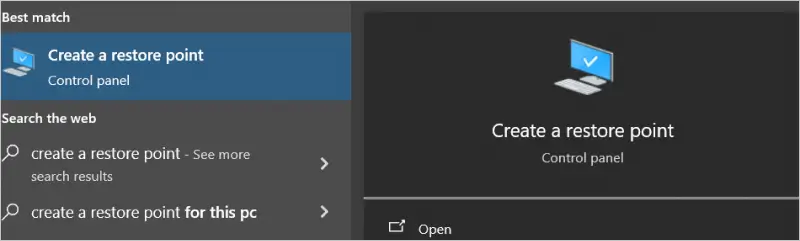
Type Create a restore point in the Windows search bar and select the result that pops up.
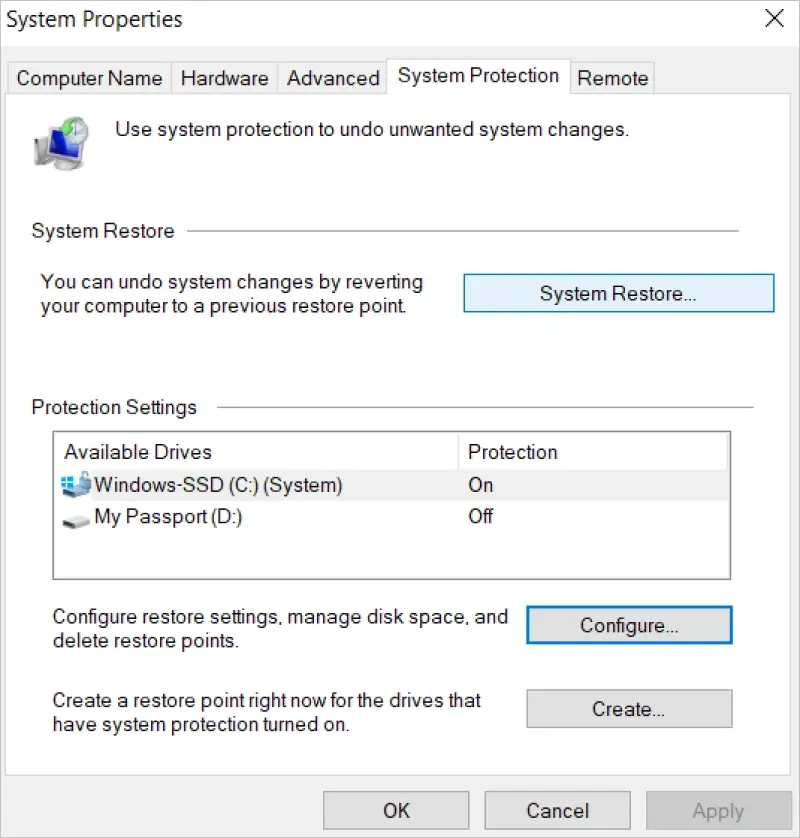
The System Properties window will open with the System Protection tab selected. Select the drive you want to configure in the Protection Settings box and click Configure.
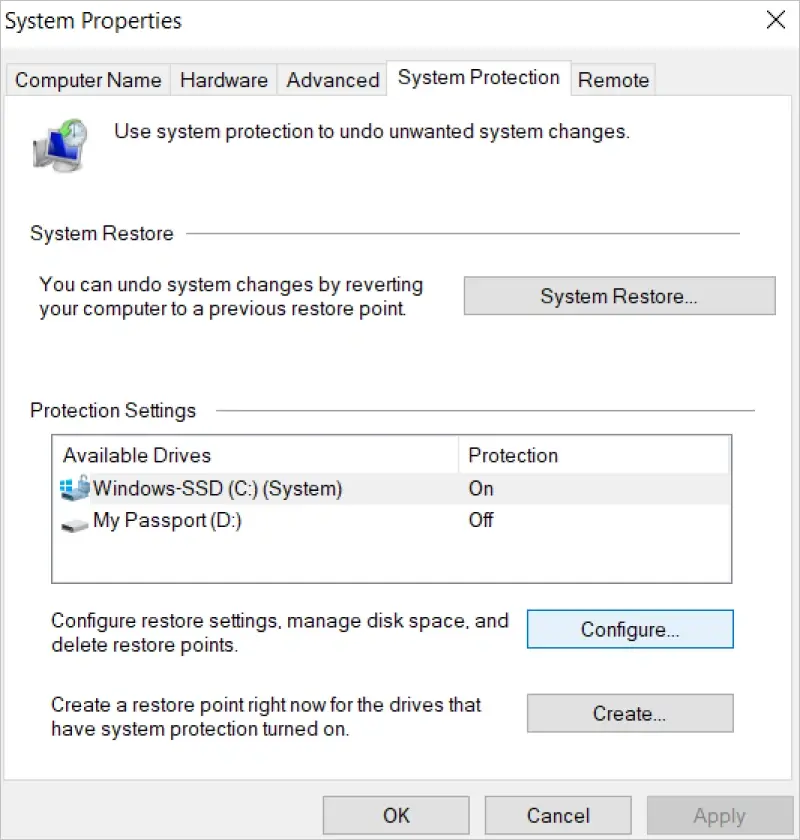
Toggle System protection under Restore settings, and then select how much space you'd like to allocate for backup data.

Click on Apply and then OK. Your system will now automatically create restore points at regular intervals.
Recovery Drive
To create a Windows 10 recovery USB, you'll need a drive at least 16GB or larger.
Connect your USB drive to your PC.
Type Create a recovery drive into the Windows search bar and tap on the result.
In the Recovery Drive window, check the option to Backup system files to the recovery drive, and click Next.

Select your USB drive and click Next.
Confirm the warning that your recovery drive will be cleared in order to proceed, and click Create.
Click the Finish button to complete the install wizard.
Steps to Restore Your Data on Windows 10
Backing up is one thing, but you should also know how to use these backups if the time comes. We'll go over each backup method in detail.
System Image
To restore your computer from a system image, you'll need a bootable USB drive or DVD to start the process.
- Restart with your bootable USB drive or DVD. Click Next if you're satisfied with the language, time, and keyboard input settings.
- In the next window, select Repair your computer in the bottom left corner.
- Select the Troubleshoot option in the Choose an option screen.
- Click on System Image Recovery.
- Navigate to and select your system image, and click Next.
- Select whether you want to format and repartition disks, and click Next.
- Click Finish, then confirm that you want to replace the current files with the system image by clicking Yes.
File History
Having backed up your files with File History, you can now recover them whenever needed by following the steps below.
Type Backup settings in the Windows search bar and select the first result.
Click on More options under Back up using File History.
Scroll to Related settings and select Restore files from a current backup.
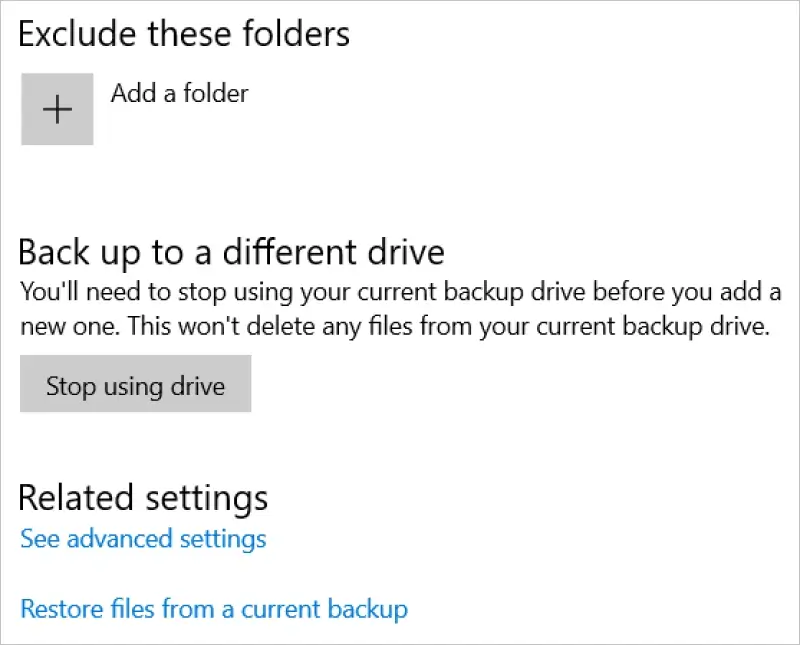
Select the files you want to recover from the displayed list. Then click on the green button to finalize the restoration process.
System Restore
Once you've created one or more restore points, you can always revert to your system's settings from those times.
Type Create a restore point into your Windows search bar and select the first option.
Click on the System Restore button in the System Protection tab.
Click Next, and select the restore point you want to revert to.
Click on Scan for affected programs to see which applications and drivers will be rolled back. If you're okay with this, press Next.
Confirm your selected restore point and click Finish to finalize the process.
Recovery Drive
To restore your Windows 10 from the recovery USB drive you created earlier, connect the drive to your computer.
- Boot your computer from the USB recovery drive you created.
- Select the “Troubleshoot” option.
- Select “Recover from a drive.”
- Select either “Just remove my files,” or “Clean the drive fully.”
- Finally, click on “Recover” to start restoring Windows from your USB drive.
- Follow the instructions on-screen to set up your computer and complete the restoration.
Troubleshooting Common Backup and Restore Issues
Backups and restorations don't always go through entirely smoothly, so issues may occasionally come up. However, many of these are easily fixed. In this section, we'll go over some of the ones you're most likely to encounter.
Storage Space
Running out of space on your HDD or SSD may prevent you from backing up. Backups can be quite large depending on the volume of data you're working with. Make sure that your storage device has ample capacity for both backing up and restoring your files.
Backup and Restore Configuration
Setting up your backup configuration the right way is crucial. For instance, if you've set up scheduled backups, make sure that the times you set align with your preferences and that your computer stays on throughout the designated times.
Similarly, when you restore your backed-up files, make sure the parameters align with the settings from the original backup. This can help to prevent corruption or data loss.
Slow or Failed Backup/Restore
If you're using an external hard drive to backup or restore from, try to use USB 3.0 or higher for data transfer, making sure your cables are secure.
Additionally, it's a good idea to free up some system resources by closing unnecessary applications. Hard drives are typically much slower than SSDs, so you don't want to overload your HDD with resource-heavy tasks.
Compatibility Issues
To avoid compatibility issues, always make sure the file types between the backups and the restoration are aligned.
Sometimes, third-party security software may be causing conflicts preventing the backup or restoration. If you face this issue, try closing these applications and trying again.
Finally, keep your Windows 10 system up to date to ensure your backup software is current.
Corrupted Files
If you encounter error messages that your backup is corrupted, follow any troubleshooting prompts on-screen to resolve them. If this doesn't work, you may need to consider re-backing up corrupted files or contact a data recovery specialist. We're here to help you with that.
Secure Data Recovery specializes in recovering lost or corrupted data. We trust that our experts will most likely be able to recover your files for you. We also have a strict "no recovery, no fee" policy. Working with us is a risk-free way to get your files back.
Give us a call today at 800-388-1266 to get a free consultation!

Monica J. White

Monica is a tech journalist with a lifelong interest in technology. She first started writing over ten years ago and has made a career out of it, with a particular focus on PCs, mobile devices, SaaS, and cybersecurity. She enjoys the challenge of explaining complex topics to a broader audience, whether it's how semiconductors work or how to back up your data. Her work has previously appeared in Digital Trends, Tom's Hardware, Pay.com , SlashGear, Forbes, Springboard, Looper, Money, WePC, and more.