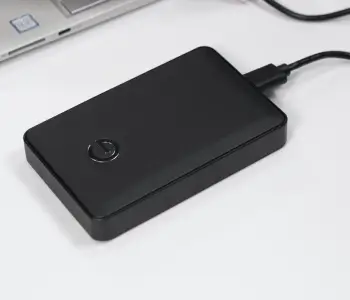
External hard drives are often a convenient, secure method of storing data or transferring files between devices. However, external drives do not always work perfectly. Sometimes, your computer will not detect a connected external device, which can prevent access to critical data.
The experts at Secure Data Recovery explain what happens with an external hard drive not showing up on Windows. They also offer easy tips on how to fix an external hard drive not showing up to regain important data.
Why Is My External Hard Drive Not Showing Up?
Here are the most common reasons an external drive will not show up on PCs:
- Connection Issue: Loose cables, defective ports, or insufficient power could cause detection problems.
- Missing Drive Letter: The device will not appear in File Explorer without an assigned drive letter.
- Software Conflict: Outdated drivers, system bugs, and anti-virus programs might prevent the external hard drive from showing up.
- File System Error: A corrupted file system or unsupported format can lead to Windows being unable to recognize the drive.
- Partition Problem: The computer may detect an unallocated drive, but cannot interact with it.
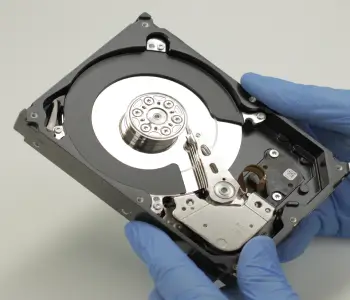
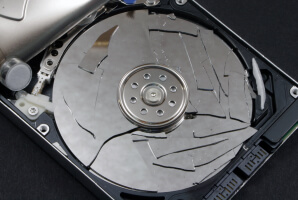
- Hardware Failure: Mechanical wear, physical damage, or logical errors could impede a connection between the external hard drive and PC.
- Security Settings: Full-disk encryption features like BitLocker will restrict access to the external device without credentials.
Each of these problems requires a slightly different approach to fix the issue.
7 Solutions When External Hard Drive Does Not Show Up
A step-by-step process can help resolve an external hard drive that does not show up.
1. Test External Hard Drive on Different PC
It is smart to isolate potential problems with the computer itself before moving onto more involved fixes.
To test the hard disk drive (HDD) on a different PC:
- Disconnect the external hard drive from the current system.
- Connect it to another computer using compatible cables.
- Open File Explorer and see if the second PC detects the external disk.
If the external drive appears on the other computer, then the device is likely fine. The problem probably resides with the initial system in that case.
There could be an issue with the device if the HDD does not show up on the new desktop or laptop.
2. Inspect Physical Connections
Sometimes, something as simple as a bad cable or port can prevent the external drive from being recognized. Trying different cables or ports on the same computer could rule out connection issues.
To examine the physical connections:
- Inspect the USB cable for fraying or kinks.
- Inspect the USB port for bent pins, dust, or debris.
- Determine if the external hard drive requires separate data and power cables.
- Move the cable while connected to see if the link is loose or secure.
Switching cables or ports could establish a better connection. If not, proceed to the next step.
3. Check Power Supply
Faulty power supplies can also cause the external drive to not show up.
Faulty power supplies can also cause the external drive to not show up. -To check the power supply to the drive:
- Use the adapter if the external hard drive comes with one. Confirm the wattage matches before using a different adapter.
- Connect the drive directly to the PC instead of a USB hub. Rear ports can provide a more stable supply.
- Check the external HDD’s LED indicator if applicable. Flickering lights indicate the device is not receiving consistent power.
The external hard drive might work in some situations, but not all of them. If so, a poor power supply could be the culprit. You can try buying a new adapter or using a different port to correct the issue.
4. Use Disk Management
Disk Management is a built-in Windows tool to configure drives connected to the system.
To use Disk Management:
Type Disk Management in the search box on the Windows taskbar.
Click Create and format hard disk partitions in the search results.
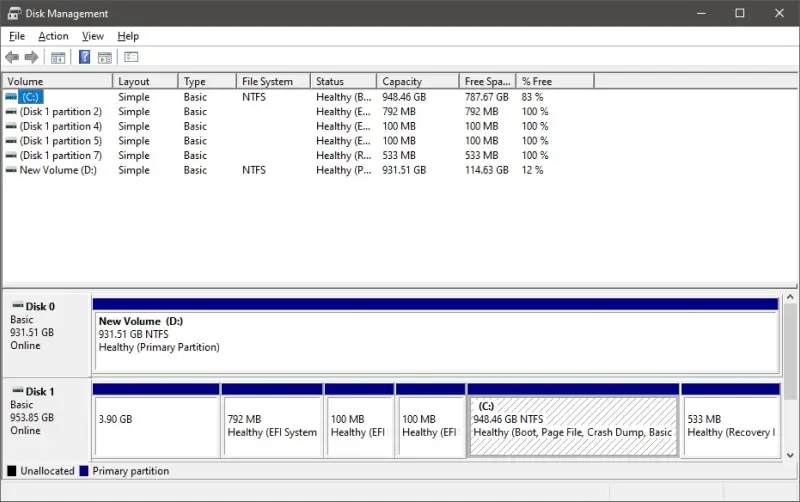
See if the drive shows up and check its Status column.
If the external drive is toggled off, right-click it and switch to Online.
If the external drive is still not recognized, right-click it and select Change Drive Letter and Paths. Click Add and pick a letter.
You can also scan the external hard drive for logical errors in Disk Management.
You can also scan the external hard drive for logical errors in Disk Management. -To check the external hard drive for errors:
Right-click the external hard disk.
Select Properties.
Go to the Tools tab.
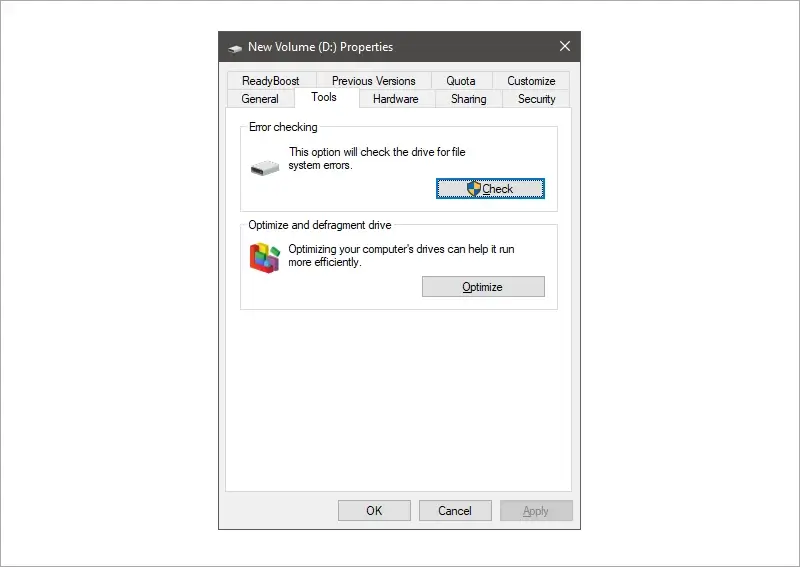
Click Check.
Note: Checking for errors can cause data loss if the tool relocates stored data. Assess the risk and back up important files beforehand if possible.
5. Initialize or Format Hard Drive
Windows cannot access a new device or corrupted drive that Disk Management displays as Unknown or Not Initialized.
To initialize an external hard drive:
- Right-click the device and select Initialize Disk.
- Choose GPT for modern systems and larger drives or MBR for legacy devices.
- Click OK.
The process prepares the external drive for use by writing the partition table to the disk. Without it, the system cannot read or write data.
The external hard drive may also appear as Unallocated.
To format an external drive for usage on Windows:
- Right-click the device and select New Simple Volume.
- Choose the volume size and select Next. (Note: Use default values for full disk.)
- Assign a drive letter and select Next.
- Choose NTFS as the file system. (Note: NTFS is a Windows-only option.)
- Leave Default for the allocation unit size.
- Enter a name for the drive.
- Check Perform a quick format and select Enter a name for the drive. -Next.
- Click Finish.
Reformatting an external hard drive will erase the contents of the disk. Proceed with caution.
The external drive might appear in File Explorer following these steps.
6. Update or Reinstall Drivers
Device drivers in Windows often work without manual input from users. However, drivers can still become corrupt or outdated, causing the external hard drive to now show up.
To update or reinstall drivers:
Type Device Manager in the search box on the Windows taskbar.
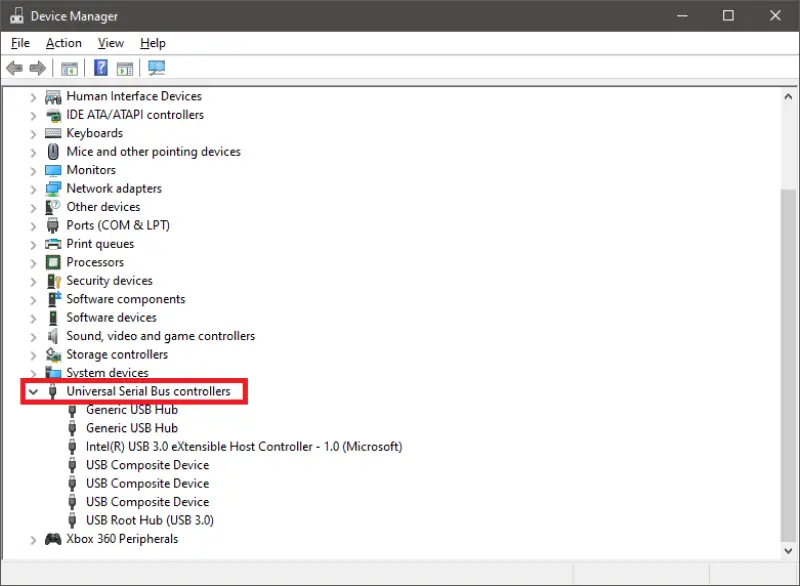
Expand the Universal Serial Bus controllers section and find the external drive if available.
Right-click the external HDD and select Update driver.
You can also download drivers and firmware directly from the manufacturer of your device.
To uninstall problematic drivers:
- Right-click the external hard drive and select Uninstall device.
- Disconnect the external device and restart the computer.
- Reconnect the external hard drive once the system reboots.
Your PC may recognize the device after installing or updating drivers.
7. Contact Professionals for Help
You could explore hard drive recovery services if your external device still is not showing up after trying to fix it.
Our external hard drive recovery specialists have the experience and expertise to restore data on a failed disk. We have recovered data across all device types and file formats. Our technicians can perform hard drive repair on your device and recover lost data. Standard data recovery services include free quotes and a hard drive repair -No Data, No Recovery Fee guarantee. You get your data back, or pay nothing. It is that simple.
Call us at 800-388-1266, request help, or find a location to speak with someone and reclaim essential files.
Frequently Asked Questions
Frequently Asked Questions -Why is my PC not detecting my external hard drive?
Your external hard drive might not be visible for several reasons. Common causes of detection problems include connection issues, software conflicts, system errors, and hardware failure. You will likely need to try several fixes to isolate the issue and resolve it.
How do I fix my external hard drive not showing up?
It depends. The step-by-step guide above helps eliminate potential problems and outlines possible solutions.
Can you recover data from an external hard drive that does not show up?
Yes. A professional data recovery service can often retrieve files from an unrecognized external hard drive. In many cases, they use advanced tools and techniques to obtain low-level access and extract data from the disk.

Timothy Burlee

Timothy Burlee is a content writer for Secure Data Recovery Services. He specializes in various topics in the data industry, including data recovery technology, storage devices, and digital forensics. Throughout his career, he has covered complex concepts and provided accessible solutions for users. Before joining Secure Data, he worked as a freelance technical writer.