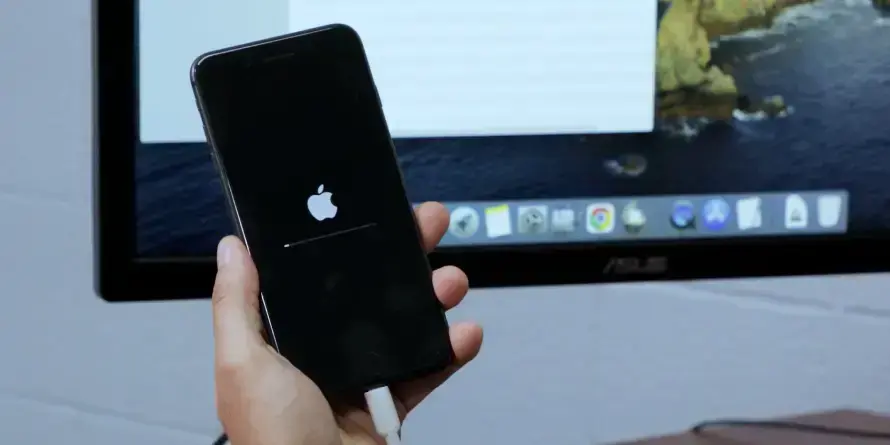
At its peak, Apple’s iTunes software served several purposes, from a popular media library and player to a mobile device management tool. Though some specialized Mac applications have replaced iTunes, the software remains an option for creating iPhone and other iOS backups. Secure Data Recovery, the authority in RAID, SSD, and hard drive recovery, provides a tutorial for importing and restoring from an iTunes backup on Windows and Mac.
How To Restore Backup From iTunes

Those with an iTunes backup can often restore their files (or earlier versions of them) even if the user duplicates the data on a different computer. Storing, importing, and restoring backups can help users avoid or recover from data loss or manage storage space across devices.
In these cases, restoring data from iTunes starts with finding backup files on the computer or mobile device. iTunes stores backups in separate locations based on the operating system. Users can manage and restore their device’s data from the backup folder.
The video tutorial and subsequent step-by-step guides explain how to restore iTunes backups on Windows and Mac.
How To Restore From iTunes Backup on Windows 10 and 11
While users can restore iPhones with an iTunes backup, the three-part process involves:
- Having the original data
- Importing the data to the computer
- Restoring the data from the iTunes application
Our customers receive their recovered data on an external drive and can store the files in multiple places, but these steps will also work for those with their own backups.
However, before restoring their iPhones, users must locate the designated folder for the backup.
Import iTunes Backups on Windows 10 and 11
Users can import the new iTunes backup on Windows 10 and 11 by connecting their external drive and navigating to the MobileSync folder. Here is the default path:
C:\Users\Your Username\AppData\Roaming\Apple Computer\MobileSync\Backup\
Or:
C:\Users\Your Username\Apple\MobileSync\Backup\
Note: If users cannot locate the backup folder, the AppData might be hidden. To enable, click “Show hidden files” in the Explorer settings, then repeat the procedure.
In the Backup folder, copy the appropriate iTunes backup into the subfolder with a string of random letters and numbers. Do not move the backup file. Copying the backup reduces the risk of data loss from an unexpected error. For customers transferring their data back to their computer from an external device, the path should look like:
iTunes Backup > Device’s Name and Case ID > String of Random Letters/Numbers
The computer should recognize the backup once the data resides in the default folder.
Restore iTunes Backup on Windows 10 and 11
Follow this process for restoring an iPhone with an iTunes backup on Windows 10 and 11:
- Connect the iPhone to the computer.
- Enter the iPhone’s passcode and press Trust This Computer on the device after it is detected.
- Click the Device button in the top-left corner of the iTunes application.
- Wait for the Summary page of the iPhone to load. Click the Summary tab from the menu on the left if it does not load.
- Click Restore Backup under the Backups section of the main window.
- Select the relevant backup from the list.
- Enter the backup password if prompted.
- Wait for the iPhone to synchronize with iTunes.
- Disconnect the iPhone once it finishes synchronizing.
How To Restore From iTunes Backup on Windows 7
Though Microsoft no longer supports Windows 7, users can still restore iTunes backups on the operating system. The following steps detail the process for finding and restoring iTunes backups on Windows 7.
Import iTunes Backups on Windows 7
By default, Windows 7 stores iTunes backups in the MobileSync folder. Here is the path for iTunes backups on Windows 7:
C:\Users\Your Username\AppData\Roaming\Apple Computer\MobileSync\Backup\
Or:
C:\Users\Your Username\Apple\MobileSync\Backup\
Note: AppData might be hidden if users cannot locate the backup folder. Click “Show hidden files” in the Explorer settings to reveal AppData before re-opening the folder.
Do not move the backup file. Instead, copy the iTunes backup from the external drive and import it into the subfolder featuring a string of random letters and numbers. Copying reduces the risk of data loss from an unexpected error. Customers using an external device with recovered files to restore data to a computer should follow this path:
iTunes Backup > Device’s Name and Case ID > String of Random Letters/Numbers
The computer should recognize the backup once the data resides in the default folder.
Restore iTunes Backup on Windows 7
Users can restore an iPhone with an iTunes backup on Windows 7 with these steps:
- Connect the iPhone to the computer.
- Enter the iPhone’s passcode and press Trust This Computer on the device after it is detected.
- Click the Device button in the top-left corner of the iTunes application.
- Wait for the Summary page of the iPhone to load. Click the Summary tab from the menu on the left if it does not load.
- Click Restore Backup under the Backups section of the main window.
- Select the relevant backup from the list.
- Enter the backup password if prompted.
- Wait for the iPhone to synchronize with iTunes.
- Disconnect the iPhone once it finishes synchronizing.
How To Restore From iTunes Backup on Mac
Like Windows, restoring an iTunes backup on macOS is a two-part process. Users must create or find the backup location before restoring their iOS device.
Import iTunes Backup on Mac
The default location for storing backups on macOS appears below:
~/Library/Application Support/MobileSync/Backup
To import an iTunes backup on a Mac:
- Connect the iPhone to the computer.
- Enter the iPhone’s passcode and press Trust This Computer on the device after it is detected.
- Open Finder from the Dock.
- Click Go in the horizontal menu.
- Click Go to Folder in the dropdown menu.
- Enter ~/Library/Application Support/MobileSync/Backup in the pop-up window.
Most macOS versions store previous backups in this folder. The best method for importing an iTunes backup involves copying the desired data from the external drive into the folder. Copying reduces the risk of data loss from an unexpected error compared to moving. Customers with a provided backup can locate the recovered data by following a path similar to:
iTunes Backup > Device’s Name and Case ID > String of Random Letters/Numbers
The computer should recognize the backup once the data resides in the default folder.
Restore iTunes Backup on Mac
At this point, users can restore an iTunes backup on their Mac:
- Connect the iPhone to the computer.
- Enter the iPhone’s passcode and press Trust This Computer on the device after it is detected.
- Click the Device button in the top-left corner of the iTunes application.
- Wait for the Summary page of the iPhone to load. Click the Summary tab from the menu on the left if it does not load.
- Click Restore Backup under the Backups section of the main window.
- Select the relevant backup from the list.
- Enter the backup password if prompted.
- Wait for the iPhone to synchronize with iTunes.
- Disconnect the iPhone once it finishes synchronizing.
What To Do if iTunes Does Not Restore iPhone
Some common reasons for errors occurring when restoring an iPhone backup with iTunes include:
- Connection issue between iPhone and computer interrupts file transfer
- Failure to establish or maintain connection to a network or the internet
- Errors in the backup file
- Bug or glitch with iTunes
Users can attempt these fixes when troubleshooting an iTunes error message:
Fix 1: Use a different USB cable or connecting port.
Fix 2: Plug the iPhone directly into the computer rather than a USB hub or passthrough.
Fix 3: Disconnect the iPhone and reboot the device.
Fix 4: Restart the computer.
Persistent problems often indicate an error in the backup file, an incompatible iPhone, or a bug with iTunes.
Importing and Restoring iTunes Backups
The exact procedure for importing and restoring an iTunes backup depends on your operating system. Following these instructions can empower users to reclaim essential files from an iPhone and prevent permanent data loss.
Yet even the best backups can still fail.
In those situations, the experts at Secure Data Recovery can help. Since 2007, our experienced engineers have encountered every failure scenario regardless of storage device, resolved over 100,000 cases, and recovered billions of files. Whether you need iPhone data recovery or another service, we have the expertise and tools to deliver solutions in the most complicated circumstances. Trust our Apple Certified Mac Technicians (ACMT) to recover your lost data.
We have maintained a 96% success rate and offer a “No Data, No Recovery Fee” guarantee. You get your data back, or pay nothing.
Call us at 800-388-1266 to start a case and regain valuable data.


