Data loss can happen to anyone at any time. It could occur because of a failed hard disk drive (HDD) or accidental deletion. Whatever the reason, the response is the same. You want that data back now. Luckily, there are a few options. Hard drive recovery software can sometimes repair and restore lost data.
Below, we explain how to recover data from a hard drive for free, with and without software, and outline conditions for success.
Key Takeaways
- The success of data recovery software depends on the details of each case.
- SecureRecovery® Undelete and Windows File Recovery can often restore deleted data on hard drives.
- We also offer a free preview of our SecureRecovery® software. It is a robust tool for more severe logical errors for users with data loss or corrupt files.
- Visit our free data recovery software page for other options tailored to your situation.
- You may need professional data recovery services if your hard drive has encountered physical damage or mechanical failure.
When To Choose Free Data Recovery Software
Data recovery software is ideal for scenarios involving recently deleted files, formatted disks, or slightly damaged file systems.
For starters, the source of data loss is typically easier for users to diagnose. You likely remember deleting data or formatting your drive. Frequent crashes or error messages when accessing files can indicate corruption. Software excels in these situations owing to its design. These tools can locate data still stored on the disk even if the device removes entries from its file table.
This approach is possible due to how hard drives work. When users delete data, the hard drive does not erase the contents of those files. Instead, the file system marks those sectors on the platter as free. That means deleted data remains in unallocated space until overwritten.
As a result, software is an effective method of retrieving data in these instances.
Note: Restoring deleted or formatted files is much more difficult on a solid-state drive (SSD). Unlike HDDs, SSDs have a TRIM command, allowing the device to collect garbage actively. Once the command is sent, the SSD wipes the data from its memory cells. TRIM optimizes the SSD’s long-term performance, but the command makes recovering data almost impossible unless it is disabled beforehand.
However, data recovery software cannot resolve cases of physical damage or mechanical failure. It will also struggle when faced with severe file corruption.
Signs the disk might be damaged include hard drive clicking or beeping. Running software on failing hardware could lead to further data loss.
While free software can be a valid option, knowing its limitations is essential. In addition, acting fast can improve outcomes. These tools work best when used as soon as data loss happens. The longer your device stores deleted data in free space, the likelier it will be overwritten.
Here are a couple of tips for using data recovery software:
- Minimize usage to preserve data that might still exist on the disk.
- Download the program to a different drive than the one with lost data.
SecureRecovery® Undelete
Accidental deletion is one of the most common data loss events. Some people catch their mistakes promptly and use the Recycle Bin to restore the files. For others, that might not be an option any longer.
We designed SecureRecovery® Undelete to recover lost files even after the Recycle Bin has been emptied or expired. It works on Windows XP or newer PCs and detects files on hard drives with NTFS or FAT formats. The tool is free for personal use.
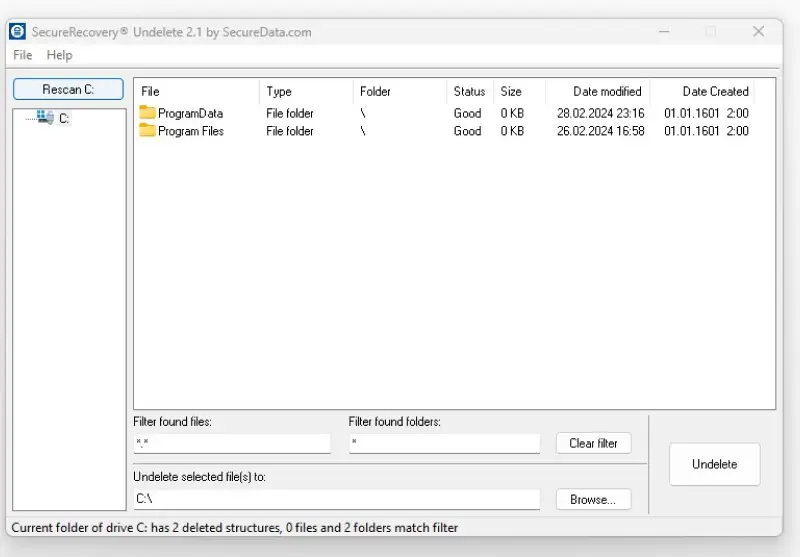
Our user-friendly software scans the disk to find file fragments in free space. After locating the deleted data, the tool bypasses the operating system and reconstructs the files on a separate device. It is that easy.
Begin the process by clicking File in the top-left corner and choosing Scan C: in the menu. Your missing files will appear in the main window. Select them and press Undelete.
Almost everyone has accidentally deleted files from their hard drive. No one needs to lose important data.
SecureRecovery® for Hard Drives
SecureRecovery® for Hard Drives has a broader purpose than a program for erased files.
While the software can restore deleted data, it also handles file corruption and other logical issues. It is compatible with Windows 2000 or newer and recognizes NTFS, FAT, and VFAT file systems. The tool can recover data from a full disk or specific partition and restore the complete folder structure. It supports long and localized file names and even retrieves data marked as encrypted. The software includes the Data Browser feature, granting users more control over the process.
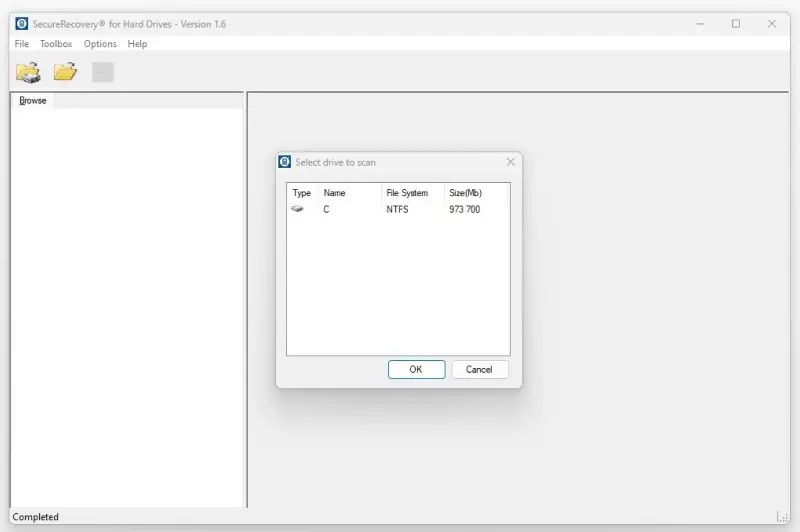
You do not need special skills to use SecureRecovery® for Hard Drive. The software allows you to browse the disk for lost data, preview the items, and save them to a selected location. If the tool encounters corruption, it can repair metadata before restoring the file. Overall, the program is an excellent choice for people who need a quick remedy for standard data loss cases.
Free Preview of SecureRecovery® for Windows and Mac
Sometimes, retrieving files with software is possible, but it typically requires a more robust approach.
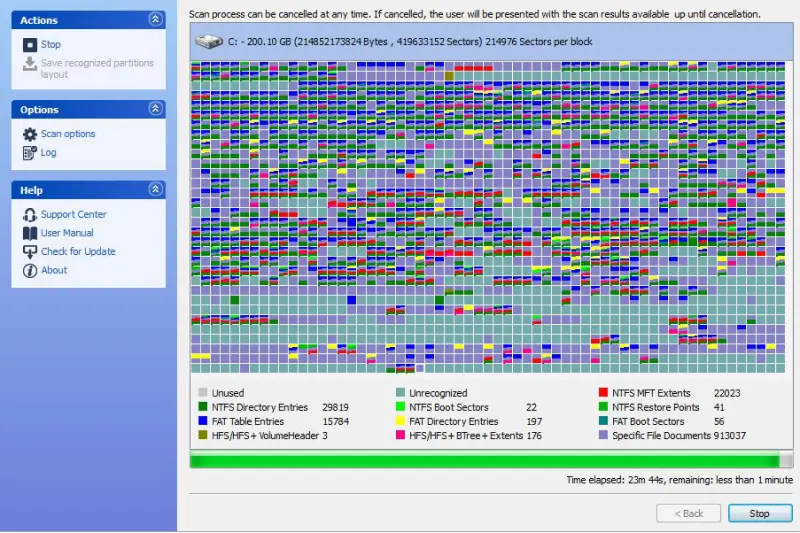
SecureRecovery® for Windows and Mac has advanced algorithms to restore data. Even in cases beyond deleted files. The program has multiple modes to scan for lost data and tools to rebuild structures in the event of file corruption. It can also help with data loss from defective partitions, conversion errors, malware infections, and other logical issues. A free demo of SecureRecovery® is available for Windows and Mac. After the scan, a list of recoverable files appears. If your lost files show up, you can pay for the full license to restore all your data.
Windows File Recovery
Windows File Recovery is a free utility on the Microsoft Store that restores deleted data. The built-in tool, available on Windows 10 and 11, recovers data through a command-line interface. It mainly supports NTFS, the default file system of Windows, but features a separate mode for FAT and exFAT.
A command-line interface can be confusing for those unfamiliar with text-based prompts. The following steps explain how to use Windows File Recovery to restore deleted files from a hard drive.
- Download Windows File Recovery from the Microsoft Store.
- Enter Windows File Recovery in the search box on the taskbar.
- Launch the tool.
- Select Yes when the tool requests permission to make changes to the device.
Now, users must interact with the interface to retrieve data from the drive. Input commands in this format:
In other words, winfr (Windows File Recovery) commands involve multiple parameters for success.
The source drive is the disk being scanned for deleted data. In most cases, that is the C: drive.
The destination drive is the disk where recovered data is saved. That is often the D: drive.
The mode depends on the circumstances of the case. Regular restores recently deleted files on an NTFS drive. Extensive performs a deeper scan and retrieves permanently deleted data using the NTFS, FAT, and exFAT file formats.
The switch refers to instructions that dictate how the program searches for data.
Here’s an example of how Windows File Recovery can reverse sudden data loss:
Your desktop runs Windows 11 from an NTFS-formatted HDD containing work documents. During routine cleanup, you delete an old project and its related files and empty the Recycle Bin. Later, you need this data back. You connect an external hard drive and launch Windows File Recovery. You are looking for a Word doc. You enter this command:
C: is the source drive. D: is the destination drive. The mode is /regular. And /n example.docx is the switch. In this case, it instructs the tool to search for a Microsoft Word file named example.
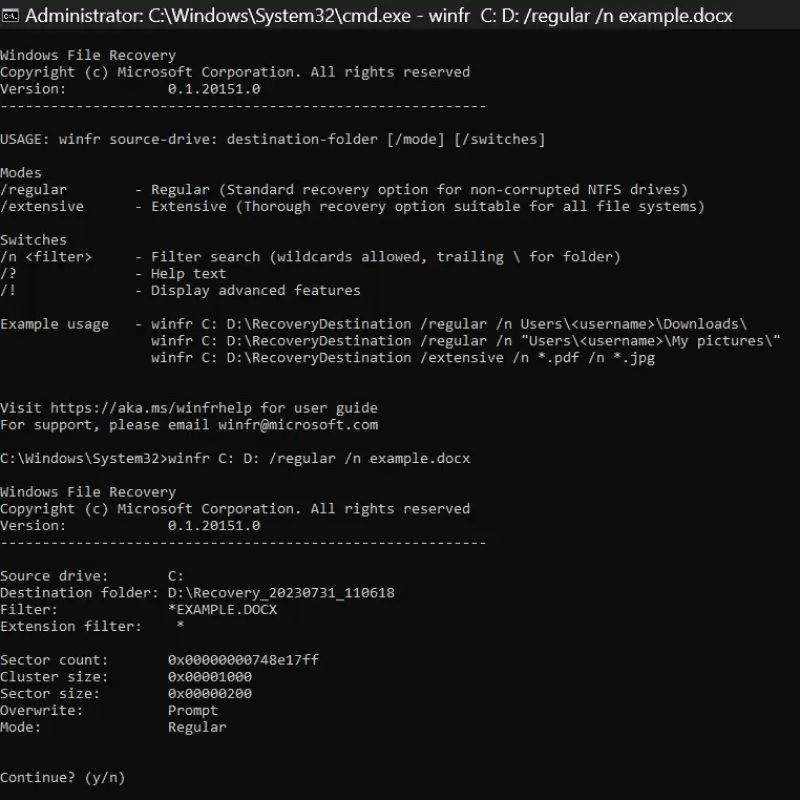
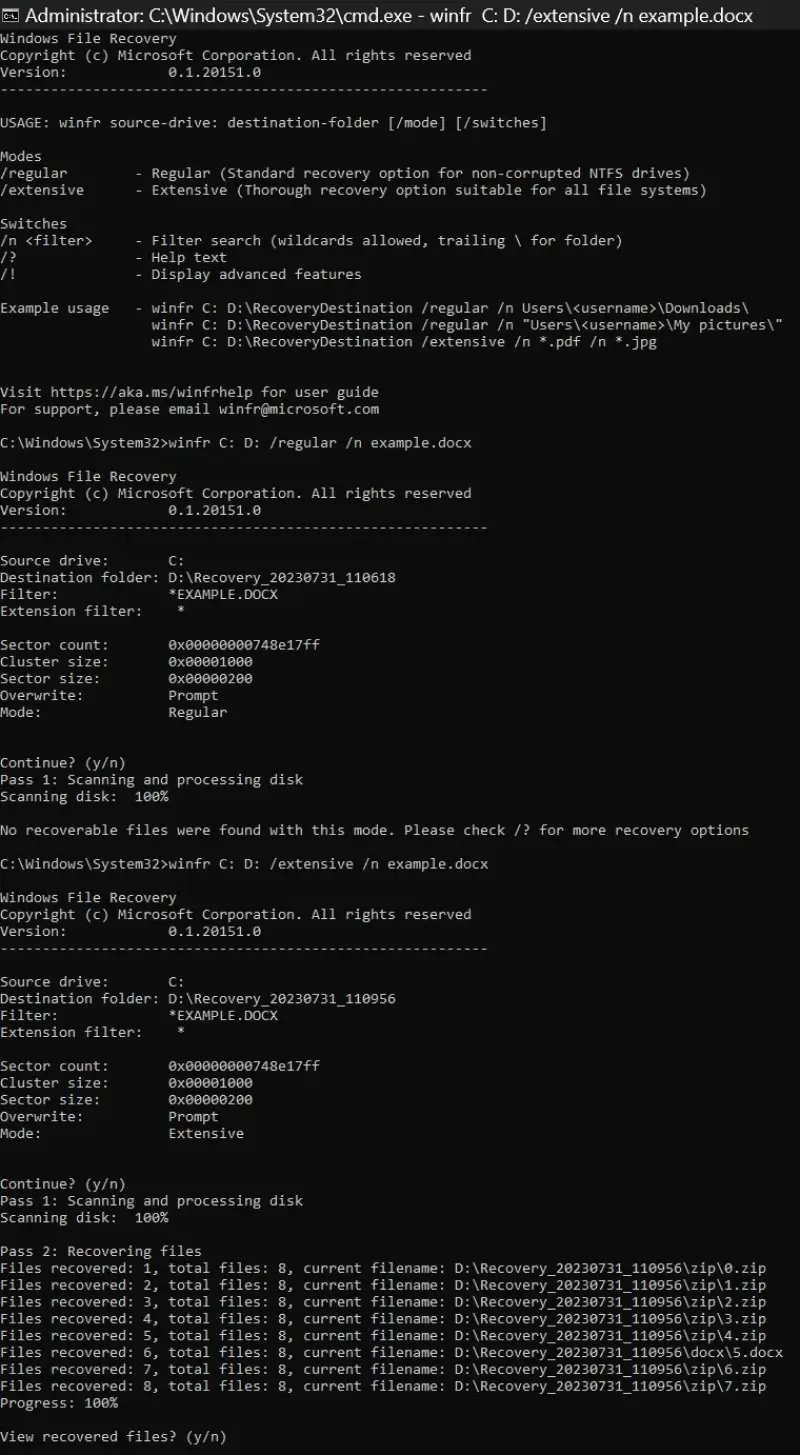
Press Y to begin the process when prompted. If successful, the utility will save the recovered file to a new folder on the external hard drive. If not, you can try a more thorough scan. To run the same search in Extensive mode:
winfr C: D: /extensive /n example.docx
Each of these cases assumes you remember the exact file name and type. Since that might not be true, Windows File Recovery allows numerous search paths. For instance, you can include a wildcard to restore all files of a specific type. It is even possible to retrieve all files stored in a particular folder.
For restoring all .docx, .xlsx, .pptx, .pdf, .jpeg, .png, .mp3, or .mp4 files:
Note: You can search for less common file formats. Just replace the listed format with the desired file spec.
Some might want to retrieve all Word, Excel, and PowerPoint files at the same time:
Note: You can have many combinations of file types using this command.
To recover specific file types from a given location:
Note: Username is a placeholder in the above file paths. Replace it with your username. These commands will recover PDFs from Downloads, songs from Music, images from Pictures, and recordings from Videos. You can change the file path and type as needed.
Visit the Microsoft Support page for more info on Windows File Recovery’s modes and command-line syntax.
Custom Data Loss Solutions
As mentioned, data recovery software needs specific conditions for successful outcomes. Some cases demand a custom approach with specialized tools and techniques. For example, software cannot address physical damage. But an expert can often recover lost data in those situations.
Secure Data Recovery has retrieved billions of files across thousands of hard drives since 2007. Our cutting-edge hardware, forensic-grade software, and state-of-the-art cleanrooms have enabled us to maintain a 96% success rate. With experienced engineers and leading certifications, our company gives you the best chance to reclaim what matters.
Call us at 800-388-1266 or request help to start your case. Our standard service features free diagnostics, no-risk quotes, and a No Data, No Recovery Fee guarantee. You get your data back, or pay nothing.

Timothy Burlee

Timothy Burlee is a content writer for Secure Data Recovery Services. He specializes in various topics in the data industry, including data recovery technology, storage devices, and digital forensics. Throughout his career, he has covered complex concepts and provided accessible solutions for users. Before joining Secure Data, he worked as a freelance technical writer.