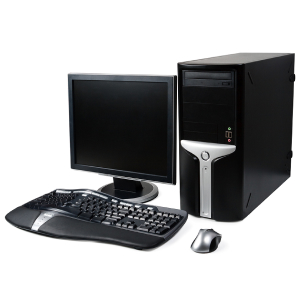
Seeing a black screen when you turn on your computer is one of the most stressful technical difficulties you can encounter. Especially since a blank screen does not give clear clues about what is wrong.
A PC that turns on with no display can lock you out of important files at the worst time. Sometimes, it can even signal a deeper problem that could put data at risk.
Many display issues are caused by minor misconfigurations and can be easily fixed. This guide will walk you through solutions in order of ease and effectiveness, from quick checks to more involved tests.
What You Need To Know:
Why Does My PC Turn On But There’s No Display or Power to Keyboard?
There are several explanations for a PC turning on but showing no display or power to the keyboard.
Here are the most common causes of display issues:
- Loose cables or unseated memory
- Interference from peripheral devices during the boot sequence
- Corrupted or outdated drivers for display adapters
- Incompatible BIOS settings
- Faulty power supply or graphics processing unit (GPU)
These causes are typically straightforward to diagnose and address, even for beginners.
How To Fix PC That Turns On But Shows No Display
The list below begins with the simplest checks and easiest solutions first. Work through the methods until the PC’s display issues are resolved.
Editor’s Note: Some of these steps can put extra stress on other components in your system, such as a storage device. Data loss is possible during repeated shutdowns because each power cycle could interrupt a write operation, causing file corruption.
Contact certified data recovery services if you become concerned about the health of your drive or losing access to critical files. We offer free diagnostics and provide quotes with no obligation.
Method 1: Wake the Device or Restart Graphics Drivers

A keyboard shortcut is the best starting point for a blank screen because they act as a soft reset. These shortcuts only take a few seconds, but they can reconfigure the system without a display.
Press the Windows key + P or Ctrl + Alt + Del to see if it wakes the monitor. Pressing the Windows key + Ctrl + Shift + B will attempt to restart the graphics driver.
Method 2: Check Cable Connections

The next step is to ensure that all cables are firmly connected to the correct ports.
Confirm that the DisplayPort (DP), HDMI, or VGA cable is connected to the GPU, not the motherboard. GPU ports are often located in a vertical slot on the lower bracket of the desktop’s back panel. They are separate from the main cluster of ports for the motherboard.
Also, inspect the monitor’s power cord for signs of visible damage.
Plug a different monitor into the PC to rule out a defective screen if possible.
If the second monitor works, the problem lies with the original panel.
No display means the monitor is fine and shifts all focus to the system.
Method 4: Disconnect All Peripherals

A peripheral device, such as a docking station, external hard drive, printer, speakers, or webcam, could interfere with the display.
For example, a connected external drive could change the boot order and interrupt the startup process. If the external storage lacks a boot partition with system files, it will appear as a black screen. Conflicts with the docking station can prevent a display signal from reaching the monitor. A failing power supply could struggle to maintain stable delivery to multiple USB devices with higher draws.
Unplugging each device helps identify whether a peripheral is disrupting the computer’s normal boot sequence.
Method 5: Perform Hard Reset

Editor’s Note: As mentioned above, a hard reset can increase the risk of data loss if there is no recent backup. Abruptly cutting power to the PC could corrupt data stored on the device. Our SSD and hard drive recovery experts use forensic-grade tools to obtain low-level access and retrieve data directly from the media. Services include risk-free quotes and a No Data, No Recovery Fee guarantee.
Sometimes, the computer needs a forced refresh to restore its display.
Hard resets can clear a temporary state that causes the monitor to stay black. They might purge residual power in the motherboard's electronics that keep the display from initializing. The process could restart a stuck boot attempt from scratch. It can also wipe the GPU’s VRAM from a prior session.
To force reset your PC:
- Turn off the computer.
- Disconnect the power cable and remove the battery from laptops.
- Press and hold the Power button for 15 to 20 seconds to drain residual power.
- Reconnect the power cable and reinsert the battery in laptops.
- Press the Power button.
If the PC turns on but shows no display, proceed to the next step.
Editor’s Note: A hard reset may fix the issue, but the PC turns on with no display again in the intermediate future. You are likely dealing with a bad driver or software glitch in that case.
Method 6: Reinstall Graphics Driver

A blank screen could persist if your GPU is loading an outdated or corrupted driver.
Forcing the computer to restart three times (Method 4) will launch Automatic Repair within the Windows Recovery Environment (WinRE). If the display returns after the third attempt, then use Safe Mode to uninstall drivers and reboot. If the computer screen is still black but the keyboard works, follow these instructions to navigate to Safe Mode without a display.
To enter Safe Mode from WinRE:
- Press the Down key twice, then hit Enter to select Troubleshoot.
- Press the Down key once, then hit Enter to select Advanced options.
- Press the Down key once, then hit Enter to select Startup Settings.
- Press Enter to select Restart.
- Press F5 to select Enable Safe Mode.
If the PC’s display functions now, then uninstall the GPU’s driver in Device Manager.
To uninstall GPU drivers in Safe Mode:
- Right-click the Start icon on the taskbar.
- Select Device Manager from the menu.
- Expand the Display adapters section.
- Right-click the graphics card and select Uninstall device.
- Restart the computer.
See if the display resumes working with the generic GPU driver. If so, install a fresh driver from the manufacturer’s website.
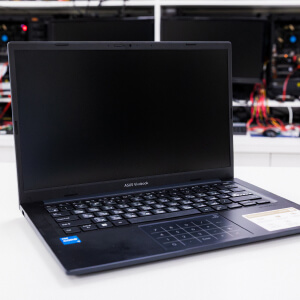
Method 7: Reseat Your RAM

Editor’s Note: Most modern laptops solder hardware right to the motherboard or processor package. As a result, laptop owners have fewer self-repair options than desktop users. Our laptop data recovery services can carefully work with these SSD modules if you need files restored from the device.
Random-access memory (RAM) is short-term storage for active apps and frequently used data.
If the CPU cannot read instructions in memory, then it might manifest as a black screen on startup.
There are three reasons that RAM can trigger display issues:
- A loose RAM stick is not fully seated in its socket, so the GPU never receives a display signal.
- Partial contact with the pads interrupts data exchange, causing intermittent display problems.
- Damaged slots can present the same symptoms as faulty RAM.
Reseating RAM will address all these possibilities.
To reseat RAM:
- Shut down the computer and disconnect the power cable.
- Press and hold the Power button for 15 to 20 seconds to drain residual power.
- Open the PC’s case.
- Locate the long, narrow slots on the motherboard.
- Release the clips at the end of the slot to remove the RAM modules.
- Realign the stick with the slot.
- Press down on both ends until the stick clicks and the retention clips snap into place.
The stick should sit flush in the socket.
If reseating your RAM does not fix the display issue, then test each stick in the first slot. This step will isolate a defective memory module from the working ones. You can also test RAM in a different slot to rule out dust, debris, bent pins, or oxidized contacts.
Method 8: Reset BIOS Settings

Mismatched BIOS settings are another possible explanation for why the display does not work.
The Basic Input/Output System (BIOS) is firmware that prepares the PC’s hardware and loads Windows. These settings can sometimes change due to aging hardware, a power surge, or a failed update. The unfamiliar configuration could cause display issues and other instability.
A corrupted or depleted CMOS battery is the most likely culprit for BIOS changes without user input. The CMOS battery is a small coin cell that delivers voltage to the motherboard between power cycles. The system uses this power to retain settings while the computer is off. Without a proper set of values, the PC may not boot fully.
Reseating a corrupted CMOS battery could restore a stable power supply and revert the BIOS settings to their defaults, reviving your display.
Editor’s Note: Like RAM, reseating the CMOS battery is usually not an option in the latest laptop models. It might even require significant disassembly for desktop users.
To reseat CMOS:
- Shut down the PC and unplug the power cable.
- Press and hold the Power button for 15 to 20 seconds to drain residual power.
- Remove the computer’s case to access the internal components.
- Find the small, coin-shaped disc on the motherboard, often located beneath the graphics card’s PCIe slots.
- Disconnect the CMOS battery from the motherboard.
- Reseat the CMOS battery on the board.
- Reseal the computer case.
- Plug in the power cable and start the PC.
- Press the assigned BIOS key of the manufacturer.
- Set the correct date and time.
- Save and exit the BIOS.
Default BIOS settings could restore your normal display.
Editor’s Note: Reseating a depleted CMOS battery will not work. However, if your setup requires custom settings to load a display, you will need another way to modify the BIOS. Using integrated graphics (as explained in Method 9) to alter BIOS settings is a potential option. The new CMOS battery will save the updated values for your specific system.
Method 9: Remove Your GPU
Some central processing units (CPUs) have integrated graphics on the chip. Many pre-built desktops and consumer laptops feature this setup.
Removing the GPU from the machine could force the system to boot using integrated graphics. If the PC’s display signal reaches the monitor without the GPU, then the problem resides with the card.
Disconnect the computer from any power source before you begin. Press and hold the Power button for 15 to 20 seconds to flush residual power. Avoid materials that conduct static and could come into contact with electronics, such as carpeting or wool clothing. Editor’s Note: Opening the desktop or laptop could void the warranty on your computer and its hardware. GPUs are very expensive to replace. Assess the risk and reward before proceeding.
Method 10: Verify Your Power Supply

A power supply unit (PSU) distributes voltage to components across several rails. Each rail supplies different hardware.
The three primary outputs are 3.3V, 5V, and 12V. Major hardware, such as the CPU and GPU, draw power from the 12V rail. As a PSU ages, the capacity and stability of the 12V rail can diminish. Therefore, your power supply might not deliver enough voltage to power the GPU. However, the 3.3V and 5V rails may continue to receive their normal supply.
In this instance, the PC powers on but does not provide a display.
This failure type is difficult to diagnose without specialized equipment to measure rail voltage under load. Replacing the unit with a sufficiently rated PSU from a working system is the best method to exclude a bad power supply.
When To Contact Experts for Hardware Failure
Secure Data Recovery has restored billions of files through desktop data recovery since 2007.
Our certified engineers have advanced tools and techniques to retrieve data directly from hard drives and SSDs.
Enjoy the peace of mind that comes with professional data recovery services. We back our work with a No Data, No Recovery Fee guarantee. You get your important data back, or pay nothing.
Call us at 800-388-1266 or fill out our form to get a free quote and discuss how data recovery works with an expert.
Frequently Asked Questions
Hearing beep codes on startup usually reveals that the Power-On Self-Test (POST) failed. On occasion, the motherboard relays this information through speakers to bypass the display. Sometimes the board uses flashing LED lights to indicate an initialization error.
Review your motherboard manual to learn about specific beep codes.
Why does my PC turn on but the monitor says “No Signal”?
This is a similar but separate display issue.
A black screen means the monitor is not receiving any input from the PC. A monitor with a “No Signal” message received power from the computer, but it is still looking for a source. For example, the screen might be searching for a DisplayPort signal while the PC outputs HDMI. Connecting the monitor to the motherboard instead of the GPU is another common cause of signal errors.
Check the screen’s input selection and ensure its cables are plugged into the right ports.
What are the best ways to prevent PC display issues in the future?
To prevent display issues:
- Note cable locations if cleaning or moving the PC.
- Handle the computer with care to minimize damage and loose connections.
- Keep drivers and Windows up to date.
- Use an antivirus program to safeguard against malware.
These simple steps reduce the risk of a PC having no display.

Yevgeniy Reznik

Yevgeniy Reznik is Laboratory Operations Manager at Secure Data Recovery Services in Cleveland, Ohio, and has more than a decade of experience as a data recovery engineer. He graduated from Cleveland State University with a degree in computer science and spent 15 years as an IT entrepreneur and small business owner before joining the company.