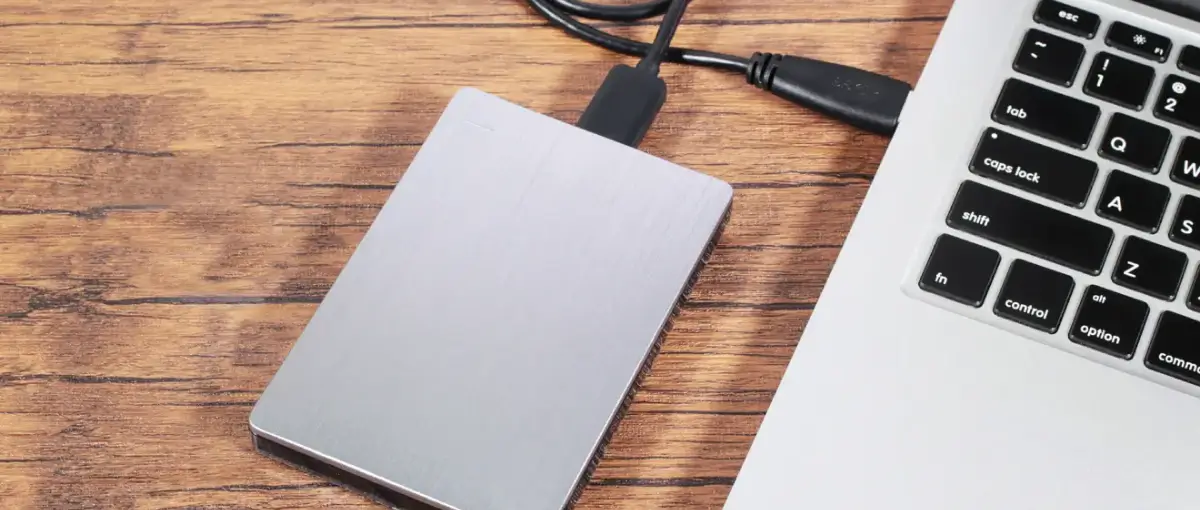
Millions depend on external hard drives to store large amounts of data and transfer files between computers. As a portable version of hard disk drives (HDDs), external devices connect to a computer via a Thunderbolt or USB cable. These drives expand or interact with internal storage, but detection problems can arise on Apple’s macOS. Secure Data Recovery, the leader in RAID, SSD, and hard drive recovery, outlines potential issues and solutions.
4 Reasons for Mac Not Recognizing External Hard Drive
Using a Mac external disk is often effortless. Users plug the portable drive into a USB port on the computer and it starts Finder, allowing them to manage their data. But sometimes the Mac and storage device cannot establish a connection. When that happens, people could lose access to critical files.
In those cases, finding an immediate fix is essential.
There are several explanations if macOS does not recognize the external hard drive. Here are the most frequent reasons:
Connection Issues
Connection issues are the most common cause of an undetected external drive. These issues range from damaged, loose cables to incorrect settings. A series of straightforward steps will determine if connection issues are the culprit.
Compatibility Issues
Compatibility is a recurring problem for external hard drives on macOS. Manufacturers design storage devices to work with specific file and operating systems. The external hard drive will not show up as a separate volume if it is incompatible with the Mac computer.
Hardware Failure
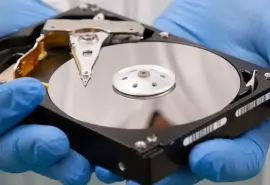
Though less common, hardware failure is a possible explanation for macOS not recognizing the external hard drive. Hard drives fail for numerous reasons, including physical damage or logical errors. Pinpointing the problem with a failed hard drive is a complex process, and Mac data recovery may be necessary. Stop using the hard drive if it clicks or beeps.
Previous Misuse
On occasion, previous misuse of the device can lead to detection issues. Failing to properly eject the drive can compromise its formatting. Certain file systems, like exFAT, are especially susceptible to damage. Always eject the disk before disconnecting.
Troubleshooting Mac External Hard Drive Not Showing Up
The good news is that users can resolve most external hard drive issues themselves. People can conduct a series of tests and eliminate potential problems with the external drive. Once the issue is identified, users can take appropriate action to mount the device and access their files or create copies.
Step 1 - Ensure Sufficient Power Supply
Users must ensure the external hard drive receives enough power if it is the first time connecting the disk to a Mac.
Different USB cables provide different outputs. For example, a USB 2.0 delivers a maximum of 500 milliamps, while a USB 3.0 can draw 900 milliamps. In general, larger drives require higher outputs. An external device receiving insufficient power will not show up on most Macs.
If needed, swap to a cable with a higher output or switch to an external source, such as a self-powered USB hub.
Avoid Low Power Mode on MacBooks when using an external hard drive. MacBooks will not detect the device if the laptop does not supply its minimum power requirements.
Proceed if the same kind of cable worked in the past.
Step 2 - Check Connections
Checking the connections is the next step in diagnosing the external hard drive. Confirm that the connection is tight.
Assuming the connection is secure, users must rule out ruined cables and ports, as damage could occur between backups or transfers.
Examine the USB cables. Worn wires, bent pins, or cracked housing could cause issues. If the cables appear intact, inspect the USB port for broken connectors. Clear debris and dust from the opening. The slightest misalignment or obstruction could prevent a proper connection. Some faulty cables and ports may even seem fine.
If possible, test the cables on another device to determine their condition. The solution could be as simple as different cables. A working cable indicates the problem lies elsewhere.
Step 3 - Edit Preferences in Finder
Finder is the default file manager for macOS, and disk management is a central component of the program.
The external hard drive should show up in the Finder window as soon as it is connected. However, there is an issue if the device is not listed under Locations. That could be because the Mac is not set to show external drives.
While these settings should not be a persistent problem, verifying that the Mac is displaying external disks is worthwhile before trying more complicated remedies.
To edit Finder’s settings:
- Launch Finder.
- Choose Preferences from the Finder menu bar.
- Select Hard Disks and External Disks in the General tab.
- Select Hard Disks and External Disks in the Sidebar tab.
Once users tick the boxes, the device should appear under Locations in the Sidebar. If the device is still missing, continue with the following steps.
Step 4 - Boot in Safe Mode
Sometimes the recent installation of suspicious software is the obstacle. Safe Mode runs fewer programs and helps users further isolate the problem.
(Note: Booting into Safe Mode requires some Mac hardware knowledge. Click the Apple logo in the top-left corner of the screen. Choose About This Mac in the Apple menu. Macs with an Intel processor will have a Processor item. Macs with an Apple Silicon chip will have a Chip item.)
To boot in Safe Mode on an Intel-based Mac:
- Shut down the computer from the Apple menu.
- Hit the Power button, then press and hold Shift on the keyboard.
- Release the Shift key when the log-in screen appears.
- Log in to the Mac.
To boot in Safe Mode on a Mac with an Apple M-series chip:
- Shut down the computer from the Apple menu.
- Press and hold the Power button until “Loading Startup Options” appears.
- Select the volume.
- Press and hold the Shift key, then choose Continue in Safe Mode. (Note: The computer will restart at this point.)
If the Mac recognizes the external drive in Safe Mode, reboot the computer into its regular mode and uninstall the rogue software.
Step 5 - Open Disk Utility
Disk Utility is a program that carries out multiple disk-related tasks on macOS. The system utility is responsible for mounting storage devices. As a result, Disk Utility is frequently used to solve Mac issues.
To open Disk Utility:
- Launch Finder.
- Go to Applications.
- Open the Utilities folder.
- Click Disk Utility.
After opening Disk Utility, users should see if the program detects the external drive. To check:
- Expand the View menu at the top of the screen.
- Choose Show All Devices.
A visible but faded external hard drive in the left column signals that the device is unmounted. An unmounted device is one of the most common Disk Utility scenarios. Fortunately, mounting a drive on macOS is easy, so users can sort this issue out in seconds. To manually mount the external hard disk:
- Select the faded external drive.
- Click Mount in the top-right corner of the window.
After mounting the device, users should confirm that it appears in Finder. If the disk does not show up, its partition table might be damaged, forcing further diagnostics.
(Note: If the drive never appears in Disk Utility, skip to Step 8.)
Step 6 - Run First Aid
Mac’s First Aid tool resides within Disk Utility. First Aid addresses structural issues with the external hard drive, including problems with the partition map. To run First Aid:
- Open Disk Utility.
- Select the faded external drive from the left sidebar.
- Choose First Aid at the top of the screen.
- Click Run.
If the repairs are successful, then the Mac will recognize the disk.
Though convenient, developers did not design First Aid to confront significant errors. Running First Aid can create other issues. In the event of severe corruption or damage, users must explore alternatives.
Step 7 - Format External Hard Drive
Changing the drive’s formatting is an additional option in instances where First Aid is inadequate.
In effect, formatting the disk presents users with a fresh start. Rather than resolving the issues with the external drive, formatting reestablishes how data is stored and retrieved. The most important part of the process is creating a file system.
Despite its effectiveness, formatting comes at a cost. Formatting a storage device erases its contents. If the data on the drive is inaccessible, users should consider data recovery software or services to recover lost data.
For those that still elect to format their Mac external drive, it is crucial to understand file system choices. The file system provides structure to the disk. Each file system possesses distinctive characteristics.
APFS features improved performance for the most recent versions of macOS. Meanwhile, Mac OS Extended (HFS Plus) allows users to still access files on older Macs. A cross-platform file system like exFAT is compatible with Macs and Windows PCs.
| File System | Overview |
|---|---|
| APFS | The default file format since macOS High Sierra. |
| Mac OS Extended | The default file format for macOS Sierra and earlier. |
| exFAT | File format supported in macOS and Windows. |
| MS-DOS (FAT) | File format supported in macOS and Windows. |
In most situations, users will select APFS or Mac OS Extended. Users needing a cross-platform external drive can choose exFAT, but exFAT is not compatible with built-in backup tools. If users want to take advantage of those tools, they should format the device to the computer’s local file system. In addition, exFAT is more vulnerable to corruption after experiencing errors.
NTFS is Windows’ default file format. As such, Macs can read an NTFS-formatted drive but cannot write data to that device.
To reformat a failed or flawed disk on Mac, enter Disk Utility and proceed with the following steps:
- Expand the View menu at the top of the screen.
- Choose Show All Devices.
- Select the faded external drive.
- Click Erase at the top of the screen. (Note: This will wipe all the disk’s data.)
- Choose the appropriate scheme from the Scheme pop-up menu.
- Choose the appropriate format from the Format pop-up menu.
- Enter a new Name.
Users should set the Scheme to GUID Partition Map for APFS or Mac OS Extended. The format depends on the drive’s anticipated usage. Names can be generic or unique.
Press Done to confirm the formatting.
If reformatting the disk did not work or was not an option, then there are a few steps left to attempt.
Step 8 - Review System Information
If the external drive is still not showing up, checking Apple’s System Information can produce helpful information.
To see the device’s status:
- Launch Finder.
- Go to Applications.
- Open the Utilities folder.
- Click System Information.
- Select USB in the left sidebar.
The Mac is typically repairing a disk that appears in System Information and does not appear in Disk Utility. Users can force the operating system to quit the action through Activity Monitor. As Apple’s task manager, Activity Monitor tracks how resources are utilized across all apps on the Mac.
To open Activity Monitor and verify its condition:
- Launch Finder.
- Go to Applications.
- Open the Utilities folder.
- Click Activity Monitor.
- Search for fsck_apfs, fsck_hfs, or fsck_exfat processes.
- Select the task.
- Click the X button in the top-left corner.
Check for the external disk on the desktop.
At this point, an undetected device suggests media damage.
Step 9 - Reset NVRAM and SMC
The final simple step for users involves resetting the Mac’s NVRAM and SMC.
NVRAM is non-volatile random-access memory, which is permanent storage that retains data even if powered down. It contains the Mac’s configurations. Sometimes, NVRAM prevents hardware, like an external drive, from being recognized. While NVRAM automatically resets on Macs with an M-series chip, Intel users need to reboot the memory manually.
To reset NVRAM on an Intel-based Mac:
- Shut down or restart the computer.
- Press the Power button if needed.
- Press and hold the following four-key sequence: Option + Command + P + R.
- Release the keys after the second startup noise.
Similarly, users can reset the System Management Controller. The SMC controls low-level hardware functions like power. Unfortunately, resetting SMC differs from model to model, so users should consult Apple Support.
Step 10 - Use Terminal
The last option is the most inaccessible for the average user. Terminal includes Apple’s command-line interface, which can be a complicated, unforgiving app. Users should be careful when inputting commands, as incorrect directives could have devastating consequences.
But Terminal can be a powerful tool in the right hands.
(Note: Most experts do not recommend Terminal for beginners. Proceed with caution. Data loss is possible.)
First, users with macOS Mojave or later need to grant Terminal full access:
- Open the Apple menu.
- Choose System Preferences.
- Choose Security and Privacy.
- Choose Privacy.
- Scroll down to Full Disk Access.
- Click the Lock icon in the bottom-left corner and enter the Mac’s password.
- Click the Plus icon and add Terminal from the Utilities list.
- Click the Lock icon again to disable editing.
To use Terminal to investigate the external hard drive’s issues:
- Launch Finder.
- Go to Applications.
- Open the Utilities folder.
- Click Terminal.
- Enter the following command: diskutil list
- Search for a header line that reads: /dev/diskX (external, physical) where X corresponds to the external disk’s number.
- Enter the following command: diskutil info diskX where X corresponds to the external disk’s number.
If macOS detects the device, more information will appear in the window. From this point:
- Enter the following command: diskutil eject diskX where X corresponds to the external disk’s number.
- Check if the disk is missing from the list.
- Reconnect the disk to the Mac and try to mount it again.
An unrecognized external drive is a reliable sign that the device is dead.
External Hard Drive Data Recovery for Mac
Do not panic if the external hard drive still is not showing up. Failed drives are inevitable.
Power down the disk if its data is irreplaceable. Do not attempt to diagnose or repair the drive. Doing so jeopardizes the data. There are dozens of reasons that drives fail. Not all of them are evident.
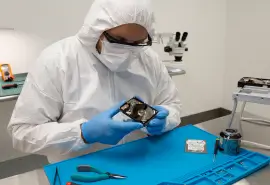
A professional can usually recover data from a damaged or defective device. Engineers often fix external hard drives and extract their valuable data.
At Secure Data Recovery, we specialize in challenging recoveries. Our team of certified experts has resolved over 100,000 cases since 2007. In the past 15 years, we have encountered every failure scenario and developed state-of-the-art tools and techniques. And our external hard drive data recovery services continue to evolve to meet the needs of a changing industry.
Call 800-388-1266 now or visit one of our locations to start a case and reclaim your data.