If your Seagate external hard drive isn’t working, you can try a few simple troubleshooting solutions.
In this article, we explain some common problems you might encounter with your Seagate external hard drive and offer solutions to help fix Seagate external hard drives on both Windows and Mac. We’ll also provide tips for recovering data from a non-detecting hard drive, troubleshooting common issues, and maintaining the health of your external HDD.
Keep in mind that any hard drive issue means your data might be at risk, so it’s always wise to consult with a professional before reformatting your drive or attempting solutions that could permanently delete your data.
Common reasons your hard drive isn’t detected
You should look for certain signs of hard drive failure that tell you your device is in trouble. You might notice signs of physical failure, like overheating or strange noises, or signs of logical failure, like frequent error messages or corrupted files.
In addition to hard drive failure, here are some common reasons your Seagate external hard disk may not be working:
- Power cord or power source issues
- USB port issues
- Driver issues
- Incorrect hard drive format
- Partition issues
- Unsupported file system

Quick hard drive troubleshooting
If you’re having trouble with your hard drive, trying a few quick troubleshooting strategies might help you get it working again, depending on the issue. The following solutions won’t result in data loss, so they’re worth trying before more serious interventions.
The very first thing to try is rebooting your computer. If that doesn’t work, run through the options below.
1. Check that power is connected (if applicable)
Some external hard drives, especially desktop drives, require a power adapter. If the hard drive light is off, your power adapter is likely not connected to power. This could happen if your power cable isn’t plugged in properly or the power outlet you’re using isn’t working.
You also want to make sure that the power source you’re using accommodates your device’s specific power requirements. For example, the power adapter specifications for a Seagate eSATA external hard drive are 12 volts, three amps, mono pin 5.5 mm x 2.5 mm, and a center positive polarity, meaning the device requires a power source that meets these specs to function.
Make sure that the adapter and power source you’re using is compatible with your specific device’s specs, especially if you’ve replaced the original power cable.
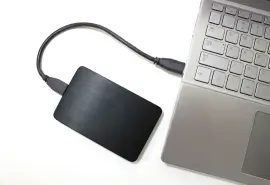
2. Check that the USB cable is connected and working
Before you begin any data recovery process, make sure that your Seagate external hard drive is properly connected to your computer. Check the cable connections to ensure that the data and power cables are securely plugged in and check that your USB cable is working. You might also want to try a different cable.
Depending on your hard drive, the cable interface you use may vary. For example, the Seagate portable drive uses a USB 2.0 cable, while the Seagate sSATA drive uses an eSATA cable. Be sure that the USB cable type you use for your device is the one it uses.
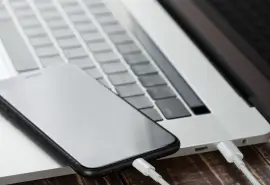
3. Try different USB ports
If the drive is properly connected but still not showing up, try plugging it into a different USB port on your computer or try plugging your drive into a different computer in case the port you’re using is broken.
4. Connect the drive to a different computer or system
To find out if the issue is with your current computer or your USB ports, try connecting your drive to a different computer. In addition to a different computer, you may want to try a different operating system (Windows or Mac) because the hard drive may be formatted for one or the other.
Newer Seagate drives come preformatted with the exFAT file system, which means you don’t have to reformat the drive to use it on Windows or Mac. Some older drives, however, may be specifically formatted for PC or Mac, but some of them may have utilities so that they can work on both operating systems without reformatting.
Reformatting a drive can make it compatible with another operating system, but it comes at the cost of erasing all of the data on it. If your drive isn’t formatted correctly for your device, make sure you back up or recover data from the device before you reformat it.
5. Run a diagnostic tool
Seagate has a diagnostic tool called SeaTools that you can use to check the health of your drive.
To use SeaTools to troubleshoot, launch the program from your computer. Once it loads, it will list the different storage devices in your system. From there, you can select what drives you want to test, and choose from a variety of data-safe diagnostic tests to run. The “Short Drive Self Test” option is adequate for most situations.
If the drive “passes” the test, that means it’s unlikely to be the source or physical cause of the problem with your system. If the drive “fails,” that could mean that the drive itself is malfunctioning or that it contains corrupted data. In any case, SeaTools provides a detailed log of its findings at the end of each diagnostic test, giving you a clear picture of what’s going on.
If these quick solutions didn’t solve your problem, the next step is to try some more advanced troubleshooting strategies based on your specific operating system.
How to diagnose your Seagate external hard drive in Windows
In these sections, we cover step-by-step ways to diagnose common problems for Windows 11, Windows 10, Windows 8, and Windows 7 devices. These are steps to take once you’ve already tried the quick hard drive troubleshooting tips above — be sure to try those first if you haven’t yet.
1. Check to see if your drive is detected
To begin, check to see if your drive is detected. If you can’t find it on your desktop, in My Computer or in your file explorer, open your Device Manager to look for your drive name. Here are the steps to do this:
- Open the Start menu and search for Device Manager. Or, hold down the Windows key on your keyboard, press the R key, and type the “compmgmt.msc” into the run box. Press enter. You can also use “devmgmt.msc” or “diskmgmt.msc” to navigate to these apps.
- Open Device Manager.
- Once your Device Manager opens, double-click the Disk Drives section in the middle window.
- Look for your drive name. If your drive is detected, it will appear here. If it isn’t detected, you won’t find it.
Note: If your drive is not detected, jump to step 4.

2. If your drive is detected, check your drive’s health
Disk Management works with your Device Manager as part of your Windows Computer Management console. Once you’ve located your device, using Disk Management can give you insight into the health of your external hard drive. Here’s how to do it:
- Once you’ve located your drive in Disk Drives, right-click on it.
- Click on Properties, then the Volumes tab.
- Click on Populate. Document the disk number provided in this window.
- Click on Disk Management, located on the left-hand side, to view the drive’s health. You should be able to locate the disk number from earlier in the middle of the window, towards the bottom.
Once you have located your drive in Disk Management, you will want to look for common error codes like RAW or Unallocated. If you see these errors and have tried the quick troubleshooting steps above, you may want to consult a professional. It’s possible to correct these issues by formatting your drive on your own, but doing so erases all the data on the drive, so you risk data loss.

3. Check your drive is formatted correctly
Before doing anything else, you’ll want to check if your drive is formatted correctly. If your drive is formatted correctly for Windows, you’ll see the following:
- NTFS: A missing NTFS means that the file system has become corrupted and needs to be formatted. If your drive has an APFS, it’s likely formatted for Mac instead.
- Capacity: Make sure the capacity you see here accurately reflects your drive’s storage. For example, if you have a 1 TB drive, it should say 931 GB.
Drive Letter: If the drive letter is missing from your drive, check to see if other drives have a letter. If other drives have a letter but your external drive is missing one, right-click on it and select the option to change drive letter or path. Note that if you do this incorrectly, it could lead to data loss.

4. Check for error codes
If your drive is not detected in the Device Manager, then you will want to check for error codes. These codes can give you some insight into what’s preventing your device from reading properly. Follow these steps to check for error codes:
- In the Device Manager, look for these common entries with a yellow exclamation point icon: “Unknown Device” or “Other Device.”
- If you see either of these, right-click on them and select “Properties.”
- Under “Device Status” check for an error code.
Note: If you see a Code 10, then your drive has likely failed and troubleshooting will result in data loss. Consider consulting a professional.
5. Troubleshooting error codes
If you see error codes like “Code 28” or “Code 43,” try the following troubleshooting steps:
- Close the window with the code.
- Uninstall your device by right-clicking and selecting uninstall.
- Shut down your computer.
- Disconnect your drive and reboot your computer.
- Plug your drive into a different port once your computer is booted.
- Windows will install device drivers. If the problem is with your hard drive driver, reinstalling or selecting Update Driver can fix any corrupted drivers. Once this is done loading, check to see if you are receiving the same code.
Note: If the above does not work, you will likely need to repair or restore the drive. Doing this can result in data loss, so it’s best to consult a professional before you try it on your own.
How to diagnose your Seagate external hard drive in Mac
In these sections, we cover step-by-step ways to diagnose common problems for Mac.
1. Open Disk Utility
To begin, you should check Disk Utility to see if your drive is detected. Here are the steps to do this:
- Check to see if your device shows up on your desktop or within Finder. If it doesn’t, open Finder.
- Select Applications.
- Select Utilities.
- Select Disk Utility. Your drive should appear there. If it doesn’t, that means your device isn’t detecting your drive.

2. Check System Information/System Profiler
If your drive is not detected, go to the “System Information/System Profiler” section. Here’s how to do it:
- Hold the Option key, then click on the Apple icon. The first entry should say System Information/System Profiler. Click on it.
- On the left-hand side of the window, locate Hardware.
- Locate the interface you are using (e.g., USB, Firewire)
- In the middle window, locate the drive and select it.
- Take note of the drive information listed towards the bottom of the window. You should see the serial or model number there.

3. Try another Mac
If your drive isn’t showing up in Disk Utility or System Information/System Profiler, part of the issue might be with your Mac. Try using another Mac with your hard drive to see if the drive is detected there.
If it is, you can continue troubleshooting within the operating system. If it isn’t, your drive might be corrupted.
4. Repair in First Aid
If the above steps don’t work, you can also try troubleshooting in First Aid.
To check if a Mac OS X volume (version 10.6 to 10.10) needs repair, follow these steps:
- Click on “Verify Disk.”
- After the verification process is finished, it will indicate whether the disk needs to be repaired or not.
- If your important data is not backed up, try running the “Repair Disk” process to fix any file system corruption.
Warning: If this process does not work, then you will need to reformat the drive. However, reformatting will erase all of your data.
Solutions that can lead to data loss
For some hard drive issues, major intervention may be necessary. However, when using more advanced strategies, proceed with caution — they could result in data loss or deletion. It might be better to consult a professional for help instead of attempting these things at home.

Some advanced troubleshooting solutions include:
- Reformatting the hard drive: If your hard drive isn’t properly formatted, it may not be compatible with your operating system or device. Reformatting the hard drive can solve this problem, but the process erases all its current data.
- Creating a new partition: If your device is reading but shows Unallocated space, creating a new partition should help the drive initialize and allow your operating system to access it. However, it’s easy to make mistakes that could lead to data loss when creating a new partition.
- Changing the drive letter: A drive needs a drive letter in order to be detectable. Usually there’s one already set, but, if you removed it, you’ll likely have to replace it in order to use the drive. Making a mistake when you attempt to change the drive letter can lead to data loss.
Tips for maintaining the health of your hard drive
One of the best ways to prevent hard drive issues and data loss is to properly care for your hard drive. Here are some tips for maintaining the health of your Seagate hard drive:
- Keep your hard drive updated. Updating your drivers is important to keeping your device functioning and ensuring it isn’t affected by corrupted ones.
- Make sure to unplug the hard drive safely. Most computers have a Safely Remove Hardware icon that allows you to select which device you want to remove. Doing this before you unplug it ensures your device and data are safe.
- Keep the hard drive in a cool and dry place. You’ll want to store your drive away from moisture or excessive light or heat, which could physically damage the device.
- Keep your hard drive organized. Having a clear and well-organized file system not only makes it easier for you to manage your data, but it also helps you recognize irregularities as soon as they come up.
- Keep your hard drive free of dust and debris. Particles from dust and debris can cause physical damage to your hard drive, so keeping it in a case or drawer can help protect it.
- Run regular backups. Backing up your data regularly is the best assurance against any potential hard drive issues.
- Perform regular virus checks. Regular checkups ensure that your device is healthy, and help you catch viruses and other issues earlier on if they do happen.
- Avoid physical shocks to the hard drive. Physical shocks can damage or compromise the delicate components of the hardware. When your hard drive isn’t in use, it’s best to store it in a place where it isn’t liable to be dropped.
Troubleshoot with caution
If you’re having issues with your hard drive, trying these fixes can help you get your device back in working
order. If none of the data-safe options work, it might be wise to consult with a professional instead of trying
them on your own to reduce the risk of lost files.
If your Seagate hard drive requires data
recovery, we have you covered. With advanced data recovery tools and years of expertise, our
professionals can help you recover files, reformat your device, and otherwise help ensure that your important
data is safe and secure.